
← Previous pattern: Crochet Cable Hat and Scarf Set · Next pattern: Willow Mittens → · More wearables
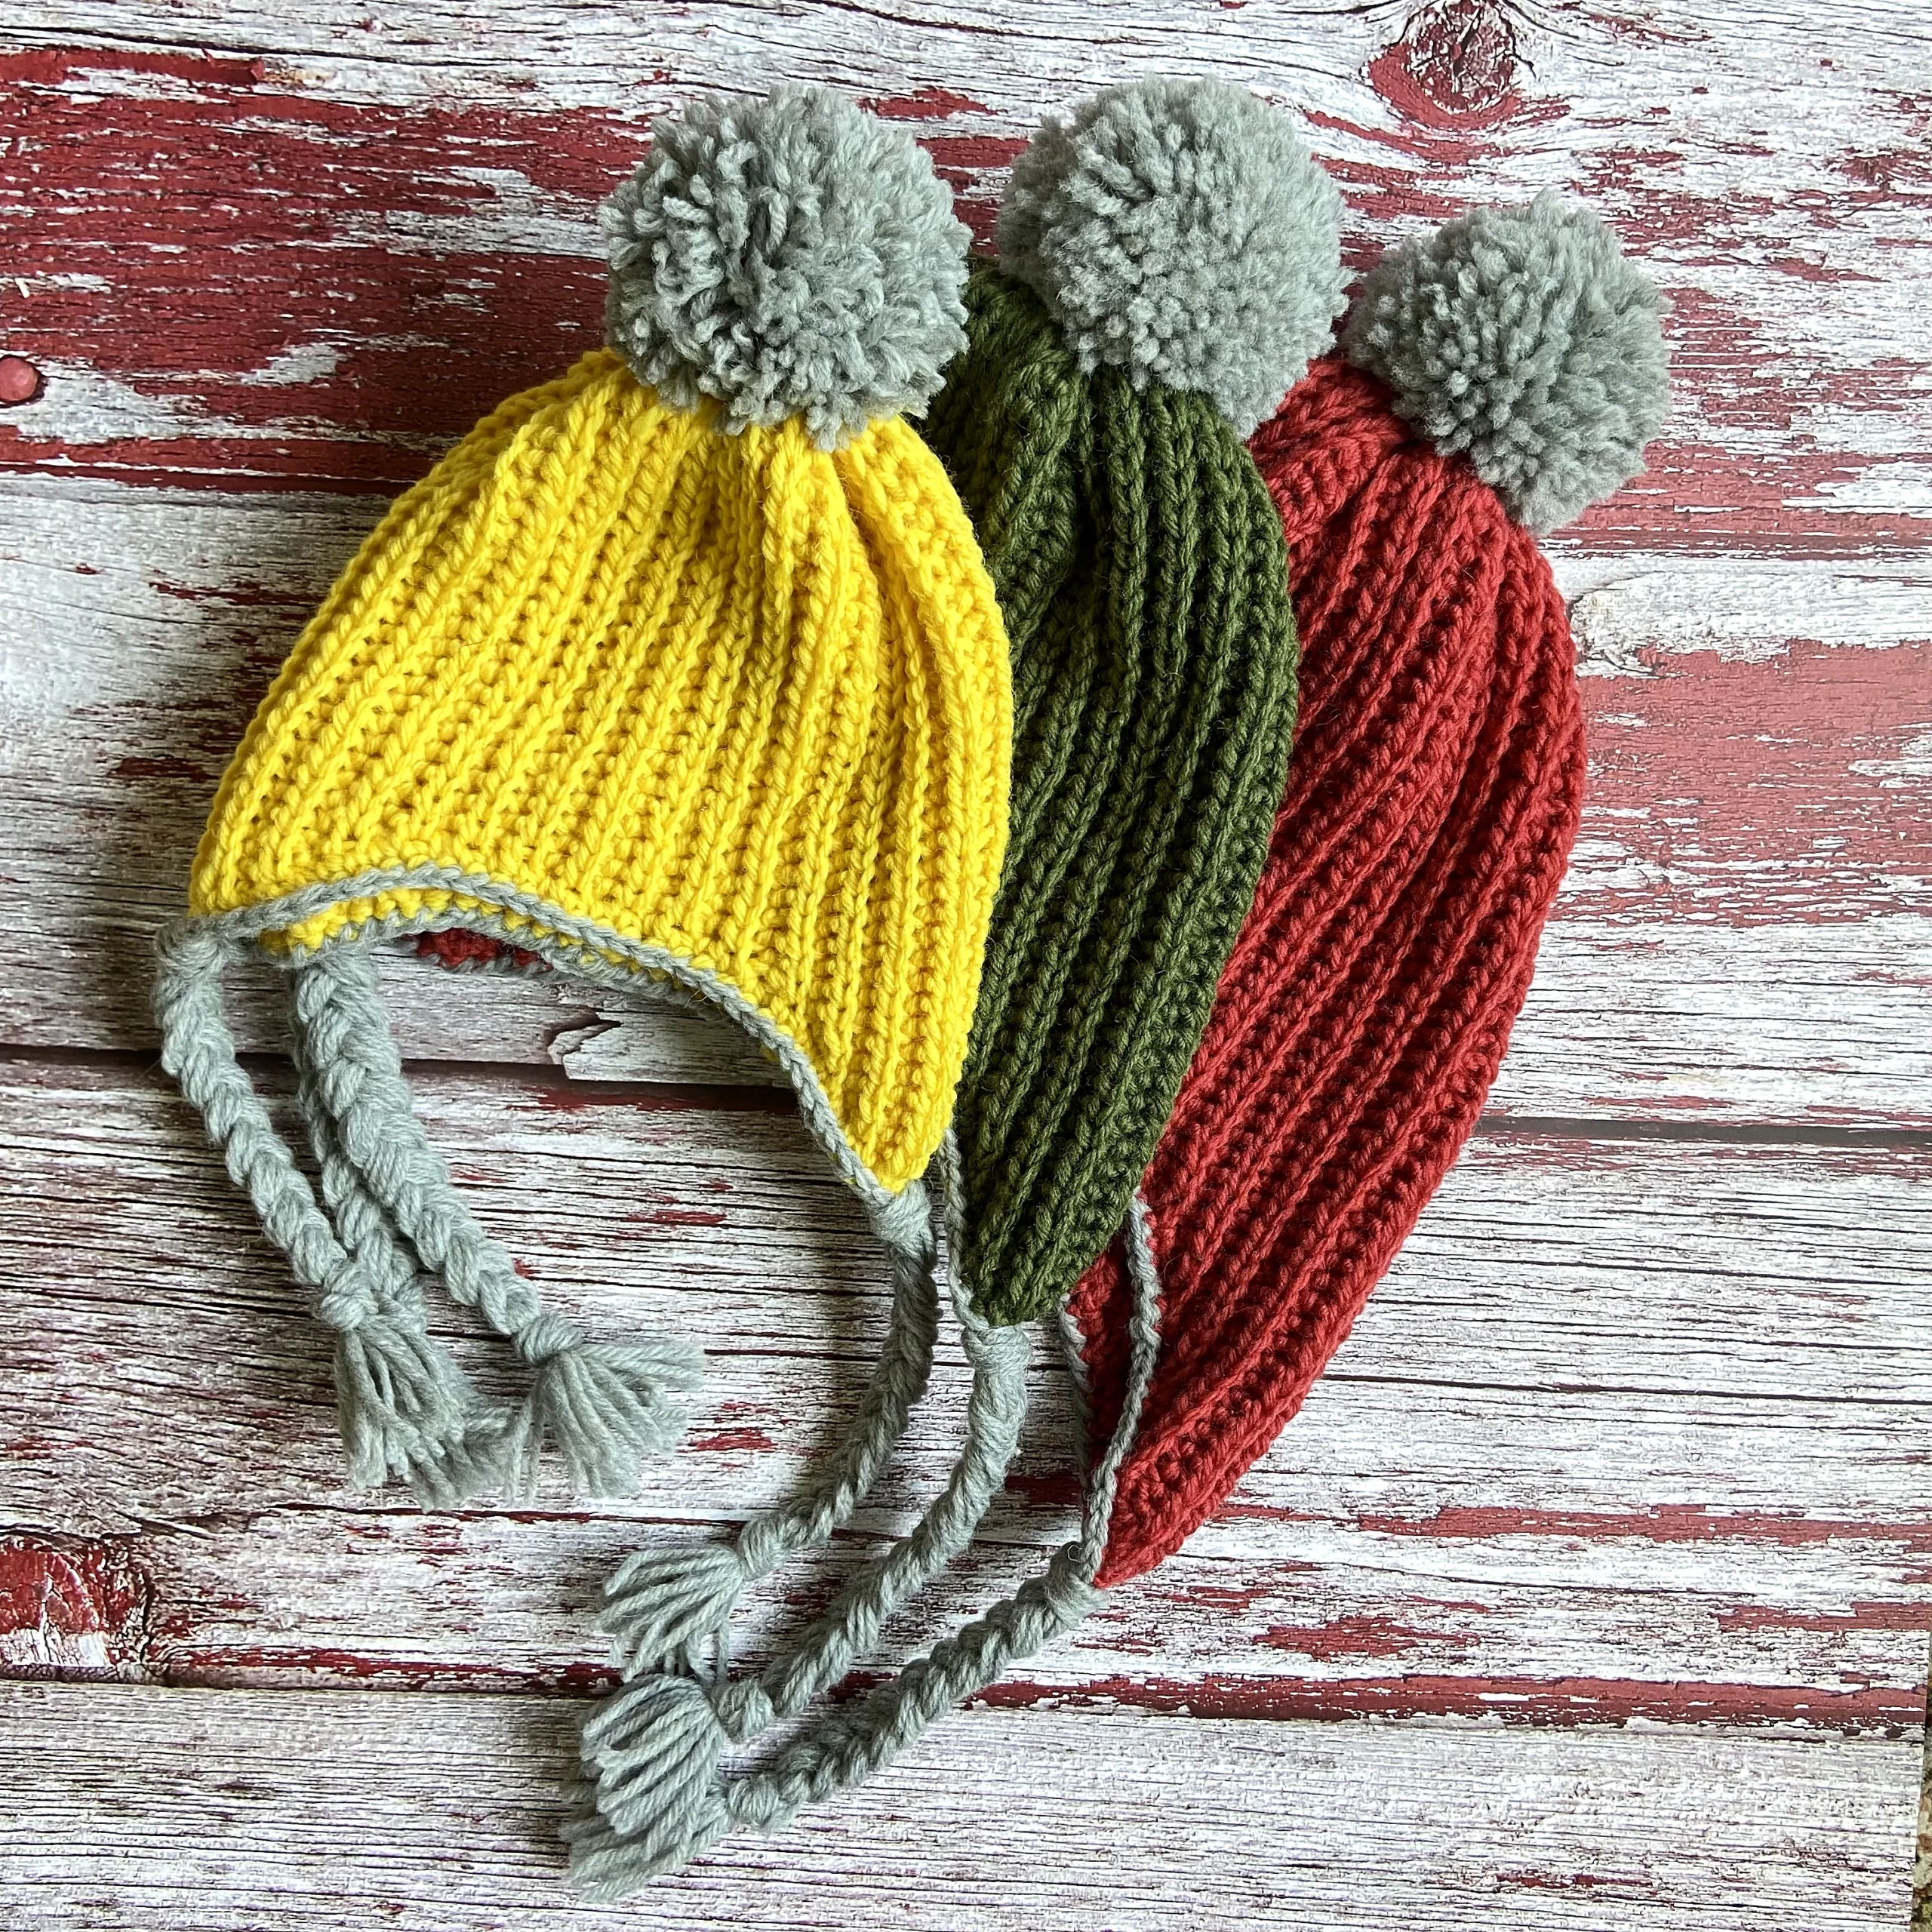
This free crochet earflap hat pattern is worked sideways in turned rows, with the earflaps shaped into the fabric. Choose from five sizes, from baby to adult large, then add a contrast border, pom-pom and braided ties. The full US-term instructions are below.
Sizes and materials
Size order: baby (toddler, child/adult small, adult medium, adult large). Finished circumference: 16 (18.25, 20.25, 22.5, 24.5) in / 40.5 (46.5, 51.5, 57, 62) cm. Height at center back: 6.5 (7.25, 8, 9, 10) in / 16.5 (18.5, 20.5, 23, 25.5) cm. The hat has considerable stretch; the pattern suggests a finished circumference 0–2 in / 0–5 cm smaller than the head.
Main color: approximately 165 (195, 220, 240, 265) yd / 151 (178, 201, 220, 242) m of worsted weight (CYC 4) yarn. Contrast color: approximately 70 yd / 64 m for any size. The original uses wool; wool, alpaca, acrylic or blends are listed options. The child/adult small size may use almost all of a 220 yd main-color skein.
Hooks and tools: US H/8 (5 mm) hook for the hat or size needed for gauge; US F/5 (3.75 mm) for the edging; yarn needle; optional removable stitch markers; a 3.5 in / 9 cm piece of cardboard for the pom-pom.
Gauge: 16 stitches and 15 rows = 4 in / 10 cm over yarn-over slip stitch through the back loop, blocked, with the larger hook. Check your gauge before choosing a size.
Abbreviations and special stitches
Blp = back loop; CC = contrast color; ch = chain; MC = main color; RS = right side; SC = single crochet; st = stitch; WS = wrong side; YO = yarn over; YOslst = yarn-over slip stitch; YOslst Blp = yarn-over slip stitch through the back loop; YOslst2tog Blp = decrease through the back loops.
YOslst: YO, insert hook in indicated stitch, YO and pull up a loop, then continue pulling through both loops on the hook. YOslst Blp: work that stitch into the indicated back loop. YOslst2tog Blp: YO, insert hook through the back loop of the indicated stitch and the following stitch, YO and pull up a loop, then pull through both loops.
The hat is worked sideways in turned rows. Turning chains do not count as stitches. A stitch marker at the first and last stitch of each row can help keep the count.
Oak Grove earflap hat instructions
Hat:
With larger hook, ch 27 (30, 33, 37, 41).
Row 1: Beginning with the second ch from hook and working into the bottom of the chain, 1 YOslst into each st. 26 (29, 32, 36, 40) YOslst.
Rows 2-5 (2-7, 2-7, 2-9, 2-9): Ch 1, turn, 1 YOslst Blp into each of the next 26 (29, 32, 36, 40) sts.
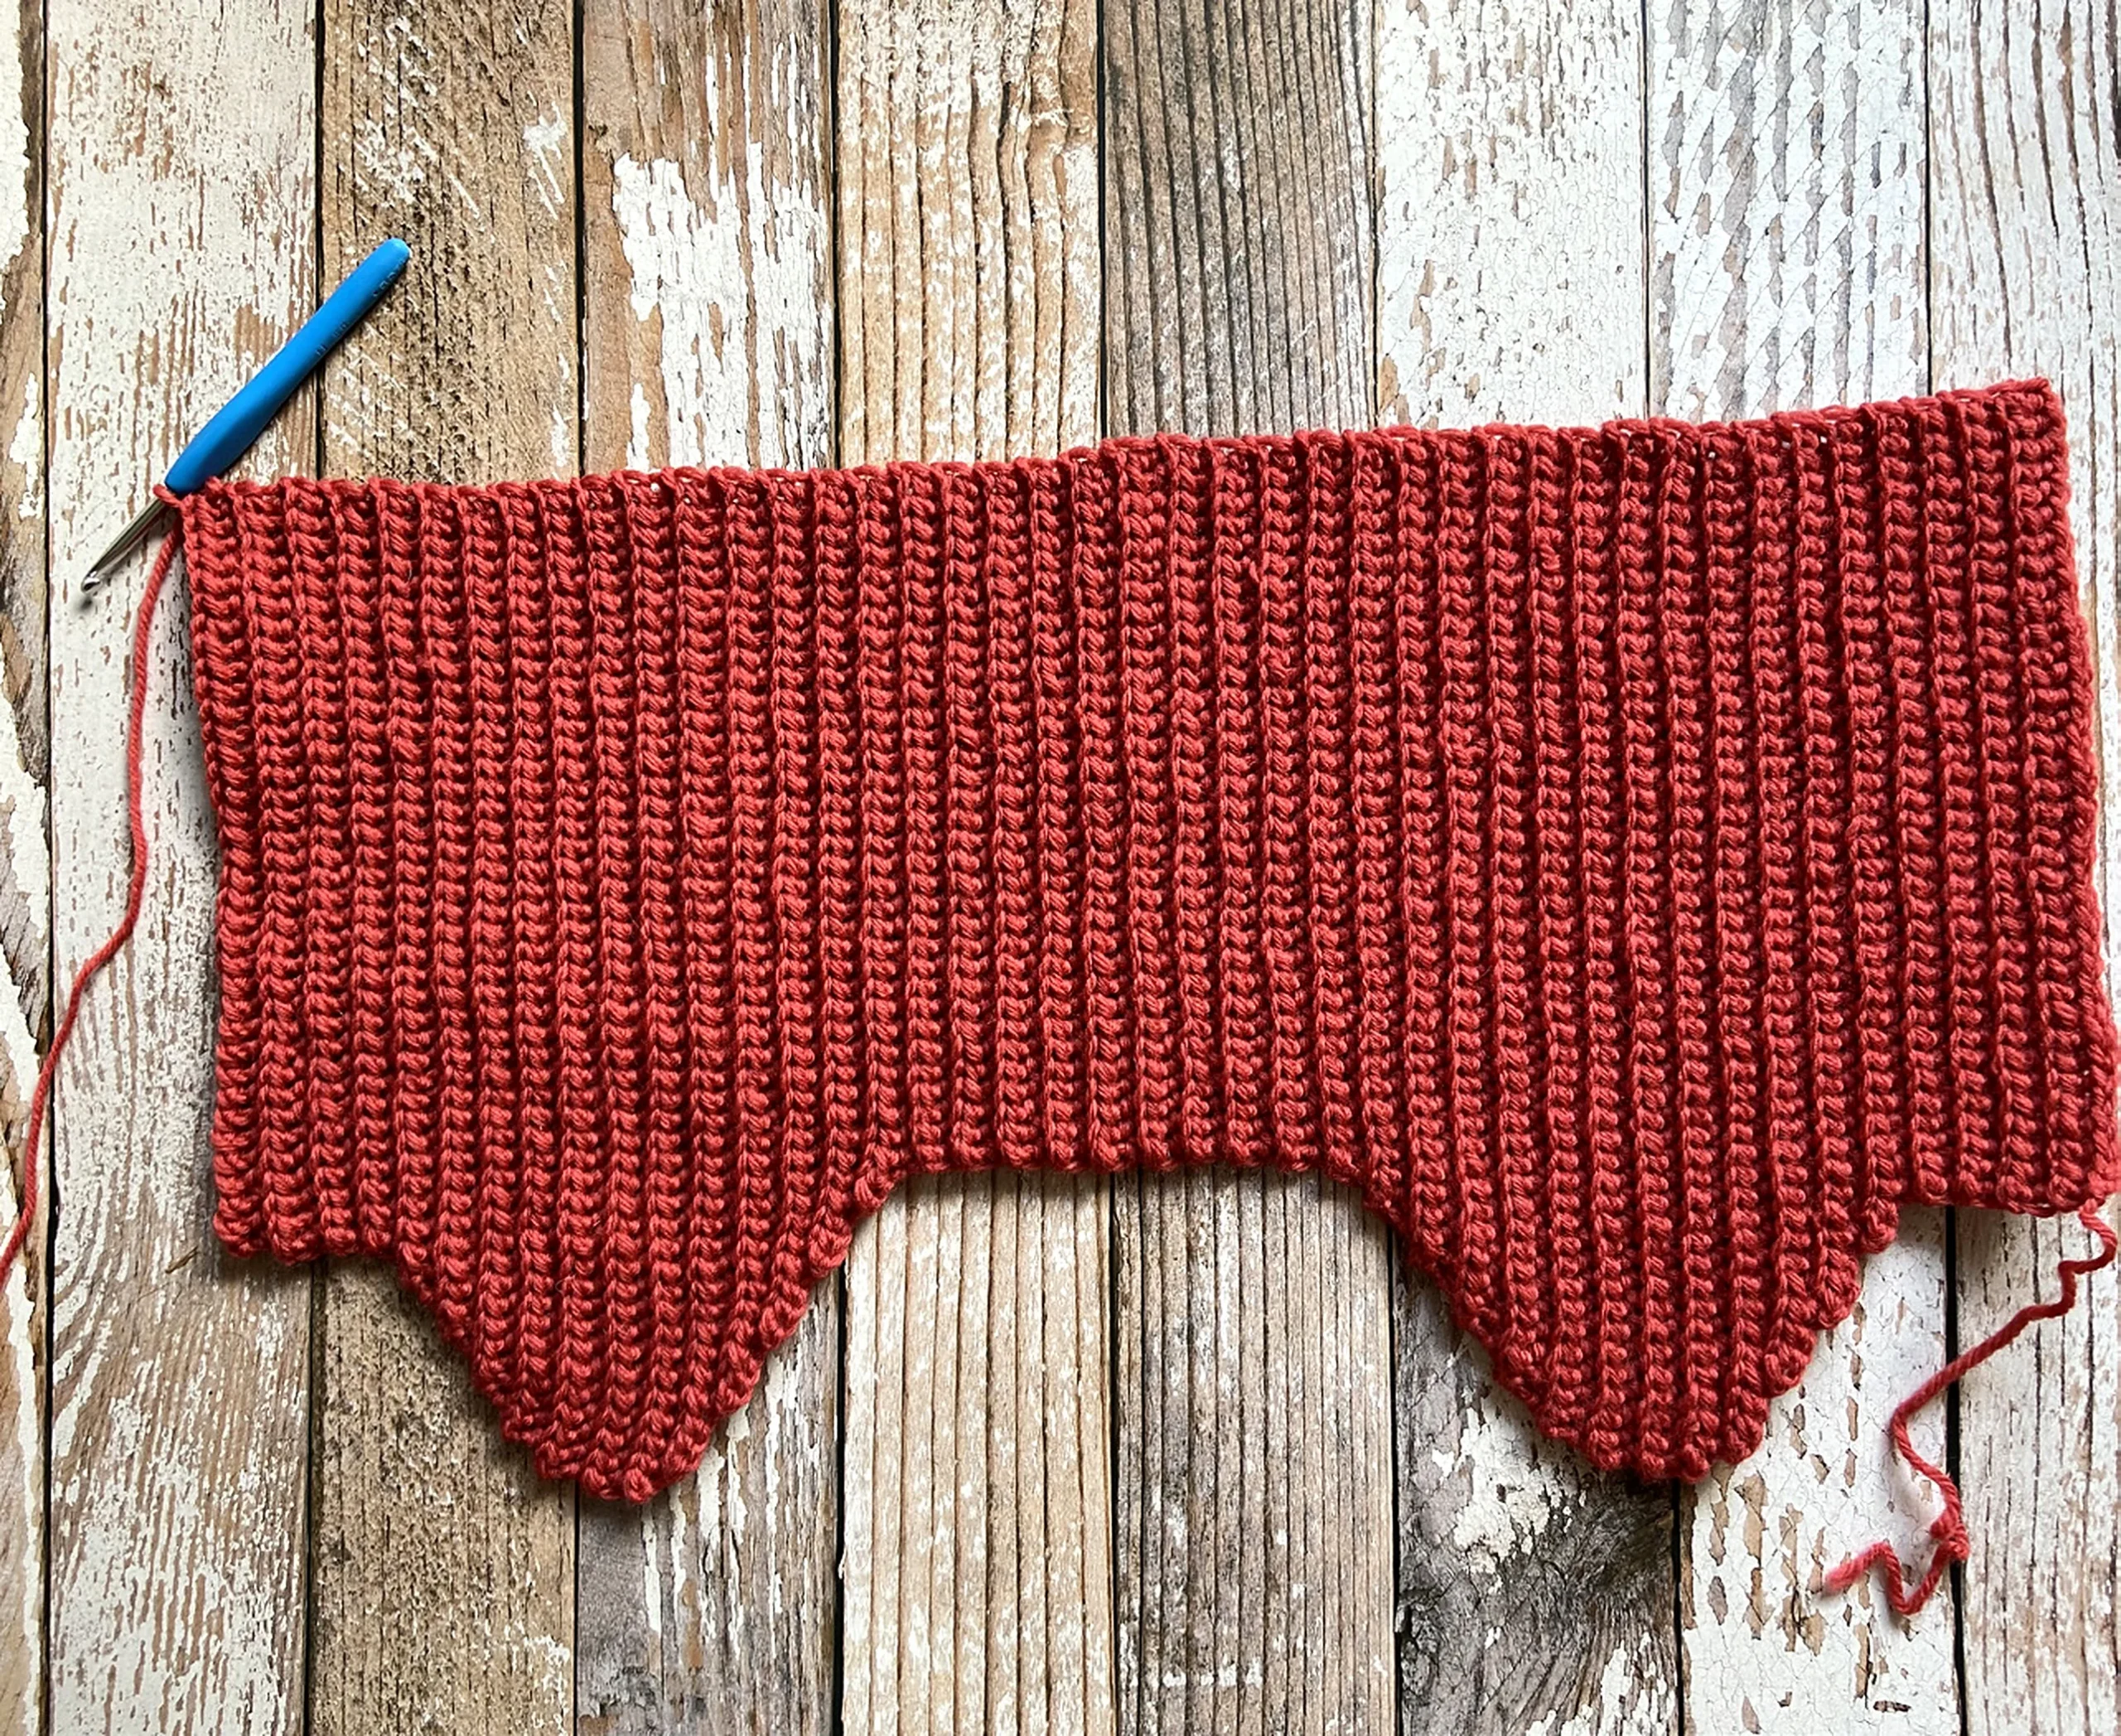
Row 6 (8, 8, 10, 10) (begins increase section): Ch 3, turn, beginning with the second ch from hook YOslst Blp in each of the next 2 chs, YOslst Blp in each of the next 26 (29, 32, 36, 40) sts. 28 (31, 34, 38, 42) YOslst.
Row 7 (9, 9, 11, 11): Ch 1, turn, 1 YOslst Blp into each st across until one st remains, YOslst in next st.
Row 8 (10, 10, 12, 12) (increase row): Ch 4, turn, beginning with the second ch from hook YOslst Blp in each of the next 3 chs, YOslst Blp in each of the next 28 (31, 34, 38, 42) sts. 31 (34, 37, 41, 45) YOslst.
Row 9 (11, 11, 13, 13): Ch 1, turn, 1 YOslst Blp into each st across until one st remains, YOslst in next st.
For sizes toddler (child/adult small, adult medium, adult large) only:
Row 12 (12, 14, 14) (increase row): Ch 4, turn, beginning with the second ch from hook YOslst Blp in each of the next 3 chs, YOslst Blp in each of the next 34 (37, 41, 45) sts. 37 (40, 44, 48) YOslst.
Row 13 (13, 15, 15): Ch 1, turn, 1 YOslst Blp into each st across until one st remains, YOslst in next st.
For sizes adult medium (adult large) only:
Row 16 (16) (increase row): Ch 4, turn, beginning with the second ch from hook YOslst Blp in each of the next 3 chs, YOslst Blp in each of the next 44 (48) sts. 47 (51) YOslst.
Row 17 (17): Ch 1, turn, 1 YOslst Blp into each st across.
For all sizes:
Row 10 (14, 14, 18, 18) (increase row): Ch 2, turn, beginning with the second ch from hook YOslst Blp in the next ch, YOslst Blp in each of the next 31 (37, 40, 47, 51) sts. 32 (38, 41, 48, 52) YOslst.
Rows 11-16 (15-18, 15-20, 19-22, 19-24): Ch 1, turn, 1 YOslst Blp into each st across.
Row 17 (19, 21, 23, 25) (begins decrease section): Ch 1, turn, YOslst Blp in each of the next 30 (36, 39, 46, 50) sts, YOslst2tog Blp. 31 (37, 40, 47, 51) YOslst.
Row 18 (20, 22, 24, 26): Ch 1, turn, 1 YOslst Blp into each st across.
Row 19 (21, 23, 25, 27) (decrease row): Ch 1, turn, YOslst Blp in each of the next 27 (33, 36, 43, 47) sts, YOslst2tog Blp twice. 29 (35, 38, 45, 49) YOslst.
Row 20 (22, 24, 26, 28) (decrease row): Ch 1, turn, YOslst2tog Blp, YOslst Blp in each of the next 27 (33, 36, 43, 47) sts. 28 (34, 37, 44, 48) YOslst.
Row 21 (23, 25, 27, 29) (decrease row): Ch 1, turn, YOslst Blp in each of the next 24 (30, 33, 40, 44) sts, YOslst2tog Blp twice. 26 (32, 35, 42, 46) YOslst.
Row 22 (24, 26, 28, 30) (decrease row): Ch 1, turn, YOslst2tog Blp, YOslst Blp in each of the next 24 (30, 33, 40, 44) sts. 25 (31, 34, 41, 45) YOslst.
For sizes toddler (child/adult small, adult medium, adult large) only:
Row 25 (27, 29, 31) (decrease row): Ch 1, turn, YOslst Blp in each of the next 27 (30, 37, 41) sts, YOslst2tog Blp twice. 29 (32, 39, 43) YOslst.
Row 26 (28, 30, 32) (decrease row): Ch 1, turn, YOslst2tog Blp, YOslst Blp in each of the next 27 (30, 37, 41) sts. 28 (31, 38, 42) YOslst.
For sizes adult medium (adult large) only:
Row 31 (33) (decrease row): Ch 1, turn, YOslst Blp in each of the next 34 (38) sts, YOslst2tog Blp twice. 36 (40) YOslst.
Row 32 (34) (decrease row): Ch 1, turn, YOslst2tog Blp, YOslst Blp in each of the next 34 (38) sts. 35 (39) YOslst.
For all sizes:
Row 23 (27, 29, 33, 35) (decrease row): Ch 1, turn, YOslst Blp in each of the next 23 (26, 29, 33, 37) sts, YOslst2tog Blp. 24 (27, 30, 34, 38) YOslst.
Row 24 (28, 30, 34, 36) (decrease row): Ch 1, turn, YOslst2tog Blp, YOslst Blp in each of the next 22 (25, 28, 32, 36) sts. 23 (26, 29, 33, 37) YOslst.
Rows 25-35 (29-41, 31-45, 35-51, 37-55) (section across forehead): Ch 1, turn, 1 YOslst Blp into each st across.
Row 36 (42, 46, 52, 56) (begins increase section): Ch 3, turn, beginning with the second ch from hook YOslst Blp in each of the next 2 chs, YOslst Blp in each of the next 23 (26, 29, 33, 37) sts. 25 (28, 31, 35, 39) YOslst.
Row 37 (43, 47, 53, 57): Ch 1, turn, 1 YOslst Blp into each st across until 1 st remains, YOslst in last st.
Row 38 (44, 48, 54, 58) (increase row): Ch 4, turn, beginning with the second ch from hook YOslst Blp in each of the next 3 chs, YOslst Blp in each of the next 25 (28, 31, 35, 39) sts. 28 (31, 34, 38, 42) YOslst.
Rows 39-52 (45-60, 49-66, 55-74, 59-80): Repeat Rows 7-20 (9-24, 9-26, 11-30, 11-32).
Row 53 (61, 67, 75, 81) (decrease row): Ch 1, turn, YOslst Blp in each of the next 26 (29, 32, 36, 40) sts, YOslst2tog Blp. 27 (30, 33, 37, 41) YOslst.
Row 54 (62, 68, 76, 82) (decrease row): Ch 1, turn, YOslst2tog Blp, YOslst Blp in each of the next 25 (28, 31, 35, 39) sts. 26 (29, 32, 36, 40) YOslst.
Rows 55-60 (63-68, 69-76, 77-84, 83-92): Ch 1, turn, 1 YOslst Blp into each st across.
Seaming row
Turn as if to work another row, fold hat, matching ends, with foundation row directly behind last row worked. Working through both loops of row in front (working row) and front loops of row in back (foundation edge), sl st across. Do not fasten off. Turn so that seam is on the inside of hat.
Edging
Change to smaller hook (two sizes smaller than hook used for hat). With CC, ch 1 (does not count as a stitch, SC around edge of hat as follows: SC in each row-end across to earflap, SC along edge of earflap making one SC into each ridge and either 1, 2, OR 3 SC between ridges. If the edge seems constricted, use fewer stitches (or a larger hook), if the edge becomes stretched out or wavy, use fewer stitches (or a smaller hook). The goal here is make a tidy border of SC that does not stretch or constrict the edge. Continue making a border of SC, placing 1 SC in each row-end across the straight edges, and working second earflap same as the first. Slst into the first SC of edging round and fasten off. Continuing with smaller hook and CC, pull up loop in same st as join, YOslst in each st around, sl st to fasten off.
Finishing
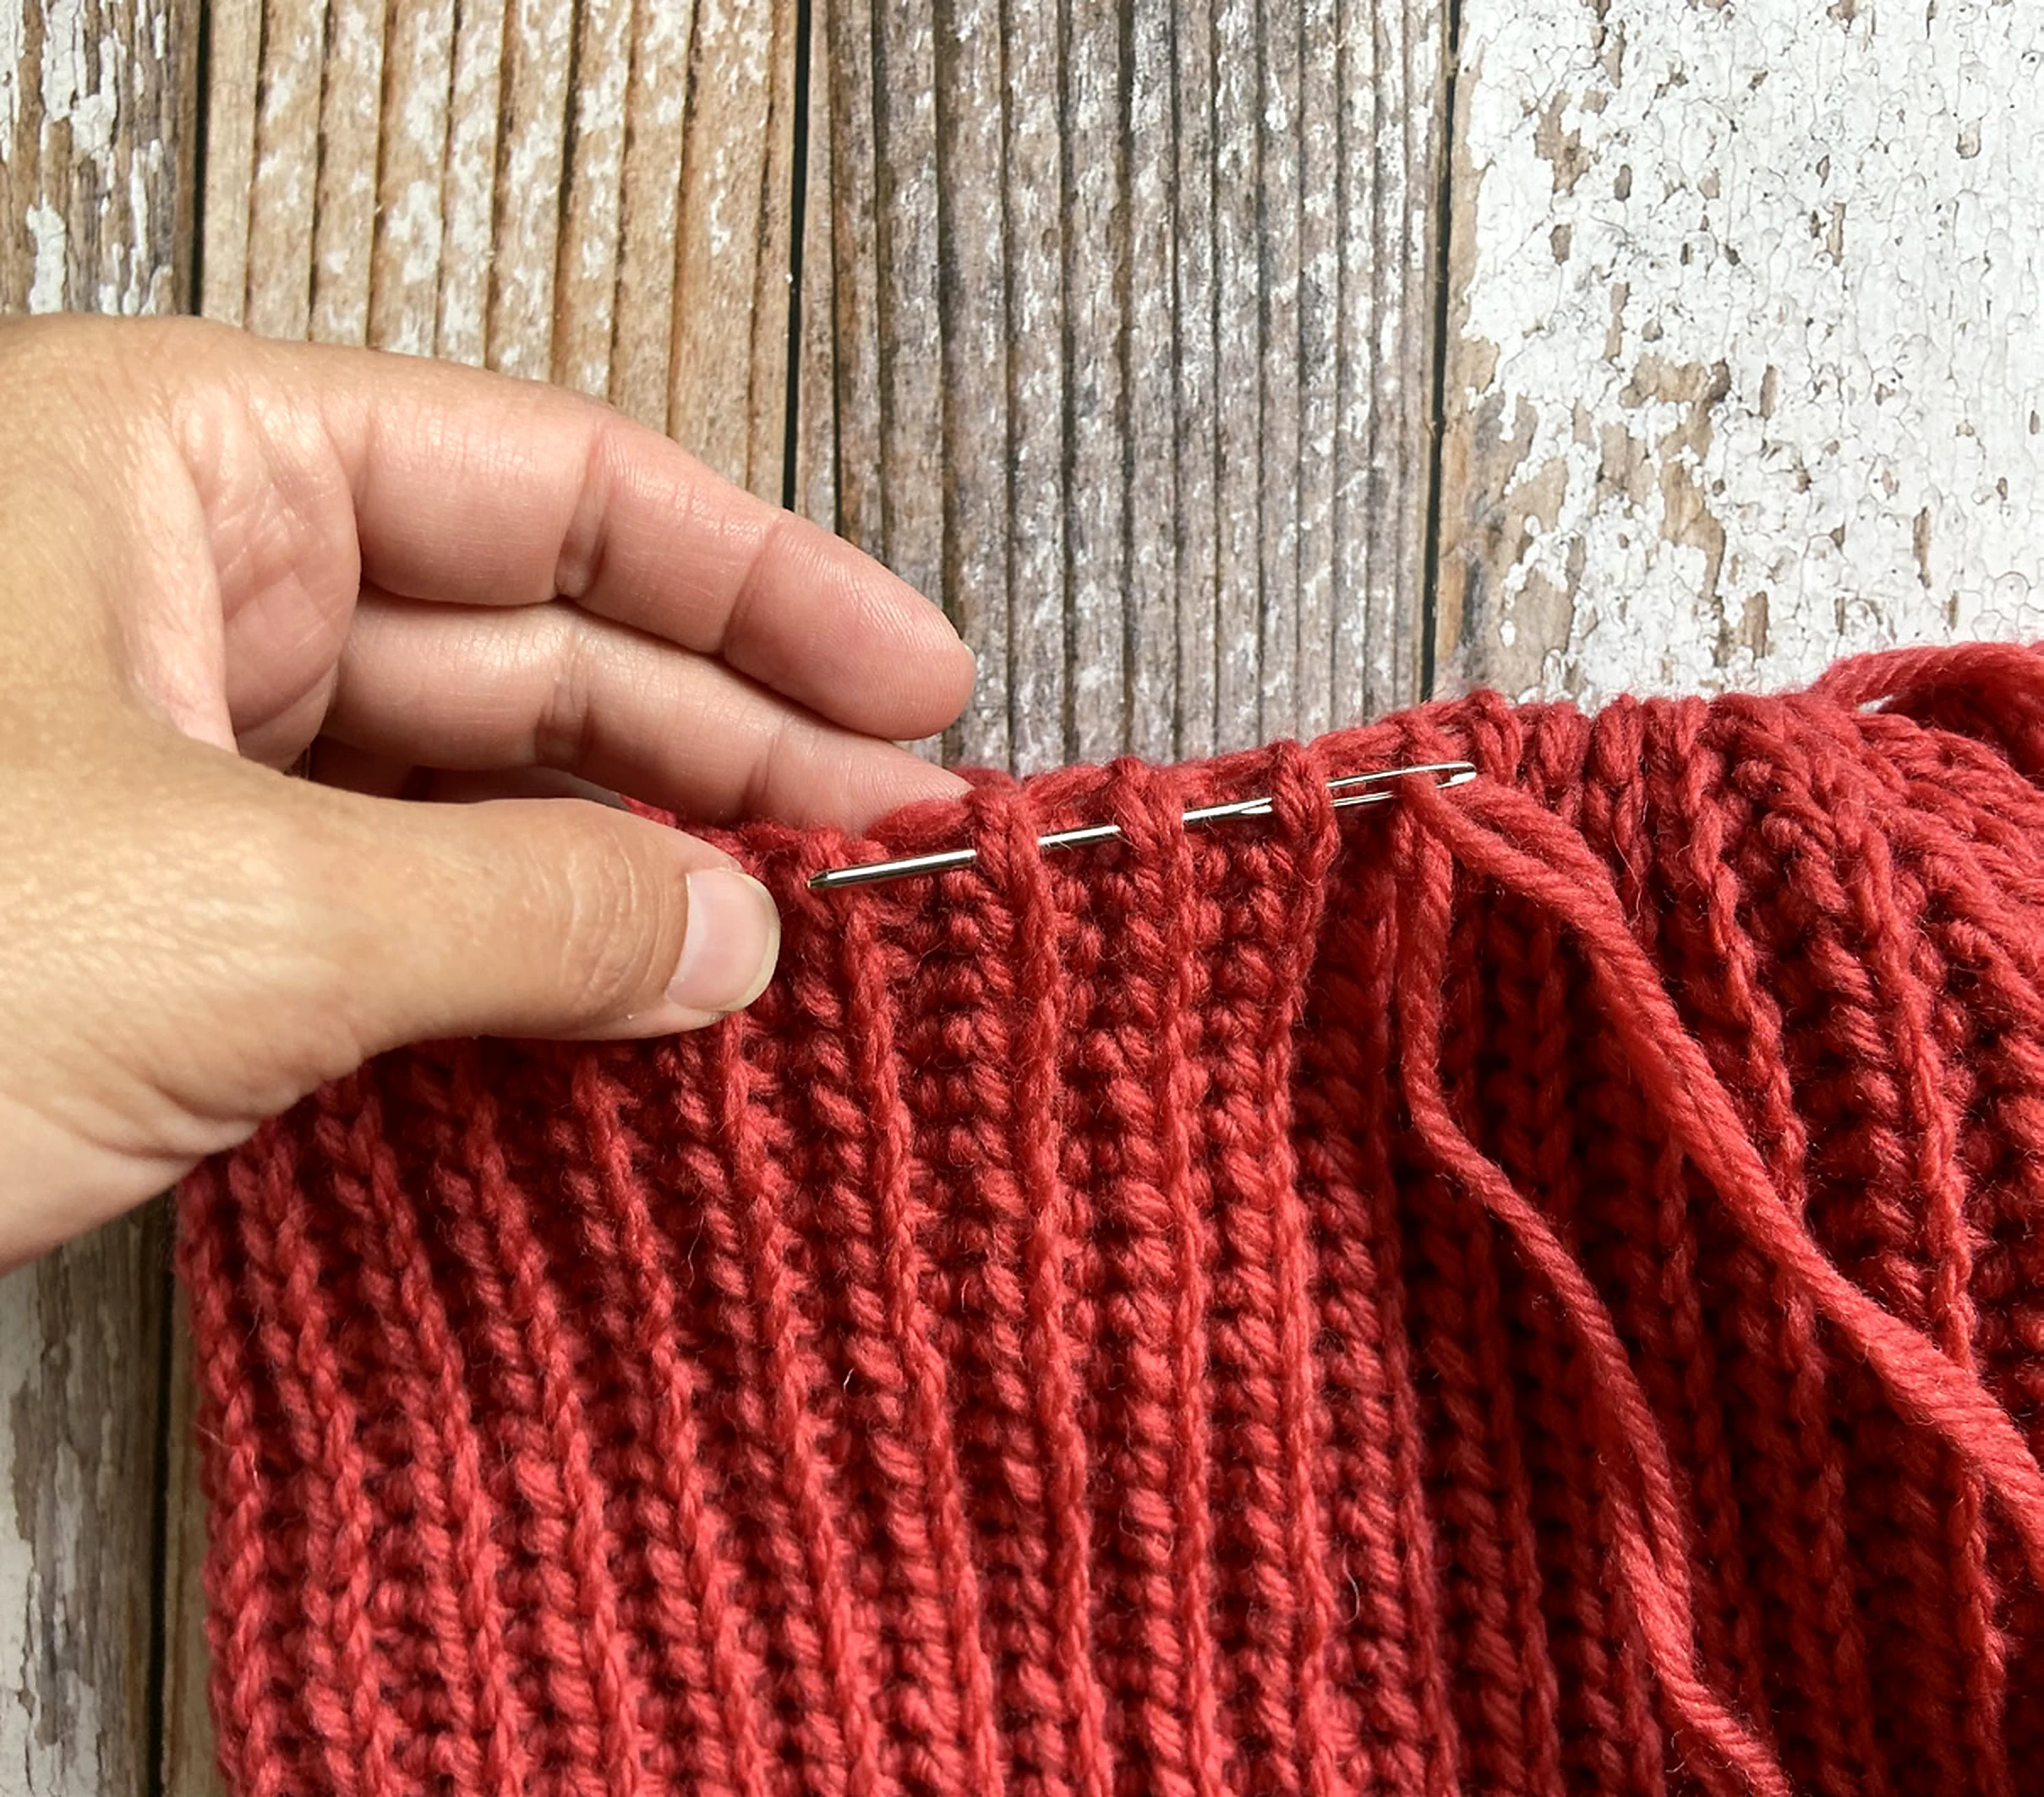
Use a double-stranded length of MC to weave through each ridge along top edge of hat, and pull tight to close top of hat as much as possible. Turn Hat inside out and use yarn tails to sew remaining hole at top of hat closed. Weave in ends, turn RS out and block.
PomPom
Cut 1 piece of CC yarn to 16” [40.5 cm] and set aside. Cut 1 piece of CC yarn to 32” [81 cm] and set aside. Wrap CC yarn loosely around piece of 3.5” [9 cm] cardboard about 140-160 times. Before removing loops from cardboard, tie the 16” [40.5 cm] piece of yarn tightly around loops near center of cardboard. Fold the 32” [81 cm] piece of yarn in half, then holding the yarn doubled, tie the center of the opposite side of pompom in a tight knot. (Now there is a knot on each side of the cardboard). Carefully slide loops off cardboard and tie the doubled piece of yarn around the center of the loops, this time around both sides- make sure you tie a very tight knot. Use scissors to cut all of the loops of the pom-pom, being careful not to cut either of the two longer strands that were used to tie the pom-pom together. Fluff pom-pom, and trim ends of pom-pom into a 3.5” [9 cm] ball. Using yarn needle and long strands of yarn, attach pom-pom to top of hat. Weave in ends.
Tie ends
Cut 24 pieces of CC at 32” [81.5 cm]. Set 12 of these pieces aside for the second tie. Insert hook from WS to RS through earflap near tip, lay center of 12 strands of cut yarn over hook, and use hook to pull through earflap until a large enough loop forms to pull all 24 ends through. Divide strands into 3 equal sections (8 ends in each section) and braid until desired length. Tie in overhand knot and trim ends. Repeat for opposite tie end with remaining 12 strands of yarn.
Try it and share your result
Which size and colors did you make? Tell us how the earflap fit, whether the edging lay flat, and if any row or finishing step felt unclear. Your experience can help the next maker.
Leave a Reply