
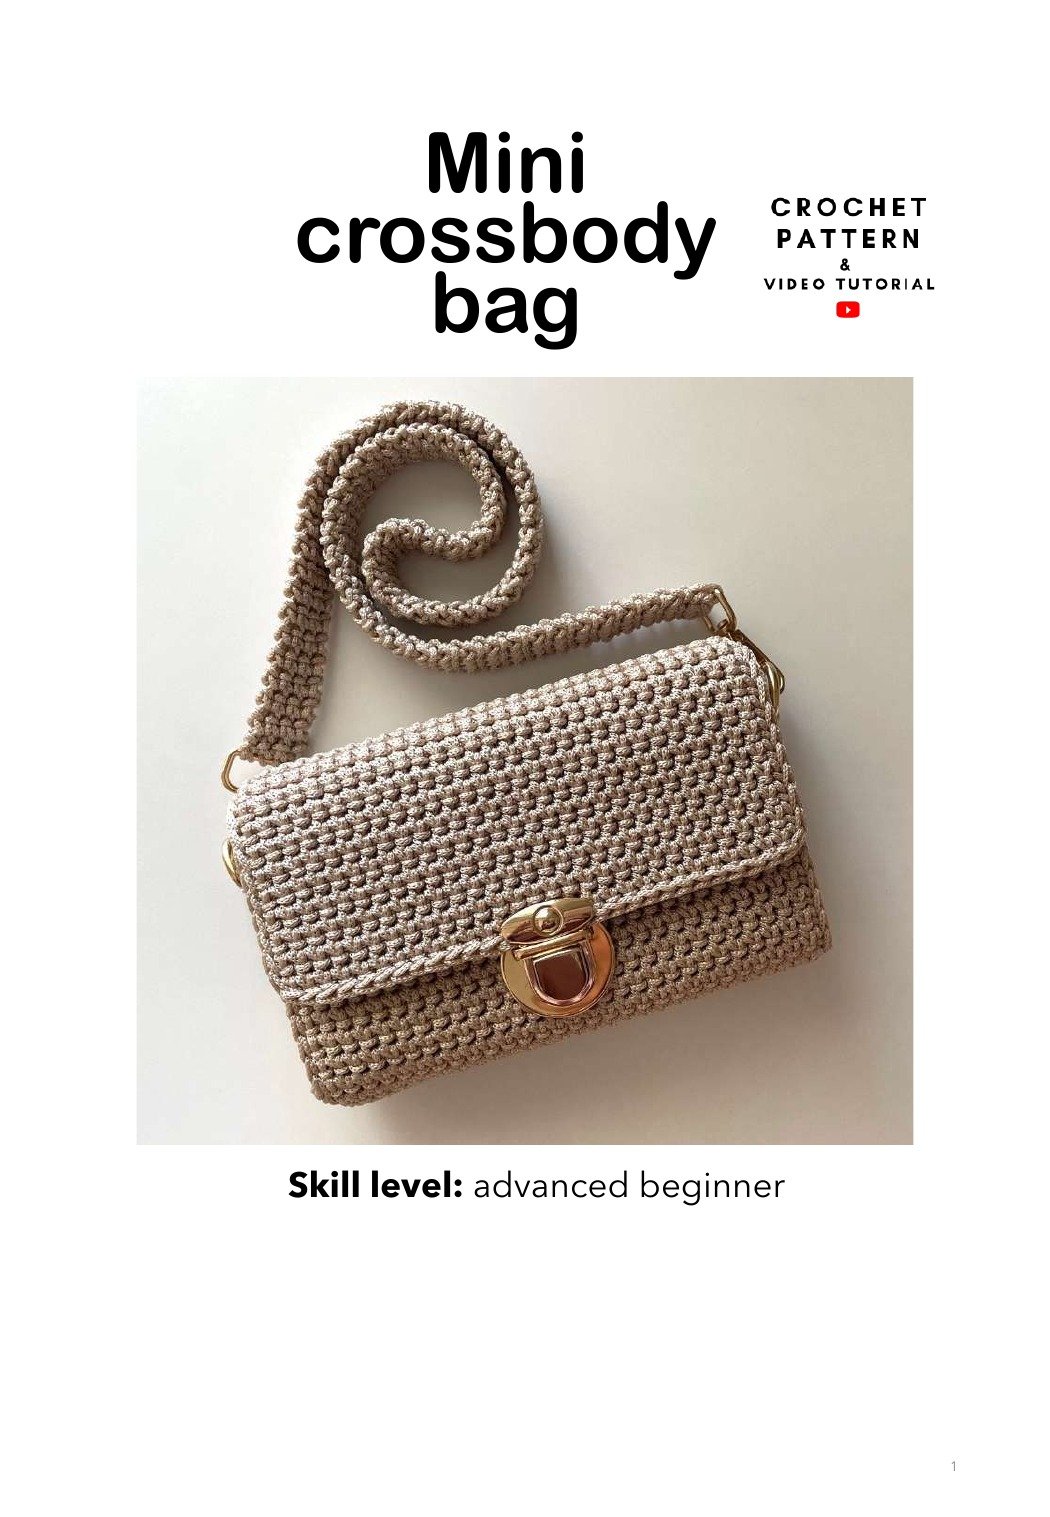
Mini Crossbody Bag Crochet Pattern
Make a structured mini bag with a shaped flap, slim side panels, secure hardware, and an optional crocheted strap. This guide preserves the original measurements, stitch method, construction sequence, and all 14 source pages.
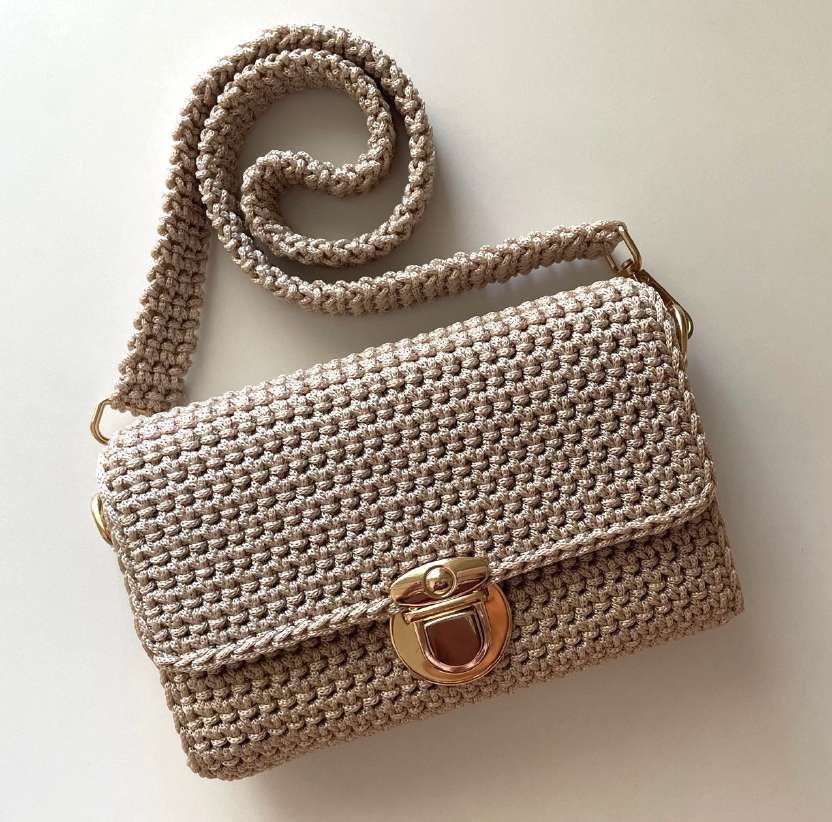
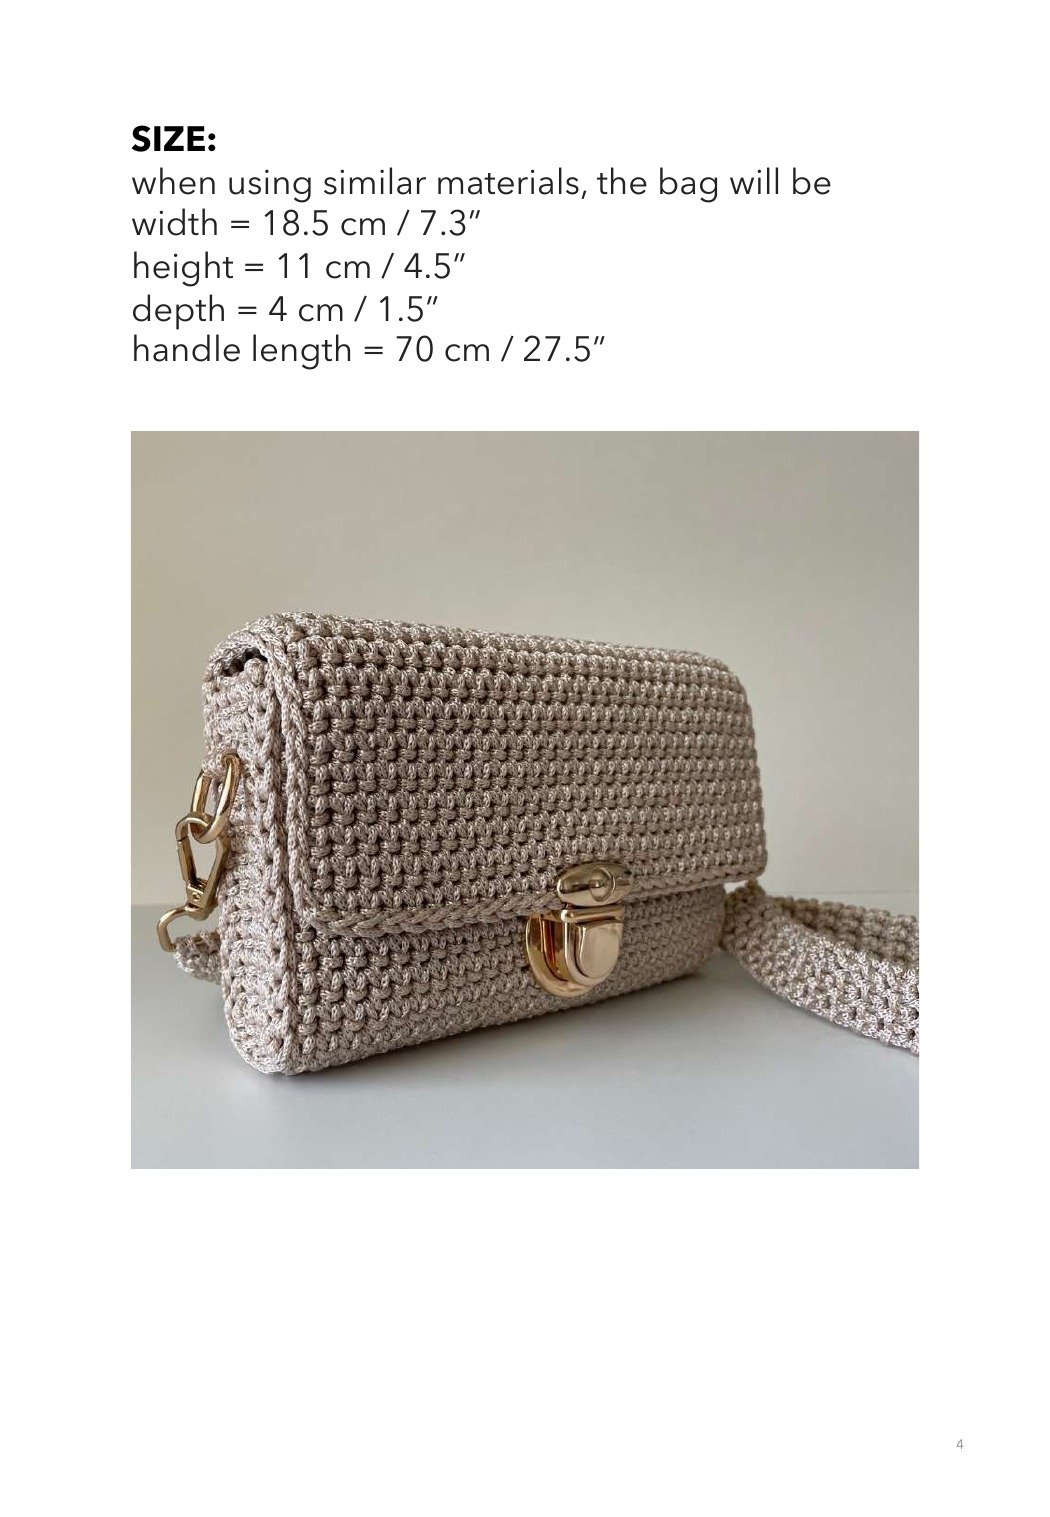
Finished size and construction
Using similar materials and matching the stated gauge, the finished bag is approximately:
- Width: 18.5 cm / 7.3 in
- Height: 11 cm / 4.5 in
- Depth: 4 cm / 1.5 in
- Handle length: about 70 cm / 27.5 in
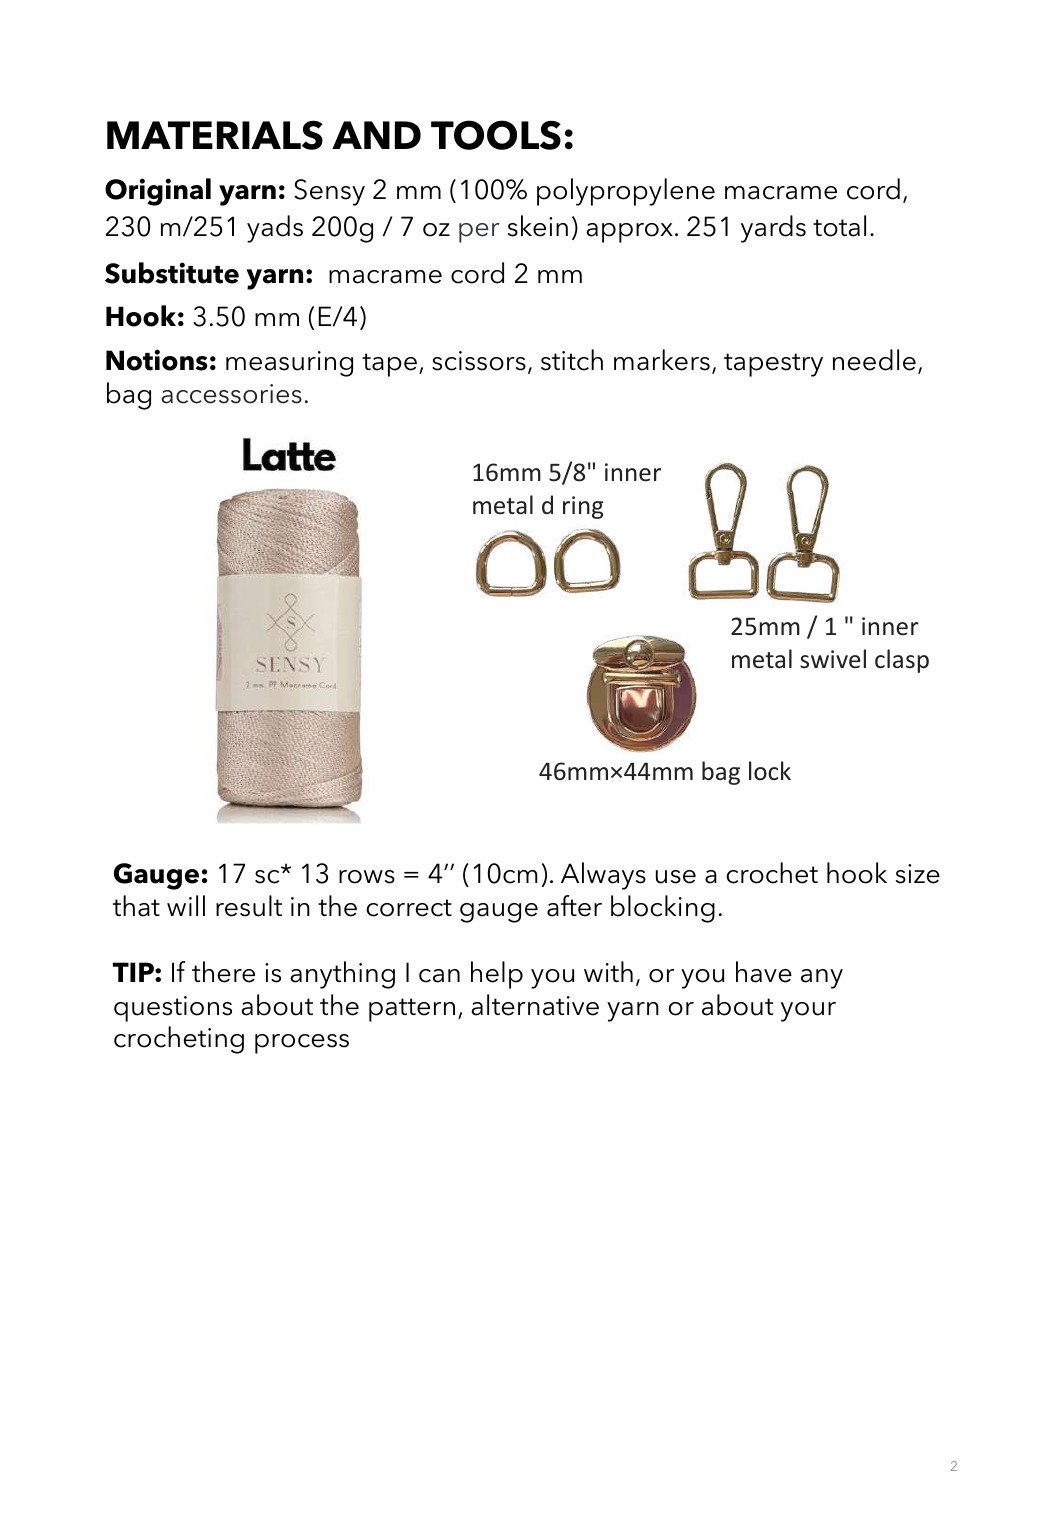
Materials
- Approximately 230 m / 251 yd of 2 mm polypropylene macramé cord (about 200 g / 7 oz)
- 3.5 mm crochet hook (E/4)
- Measuring tape, scissors, stitch markers, and tapestry needle
- Two 16 mm / 5⁄8 in inner D-rings
- Two 25 mm / 1 in inner swivel clasps
- One bag lock, approximately 46 × 44 mm
The source permits a substitute 2 mm macramé cord. Changing cord thickness changes the finished size, stiffness, gauge, and hardware fit.
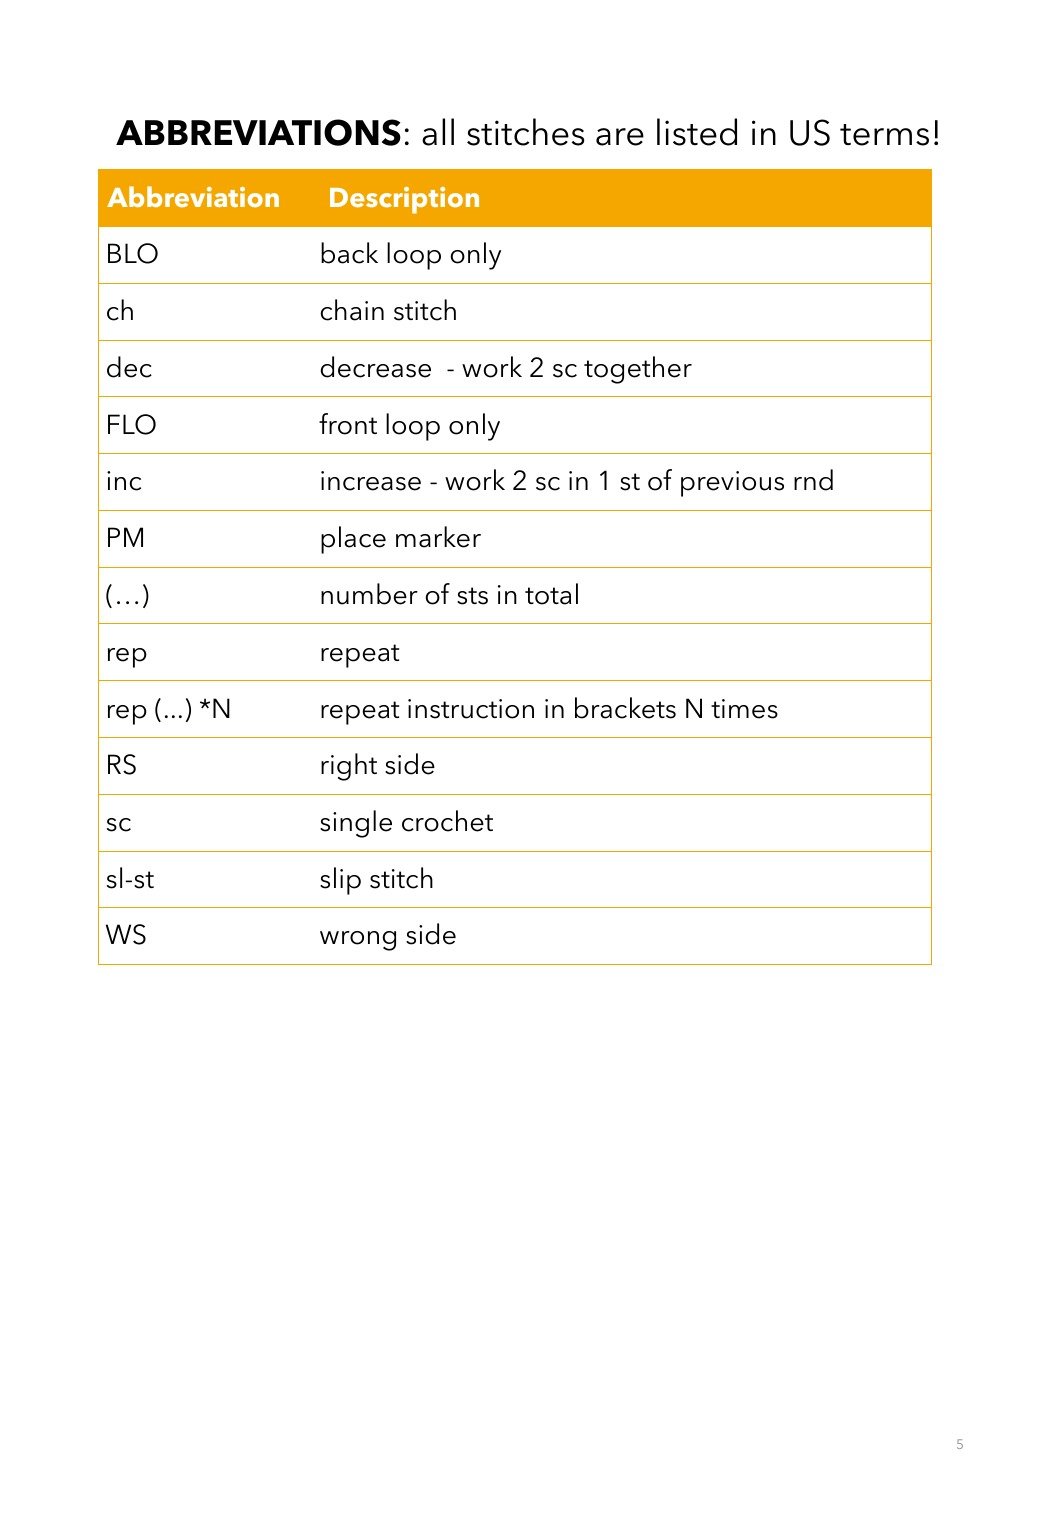
Stitches and abbreviations
| Term | Meaning |
|---|---|
| ch | chain |
| sc | single crochet |
| sl st | slip stitch |
| BLO / FLO | back loop only / front loop only |
| inc | 2 sc in one stitch |
| dec | single crochet 2 stitches together |
| RS / WS | right side / wrong side |
All stitch names use US terminology.
Start the main panel
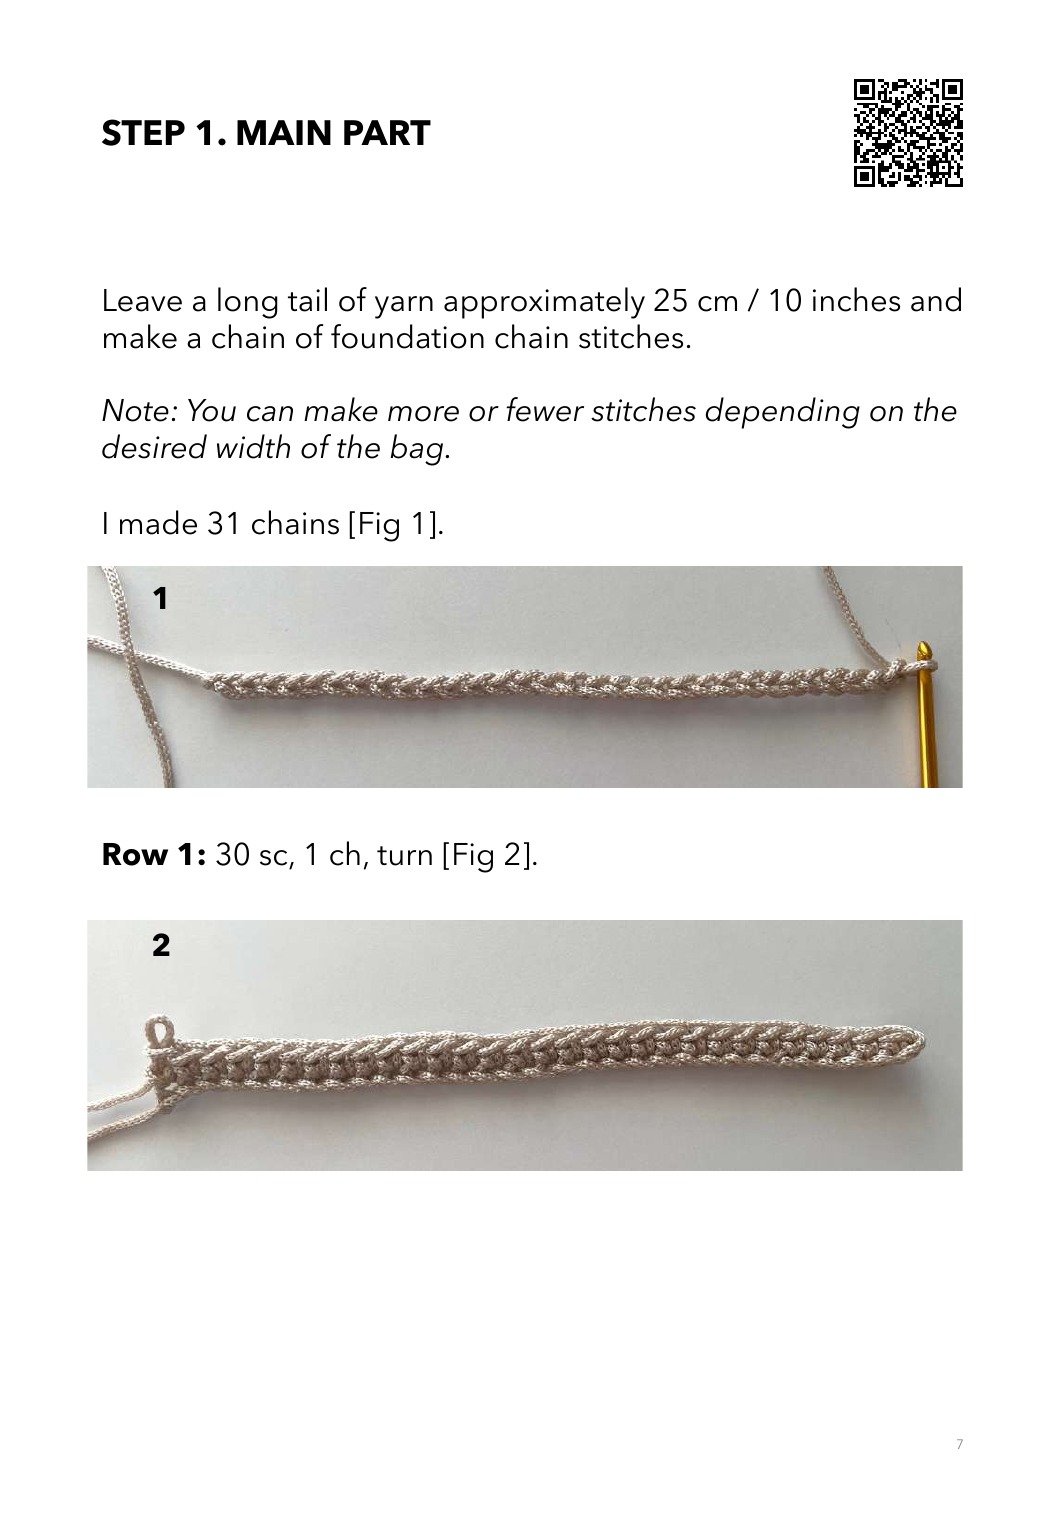
Leave a 25 cm / 10 in tail and chain 31. Row 1: work 30 sc, ch 1, and turn.
Complete written pattern
1. Main panel
- Leave a tail about 25 cm / 10 in long and chain 31.
- Row 1: 30 sc, ch 1, turn.
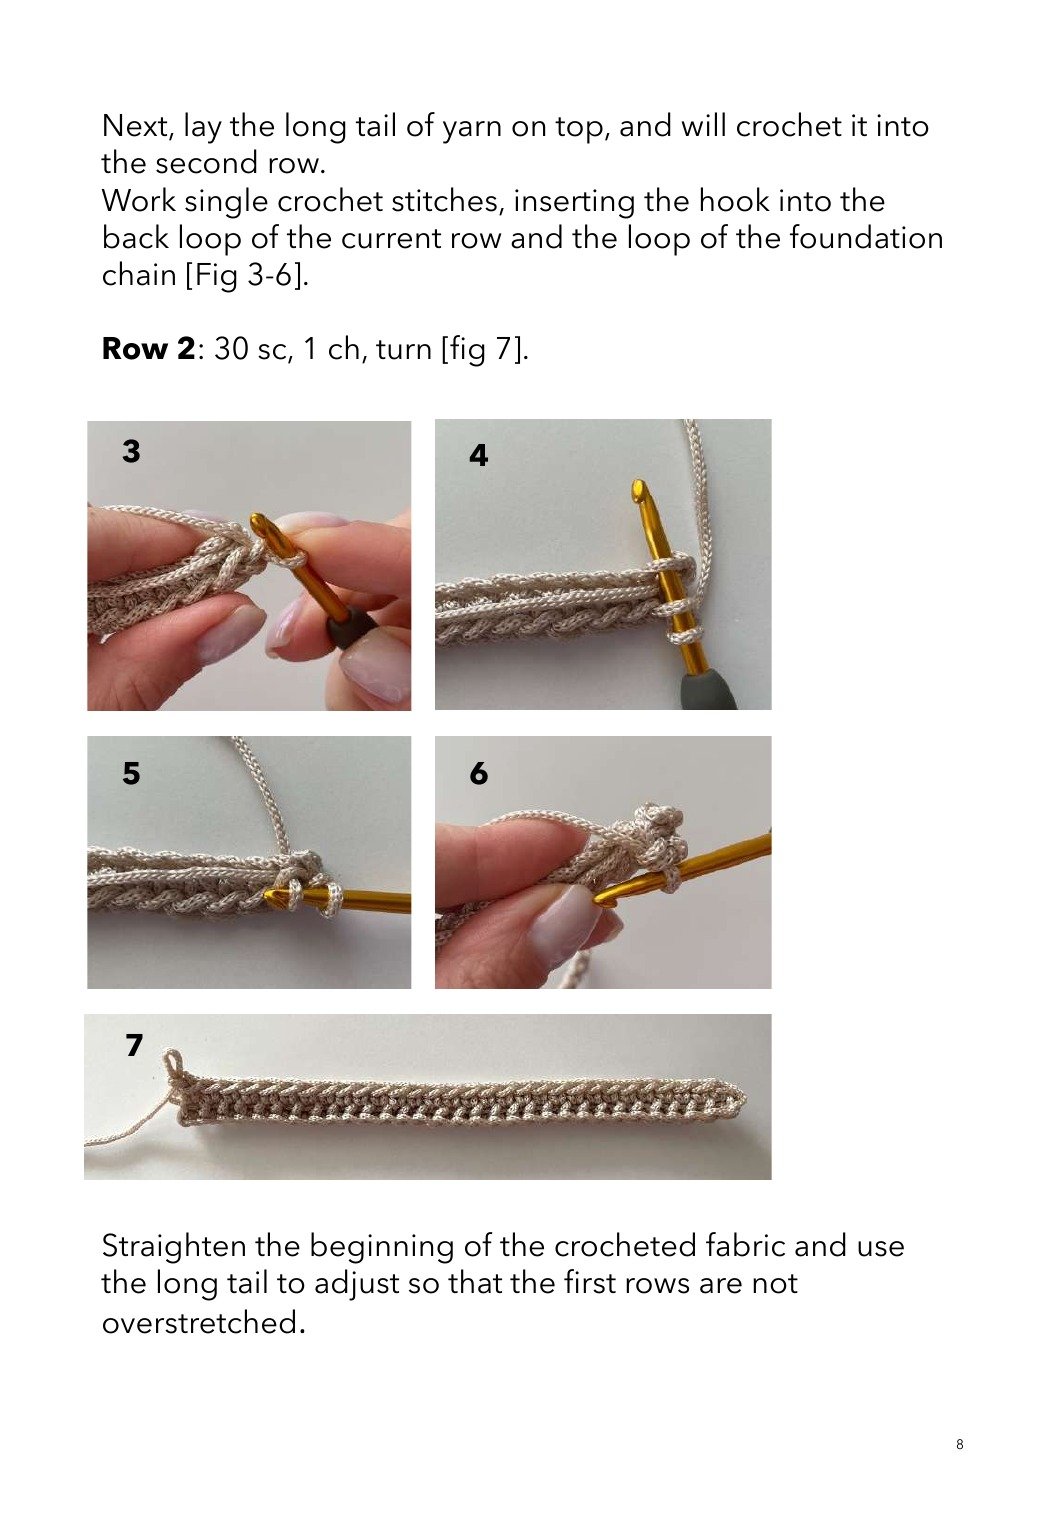
- Row 2: Lay the starting tail across the work. Insert the hook through the back loop of the current row and the corresponding foundation-chain loop; work 30 sc, ch 1, turn.
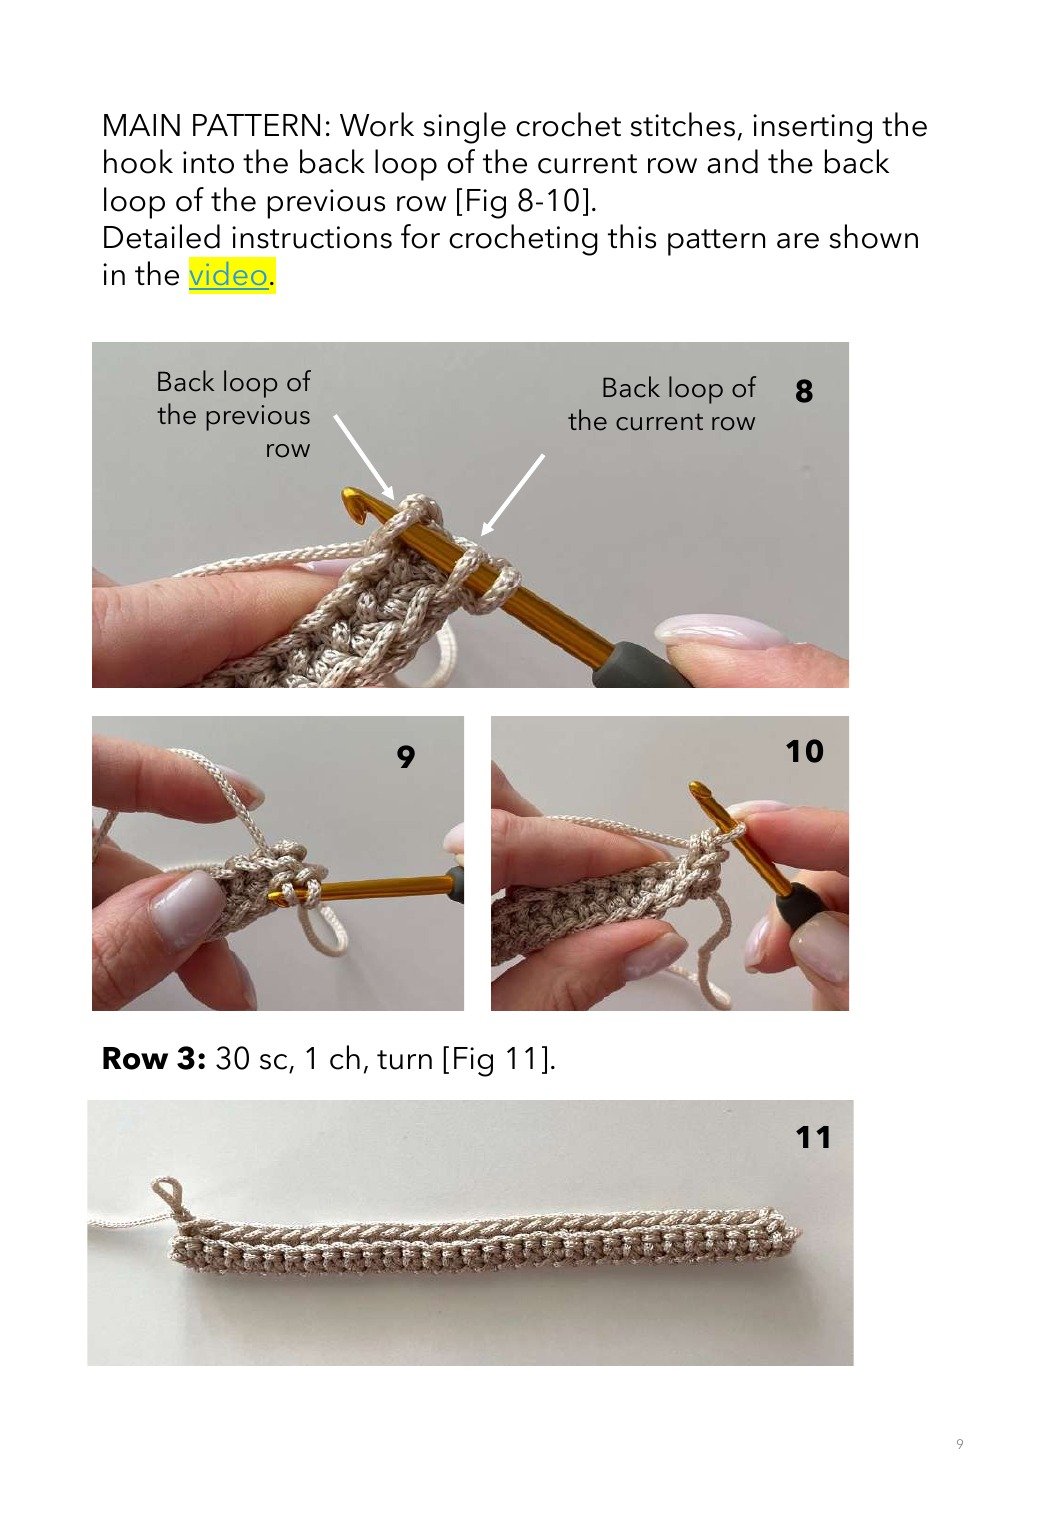
- Row 3 and onward: For each sc, insert through the back loop of the current row and the back loop of the preceding row. Work 30 sc, ch 1, turn.
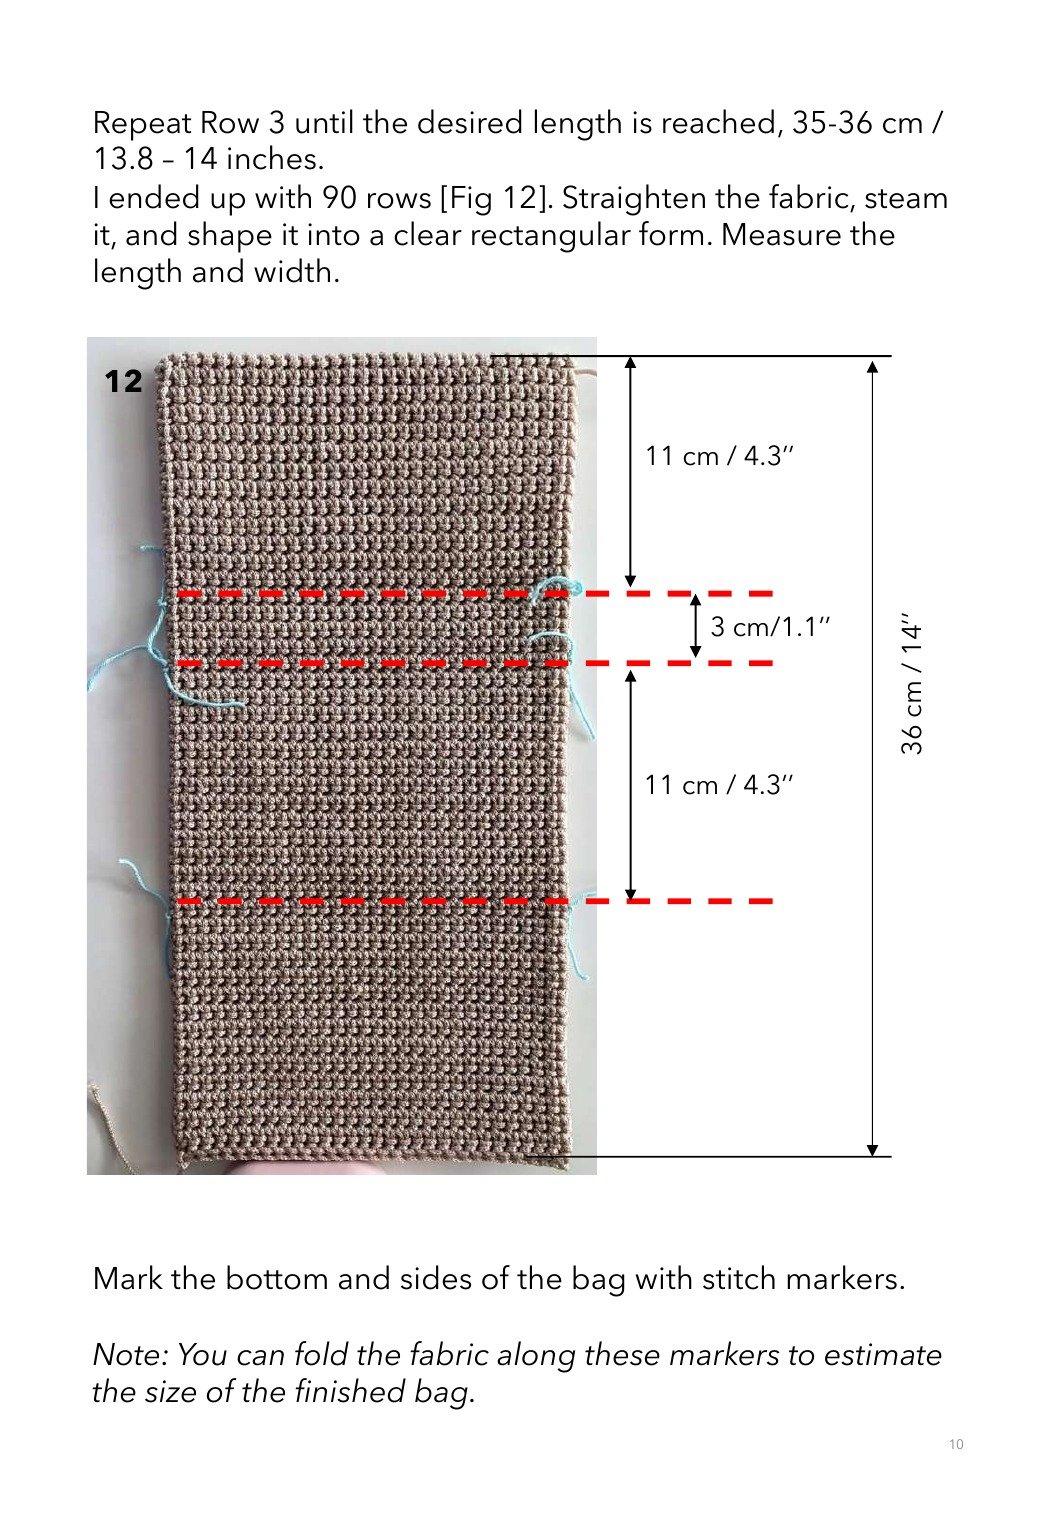
- Repeat until the panel is 35–36 cm / 13.8–14 in long. The source sample uses 90 rows.
- Steam and square the rectangle. Mark fold lines so the body measures about 11 cm, the base 3 cm, and the flap 11 cm.
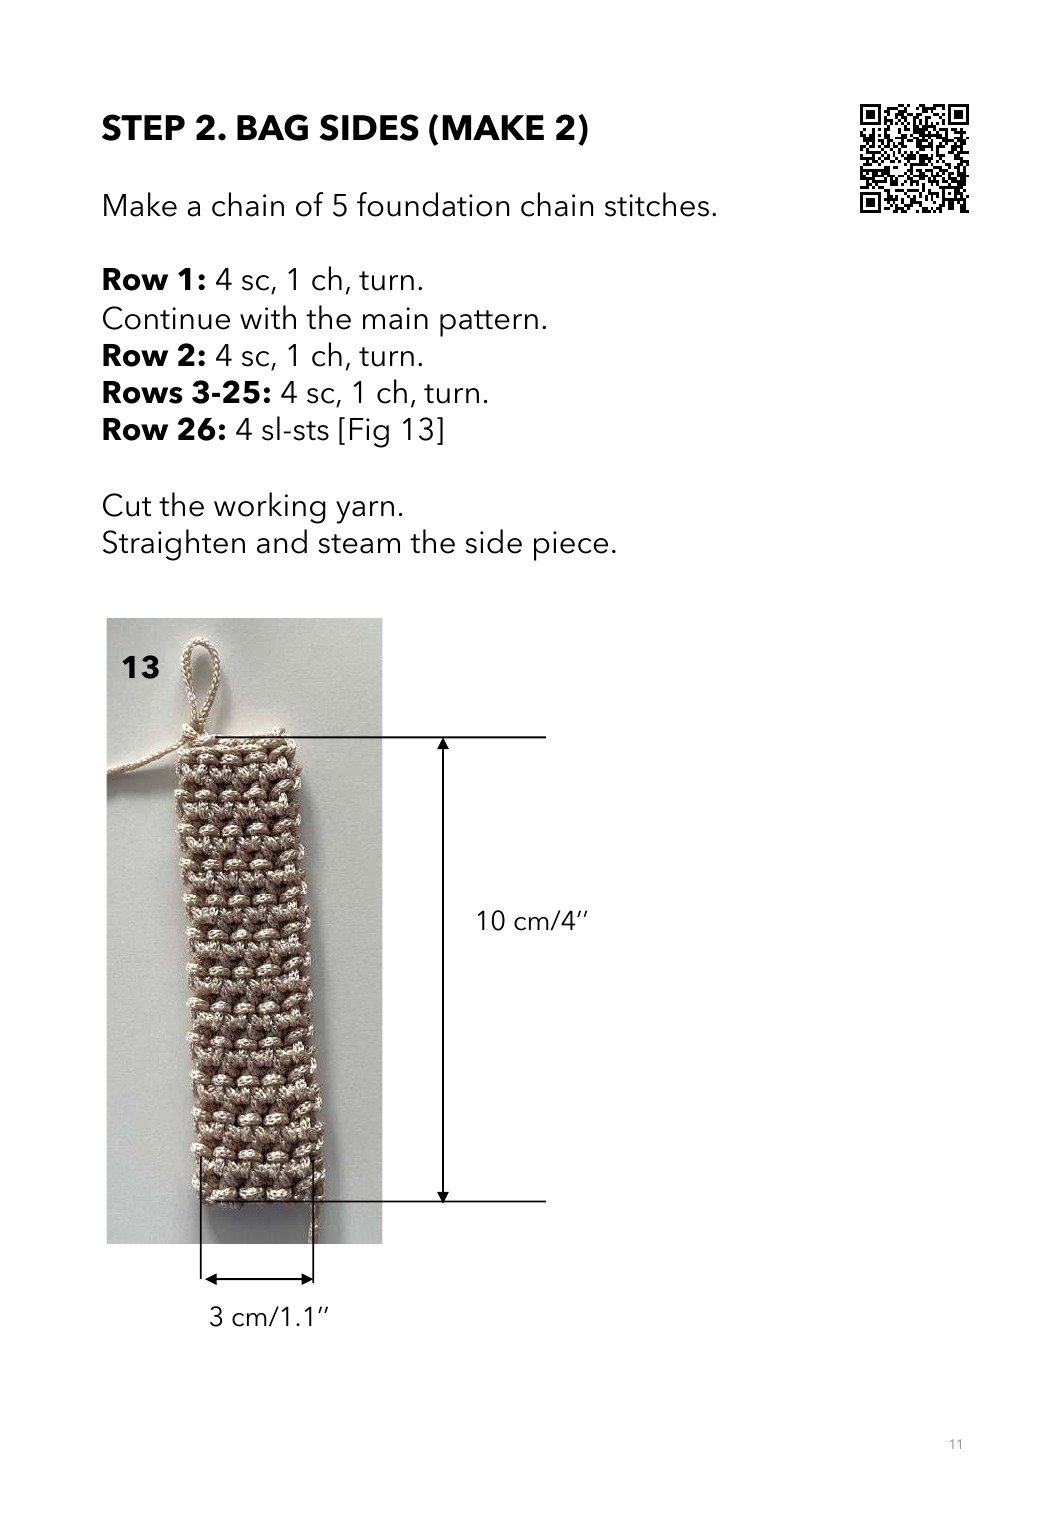
2. Side panels — make two
- Chain 5.
- Row 1: 4 sc, ch 1, turn.
- Rows 2–25: Continue the same double-back-loop texture with 4 sc, ch 1, turn.
- Row 26: 4 sl sts. Fasten off, then straighten and steam.
3. Join and add hardware
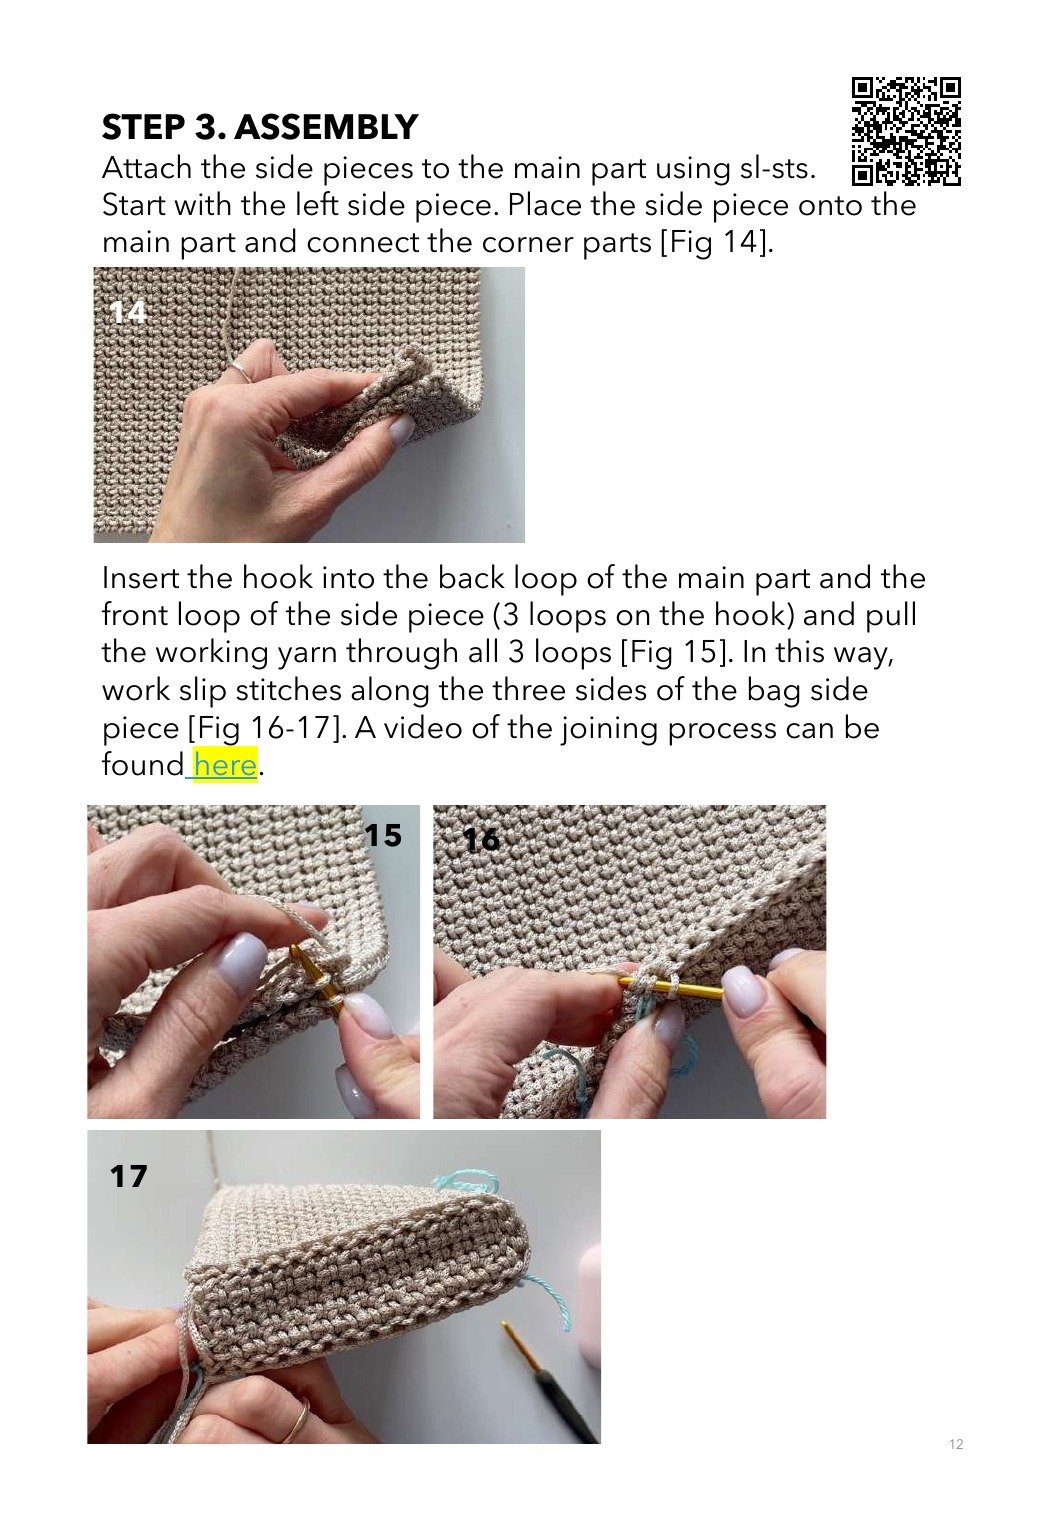
- Place the first side panel against the main panel and align the corners.
- For each joining slip stitch, insert through the back loop of the main panel and the front loop of the side panel, then pull through all three loops.
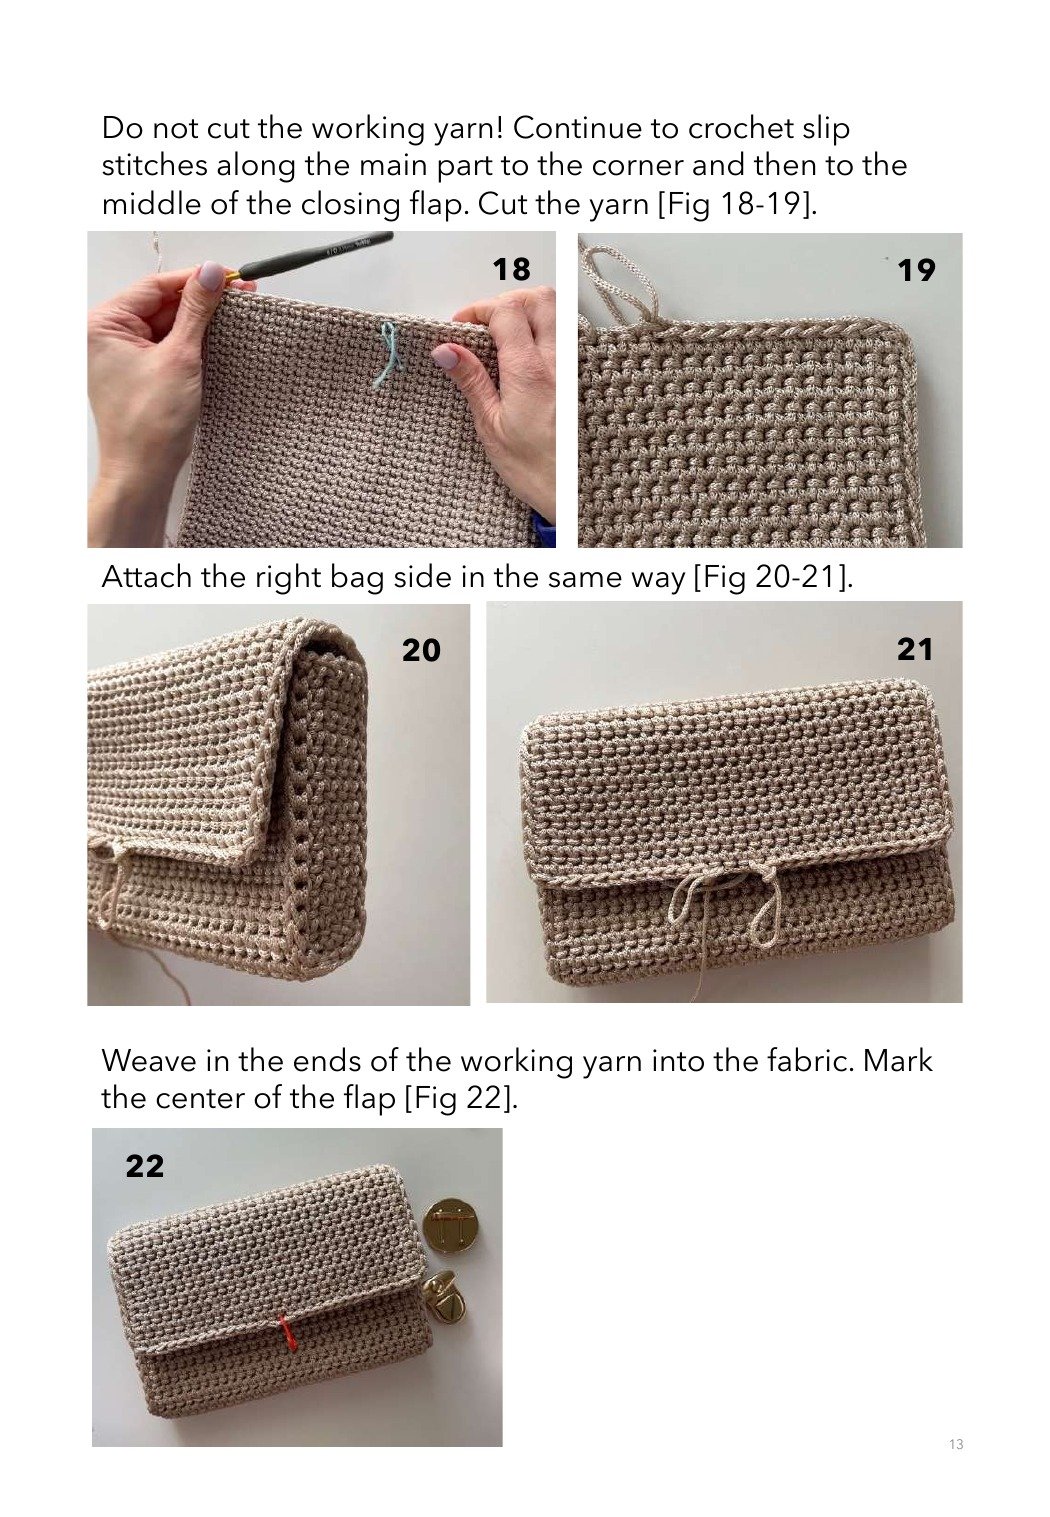
- Join around three edges. Without cutting the yarn, continue slip stitching along the main panel to the corner and toward the center of the flap. Fasten off.
- Attach the second side in the same way and weave in all ends.
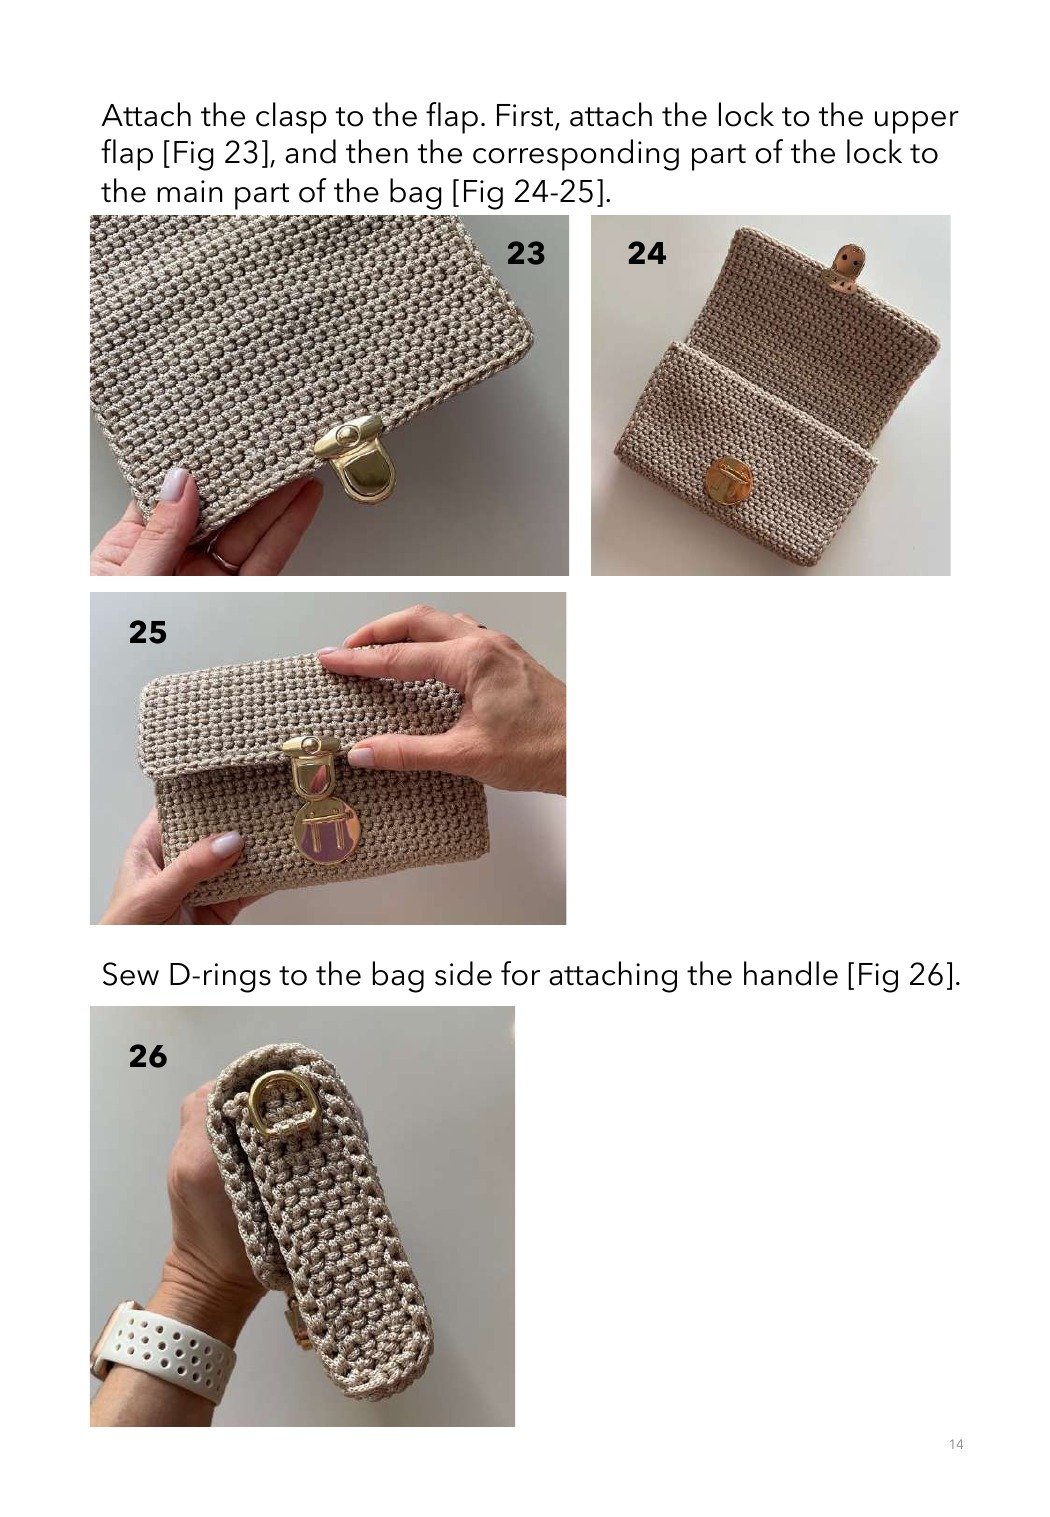
- Mark the flap center. Install the upper lock on the flap, then align and install its matching part on the bag front.
- Sew a D-ring securely to each side panel.
4. Optional crocheted handle
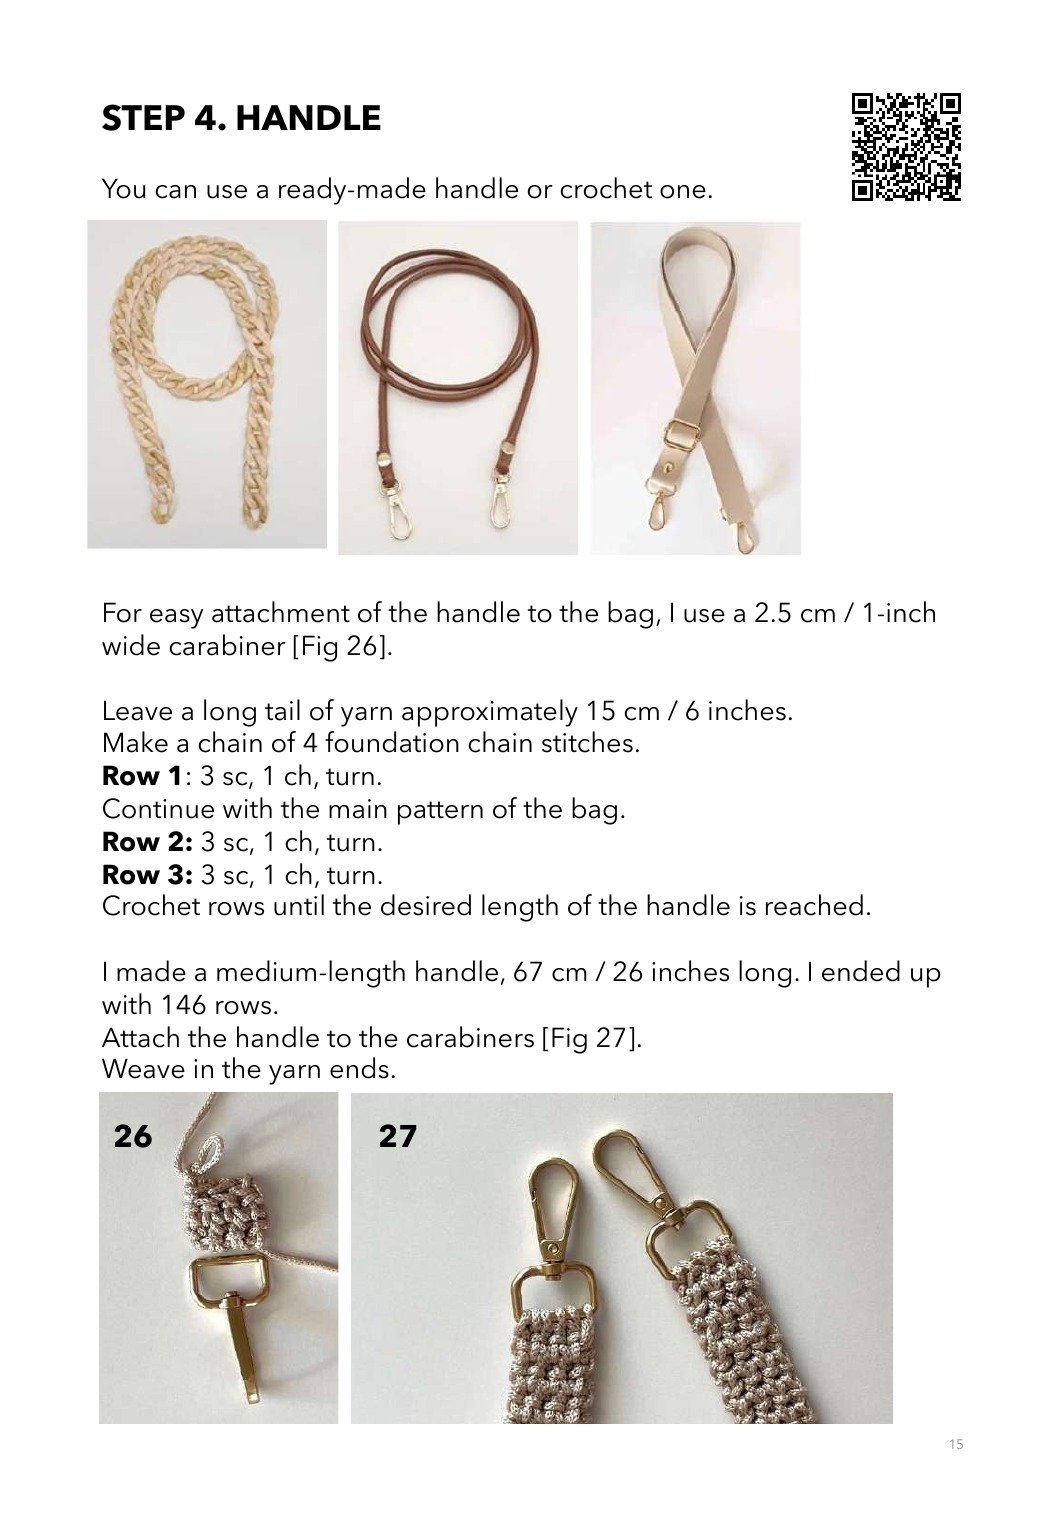
- Leave a 15 cm / 6 in tail and chain 4.
- Rows 1–3: 3 sc, ch 1, turn, using the same textured stitch method.
- Continue to the desired length. The source sample measures about 67 cm / 26 in and uses 146 rows.
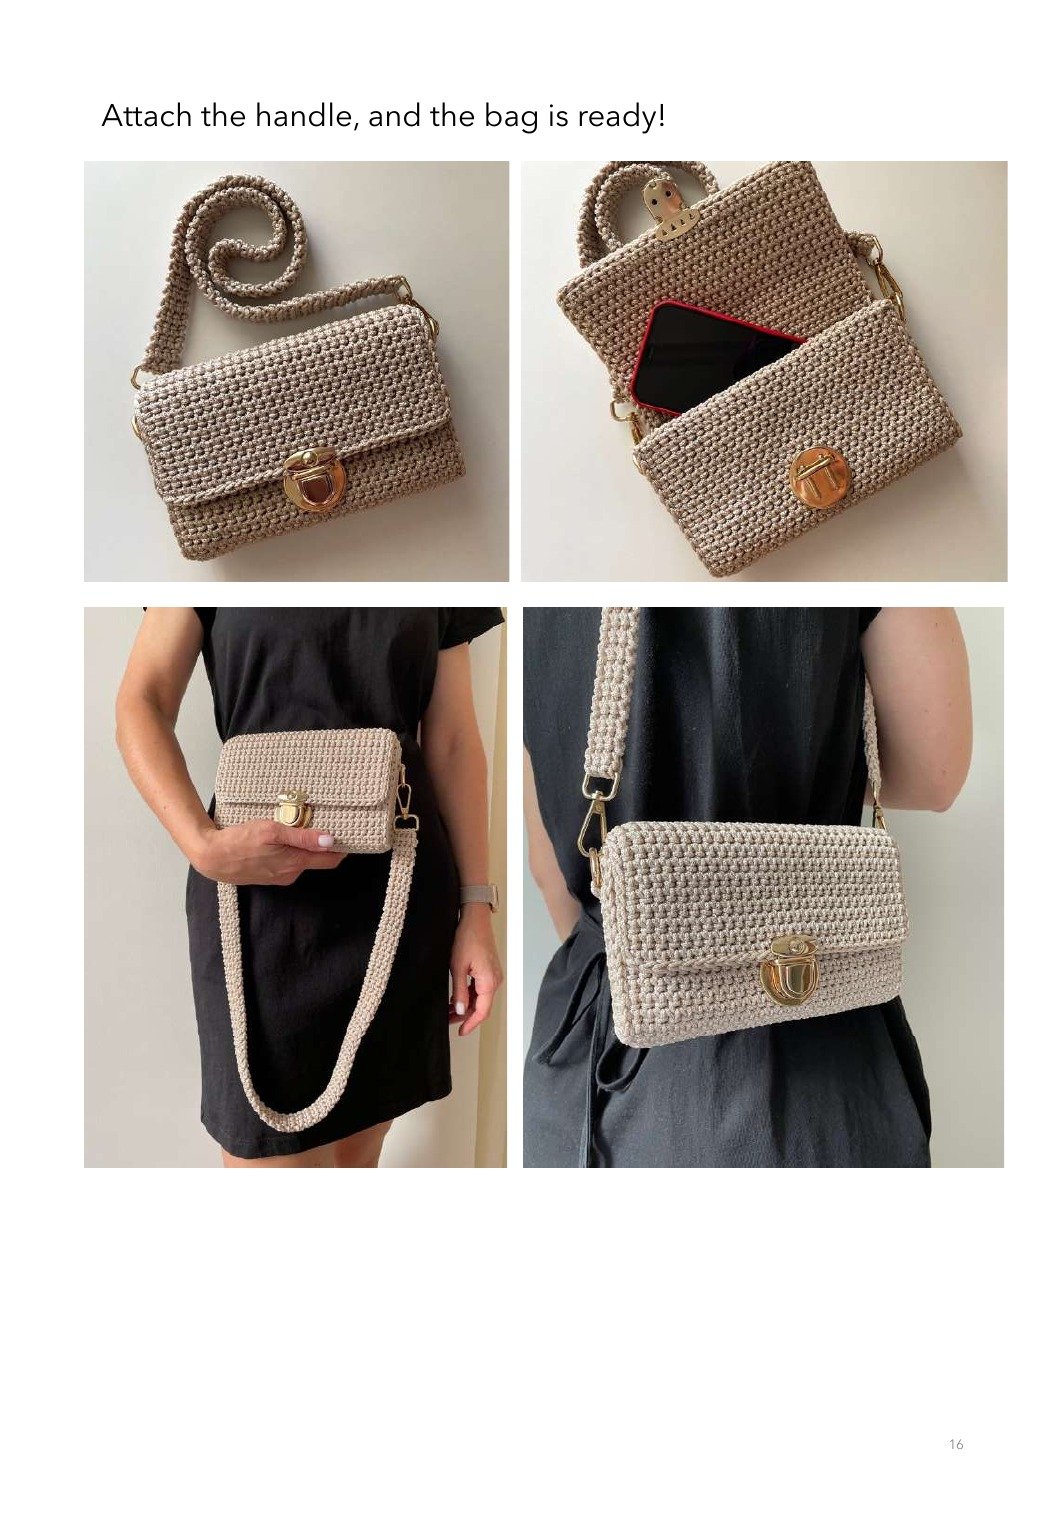
- Attach each end securely to a 25 mm / 1 in swivel clasp, weave in the ends, and clip the strap to the D-rings.
Fit and count checks
- The main panel remains 30 stitches wide throughout.
- Both side panels remain 4 stitches wide and should match before assembly.
- The sample’s 90-row body and 146-row strap are measurements, not mandatory counts; match the stated length and gauge.
- Test the lock alignment before permanently fastening both pieces.
- Check that all hardware is tightly secured before carrying valuables.
Questions
Can I change the bag width?
Yes. Change the starting chain, then keep a consistent stitch count. Recalculate side placement, lock position, and hardware spacing before assembly.
Why are two back loops caught in the main stitch?
The stitch joins the current row to the previous row’s back loop, creating the dense, structured texture shown in the source photos.
Can I use a ready-made strap?
Yes. The original pattern specifically allows either a ready-made handle or the crocheted strap.
Must I use polypropylene cord?
No, but the substitute should be a firm 2 mm macramé cord. Always swatch because softness and thickness affect structure and gauge.
All 14 original PDF pages
Open any page to inspect the complete original photographs, diagrams, measurements, and construction sequence.
Use + / − or the mouse wheel to zoom. Drag the image to inspect stitch details. Press Esc to close.
Leave a Reply