
Stella Crochet · Bags & Purses
Granny Square Clutch Crochet Pattern
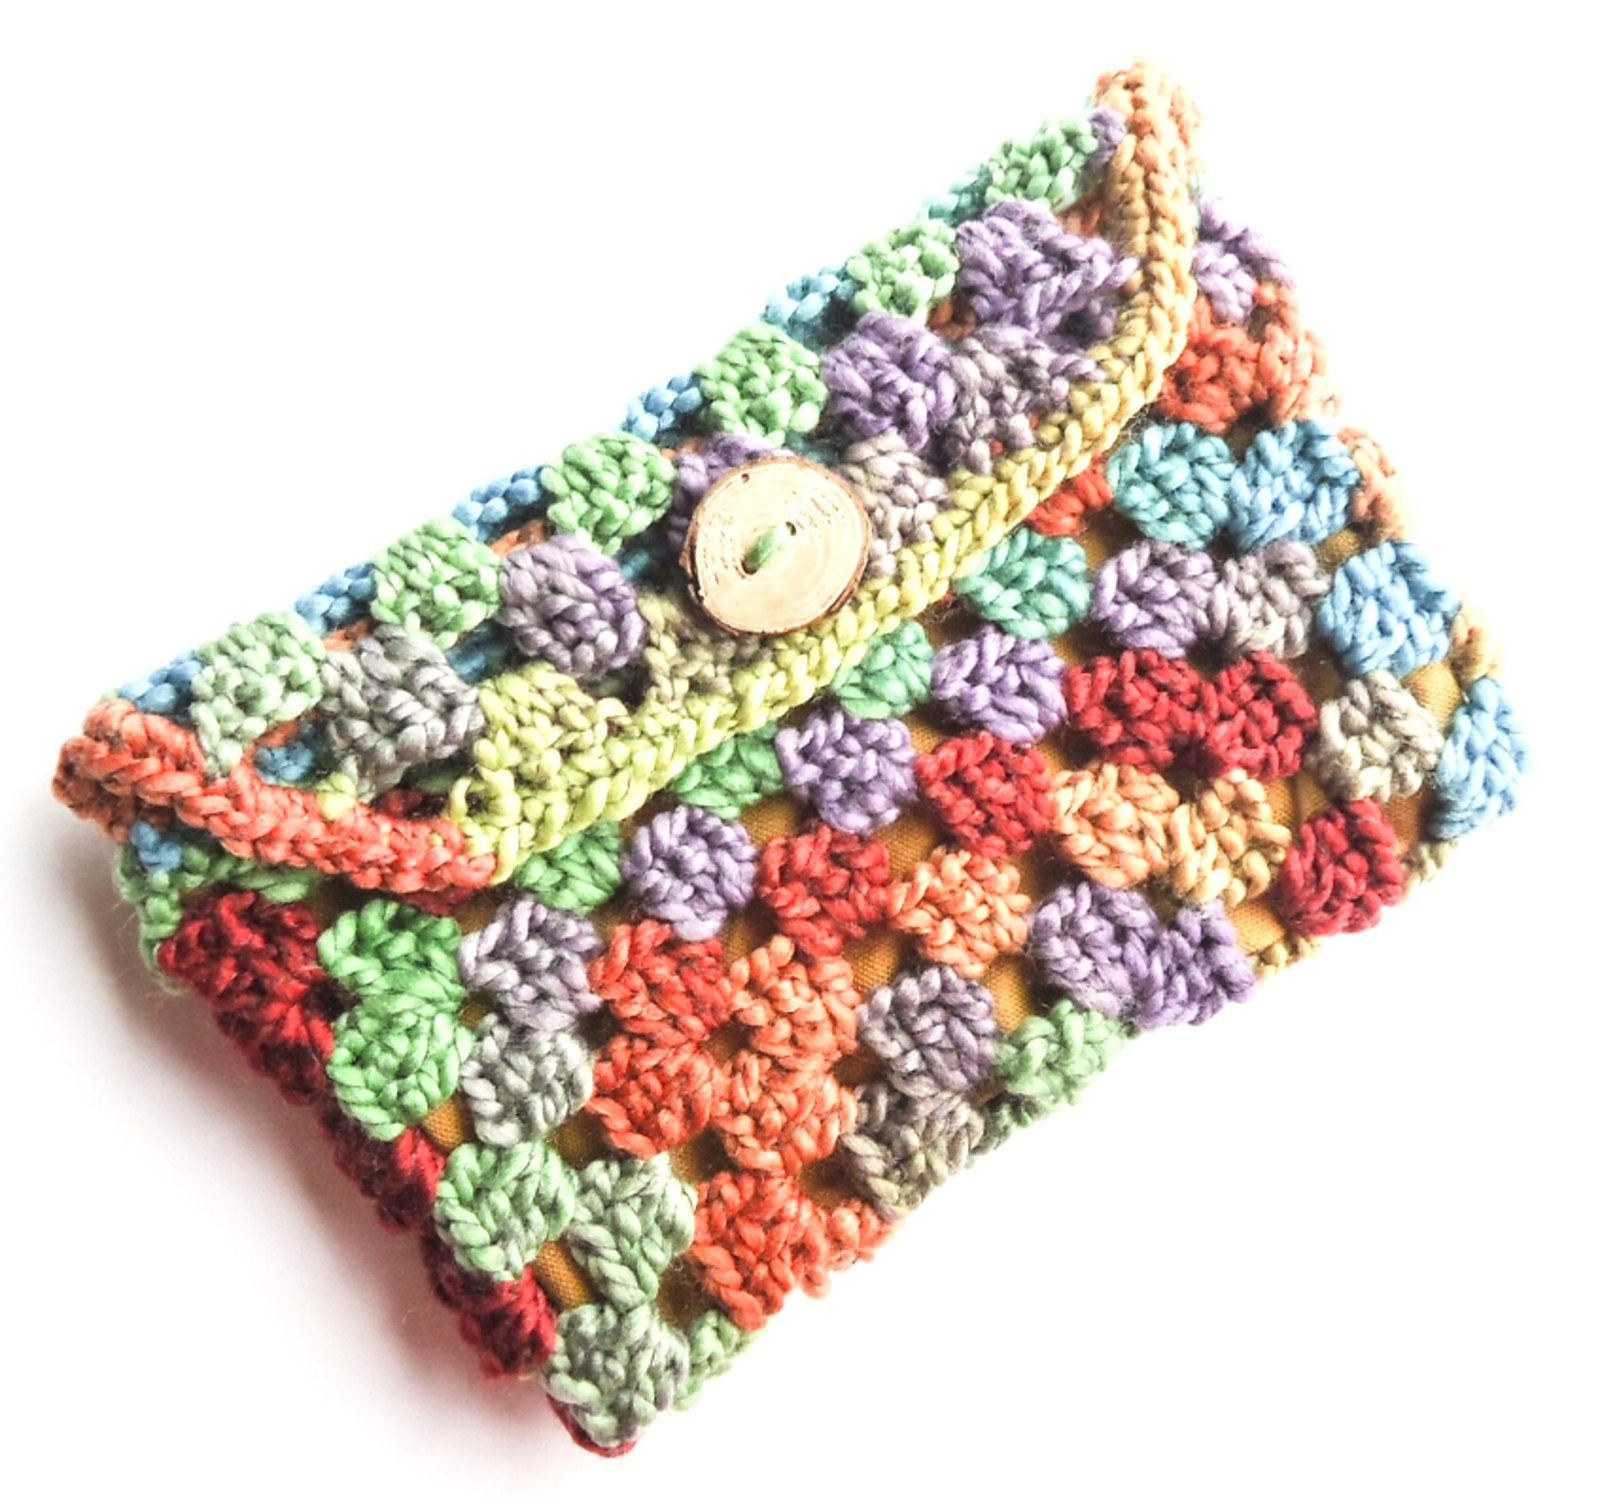
Turn one seven-round granny square into a practical 9-inch clutch with joined side seams, a shaped flap, a button closure, and an optional fabric lining. This granny square clutch crochet pattern preserves the source construction while making every stage easy to check.
Project Overview
Finished size
Approximately 9 in wide × 5 in tall. Yarn, hook size, and the number of square rounds can change the final measurement.
Gauge
Three rows and nine stitches, or three 3-dc clusters, measure approximately 2 inches.
Construction
Work one granny square to seven rounds, fold it with right sides together, join the short sides, and turn it right side out. Two opening rounds prepare the top. A four-row tapered flap completes the crochet.
Materials and Abbreviations
- Bulky multicolor yarn
- 6 mm (J/10) crochet hook
- One button
- Tapestry needle and scissors
- Fabric, matching sewing thread, and sewing needle for the optional lining
| ch | chain | sl st | slip stitch |
|---|---|---|---|
| sc | single crochet | dc | double crochet |
| tr | treble crochet | sp | space |
For a general terminology refresher, use this crochet reference.
Rounds 1–3: Build the Center
Round 1: make a magic ring. Ch 3, 2 dc, ch 2, then work three more groups of 3 dc separated by ch 2. Finish with ch 2 and join to the beginning. You now have four 3-dc clusters and four corners.
Round 2: ch 3 and 2 dc in the same corner. Repeat three times: ch 1, then (3 dc, ch 2, 3 dc) in the next corner. Ch 1, work 3 dc in the final corner, ch 2, and join. The beginning and ending groups complete the fourth corner.
Round 3: ch 3, 2 dc in the same place, ch 1. Work 3 dc and ch 1 in every side space. In the next three corners work (3 dc, ch 2, 3 dc, ch 1). In the final corner work 3 dc, ch 2, and join to complete the split corner.
Rounds 4–7: Enlarge the Square
Continue the standard granny-square structure until the square has seven rounds. Work 3 dc into every chain-1 side space and separate neighboring clusters with ch 1. In every corner, work (3 dc, ch 2, 3 dc). Keep the four corner spaces aligned and count the same number of clusters on every side.
Fold the square in half with the right side facing inward. Slip stitch or sew the two short side edges together. Fasten off, weave in the ends, and turn the pouch right side out.
Rounds 8–9: Finish the Opening
Round 8: work (3 dc, ch 1) into each chain-1 space around the opening. At each folded edge or seam, work 1 dc into each of the next 3 stitches, then ch 1 before continuing the cluster repeat. Begin with ch 3 and 1 dc in the same space; finish with the final dc and join, completing the split opening cluster.
Round 9: ch 1 and sc in every stitch around. Join with a slip stitch, but do not fasten off because the flap begins from this round.
Shape the Flap
Row 1: sl st into the next stitch. Ch 3, dc in the next 2 stitches, ch 1, then work 3 dc in the next gap and ch 1. Continue with 3-dc clusters separated by ch 1—seven cluster repeats in the original size—and finish with dc in the last 3 stitches.
Row 2: ch 4 and turn. Repeat (3 dc, ch 1) five times, work 3 dc, then tr into the beginning of Row 1.
Row 3: ch 4 and turn. Repeat (3 dc, ch 1) four times, work 3 dc, then tr into the beginning of Row 2.
Row 4: ch 4 and turn. Repeat (3 dc, ch 1) three times, work 3 dc, then tr into the beginning of Row 3.
Optional Row 5: sc evenly around the clutch opening and flap. Fasten off and weave in the ends. Sew on a button that passes through the natural gap between two 3-dc clusters; no separate buttonhole is required.
Optional Fabric Lining
Fold a piece of fabric in half with the right side inward. Measure and cut it to match the finished clutch body. Sew the two short sides. Fold and stitch the top raw edge for a neat opening, insert the lining into the clutch, and hand-sew it around the top with small invisible stitches.
Interactive 8-Step Reader
Step 1: Gather materials
Prepare bulky yarn, a 6 mm hook, a button, and finishing tools.
Step 2: Start the square
Make the four-cluster center with four chain-2 corners.
Step 3: Grow evenly
Continue the granny-square repeat through Round 7.
Step 4: Fold and seam
Fold right sides together, join both short sides, and turn.
Step 5: Finish the opening
Work the cluster round and one single-crochet round.
Step 6: Shape the flap
Decrease the cluster repeats across Rows 1–4.
Step 7: Add closure
Edge if desired and sew on the button.
Step 8: Line the clutch
Add the optional fabric lining and secure it invisibly.
Count Checks and Troubleshooting
- Every square round must retain four chain-2 corner spaces.
- Each new round adds one 3-dc cluster to every side.
- If the square cups, loosen the chain spaces; if it ripples, reduce excess tension differences.
- Keep both side seams the same length so the opening remains level.
- The flap repeat decreases from seven clusters in Row 1 to five, four, and three repeats.
- Choose a button that fits naturally between cluster gaps.
Granny Square Clutch Crochet Pattern FAQs
Can I change the clutch size?
Yes. Add or remove granny-square rounds, then adjust opening and flap repeats to the new width.
Is a lining required?
No, but it helps keep keys and other small items from slipping through the crochet fabric.
Why are the first and last corner instructions split?
The round begins inside a corner, so the final stitches complete that same corner at the join.
Does the flap need a buttonhole?
No. Select a button that passes through a gap between 3-dc clusters.
Why This Granny Square Clutch Crochet Pattern Works
This granny square clutch crochet pattern keeps the adaptable granny-square base while giving clear seam, opening, flap, closure, and lining instructions. Use the original photos and zoom controls to inspect the technical details. The granny square clutch crochet pattern is especially useful when you want a compact bag without constructing separate front and back panels.
Leave a Reply