
STELLA CROCHET · BAGS & PURSES
Granny Square Tote Bag Crochet Pattern
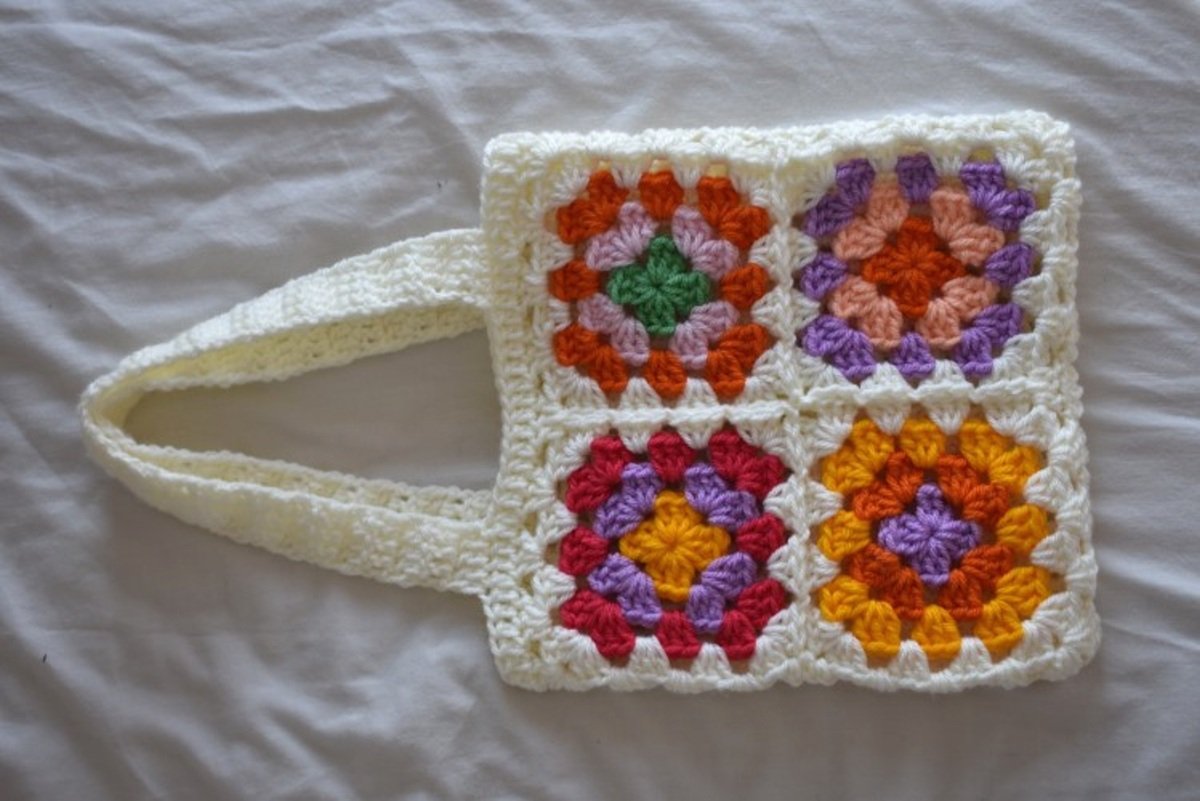
Make a colorful 28 × 29 cm tote with four joined granny squares on the front, one large granny square on the back, and two sturdy crocheted straps.
Intermediate 6 mm hook Chunky yarn US terms
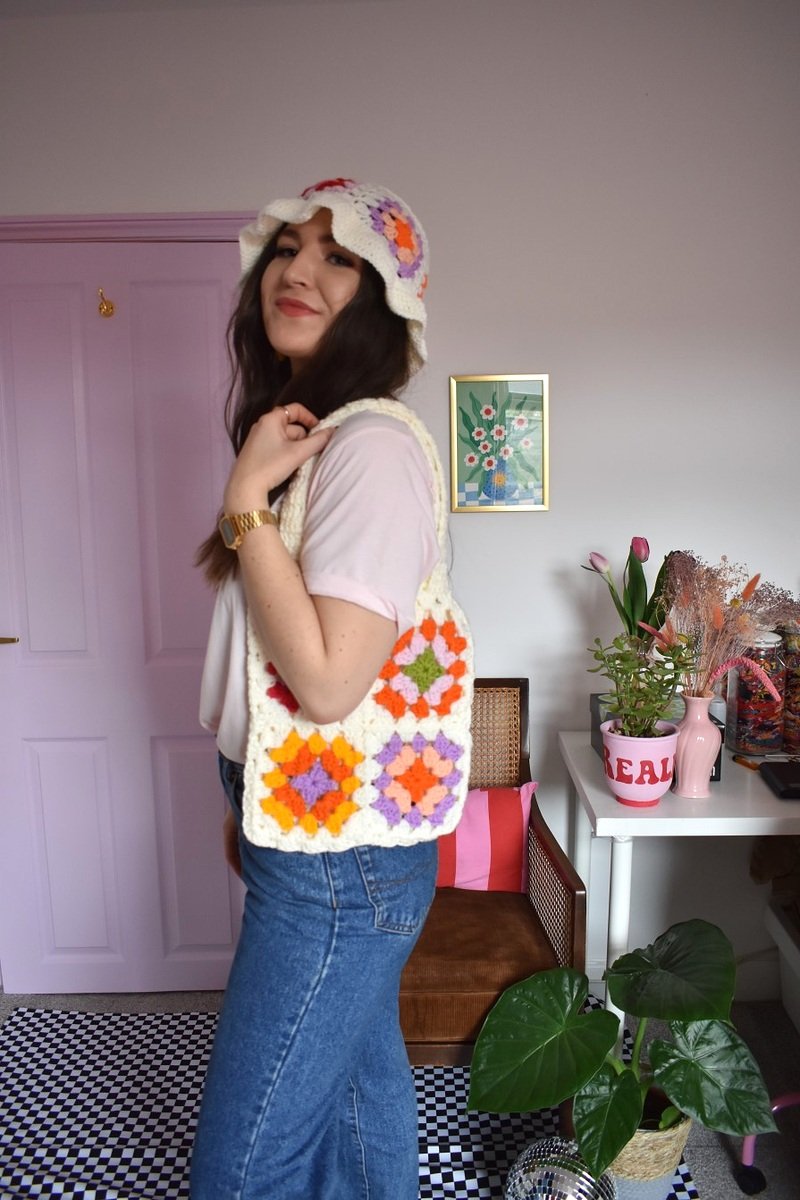
Materials, Size and Gauge
- 6 mm crochet hook
- Chunky acrylic yarn: about 175 g total
- Approximately 139 g for the main color and small amounts of eight contrast colors
- Yarn needle, scissors and optional stitch markers
- Finished size: approximately 28 × 29 cm
Gauge checkpoint: each four-round front square should measure about 13.5 cm across, or 17 cm corner to corner. Match the square size before continuing so the front and back panels align.
Abbreviations
ch chain · dc double crochet · sl st slip stitch · sp space · st(s) stitch(es) · beg beginning.
Front Squares — Make Four
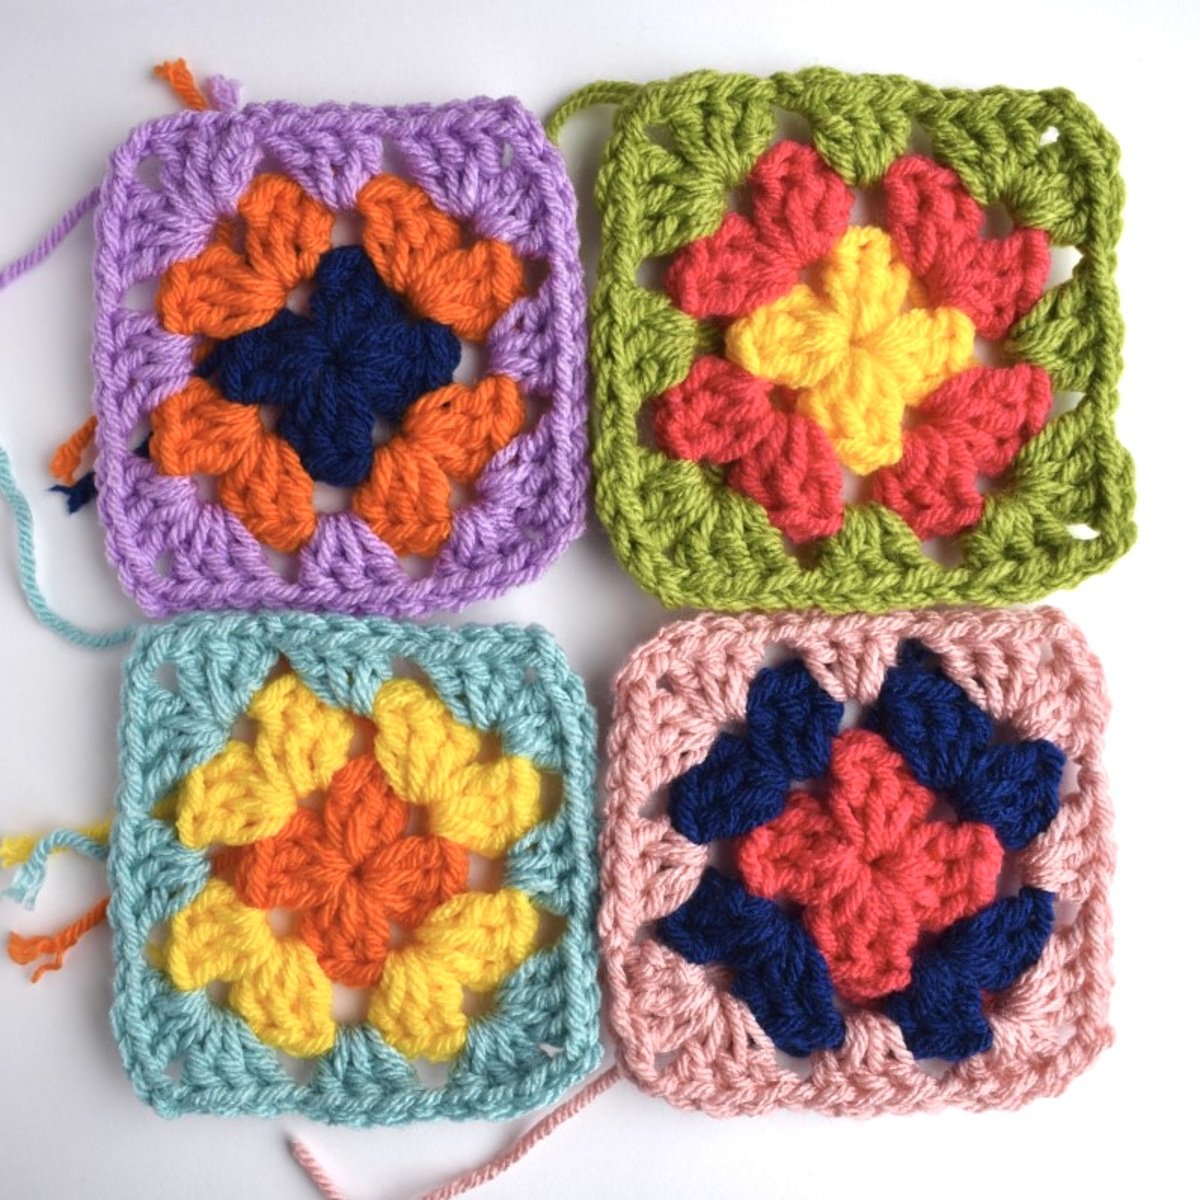
- Round 1: Ch 4 and sl st to the first ch to form a ring. Ch 3 (counts as dc), 2 dc in ring, then work (ch 2, 3 dc in ring) three times. Ch 2 and join to the top of beg ch 3. Fasten off.
- Round 2: Join a new color in any corner ch-2 sp. Ch 3, then (2 dc, ch 2, 3 dc) in the same sp. Ch 1. Work (3 dc, ch 2, 3 dc) in each remaining corner, with ch 1 between corners. Join and fasten off.
- Round 3: Join a new color in any corner. Work (3 dc, ch 2, 3 dc) in the corner, ch 1, 3 dc in the next ch-1 sp, ch 1. Repeat around. Join and fasten off.
- Round 4: Join the main color in any corner. Work (3 dc, ch 2, 3 dc) in each corner and 3 dc in each ch-1 sp, with ch 1 between every cluster. Join and fasten off. Use the joining method below for Squares 2–4.
Join the Four Front Squares
- Complete Square 1 normally through Round 4.
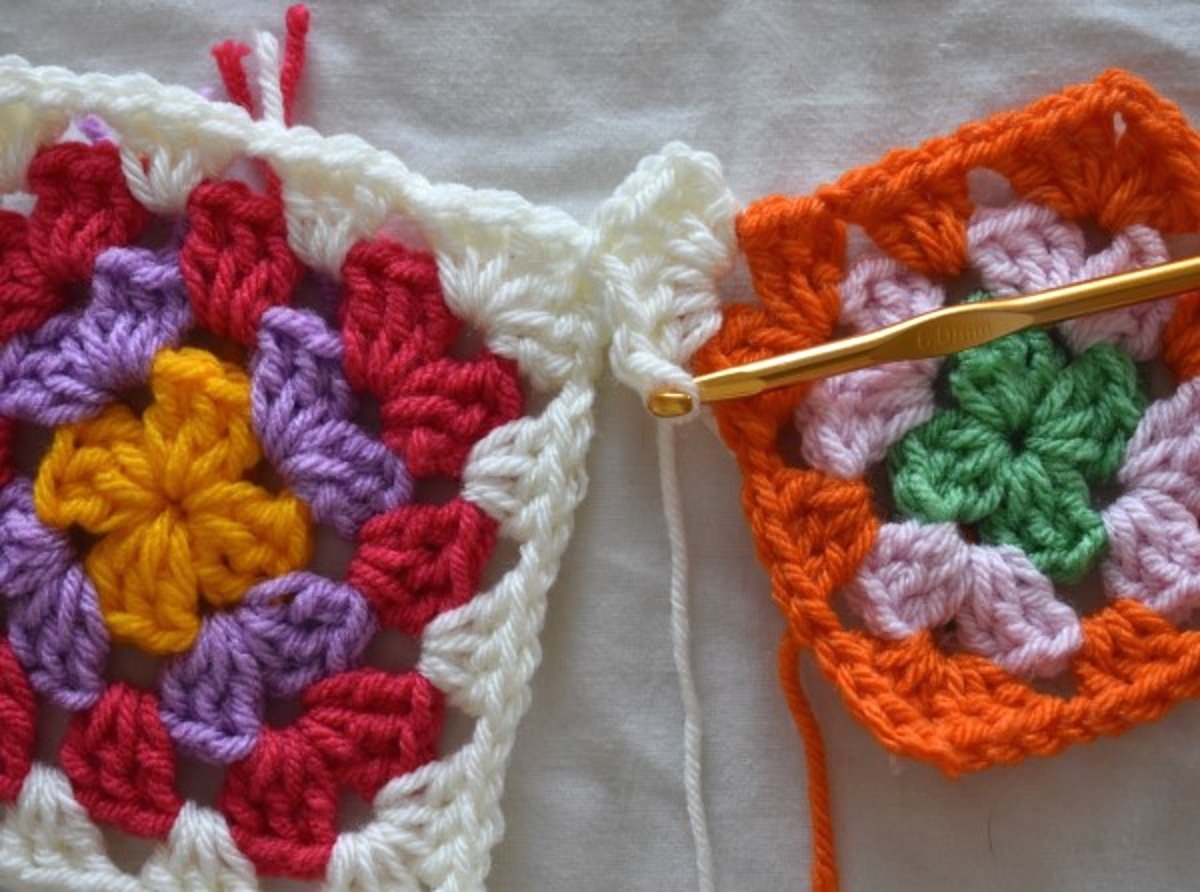
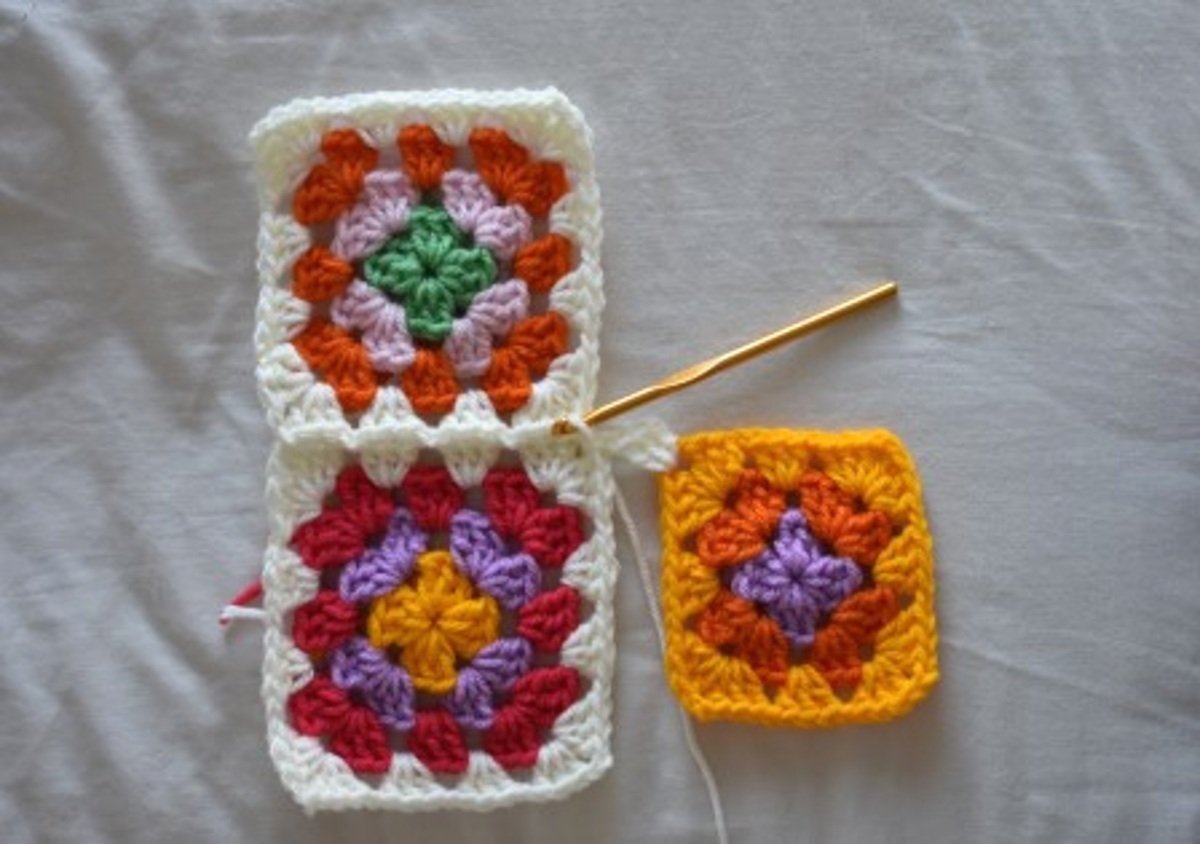
- On Square 2, begin Round 4 and stop after the first 3 dc of the corner that will connect to Square 1.
- Ch 1, sl st into the adjoining corner of Square 1, ch 1, then finish the corner with 3 dc.
- For each side space, work 3 dc in Square 2, then sl st into the matching space of Square 1. Repeat across the side.
- Join the far corner in the same way, then finish Round 4 normally.
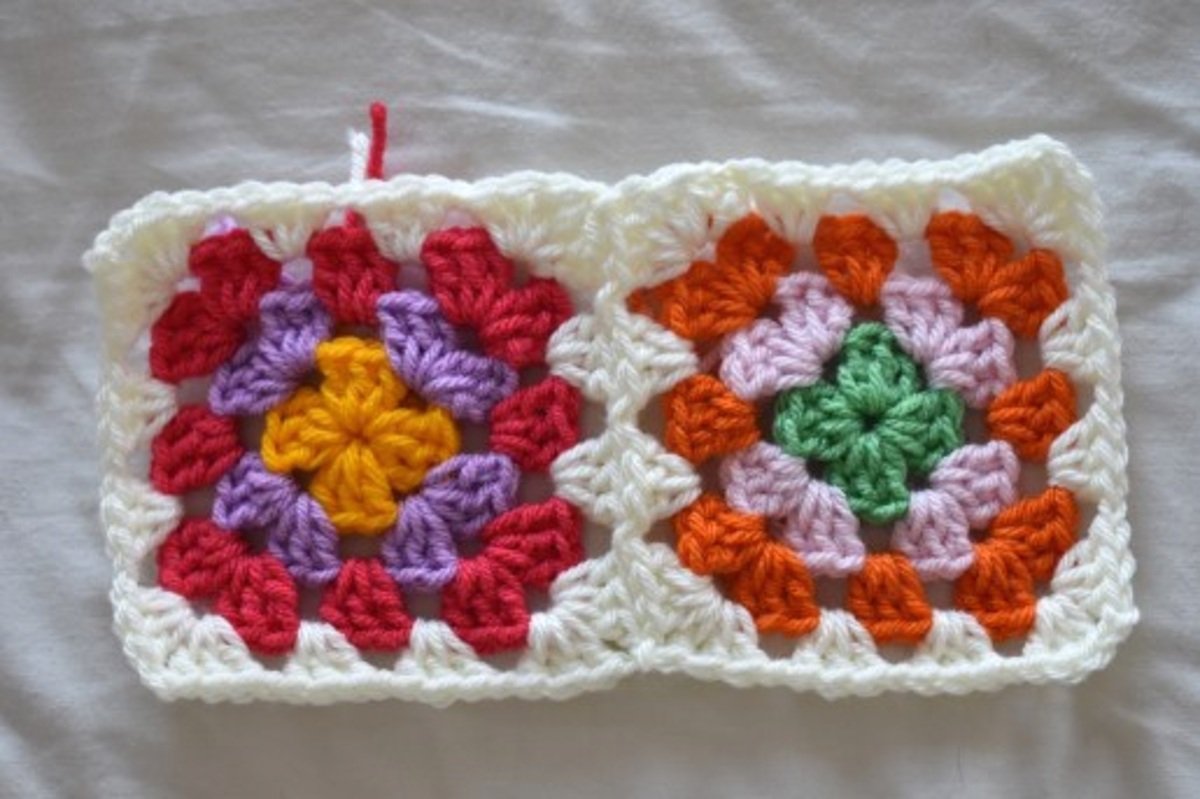
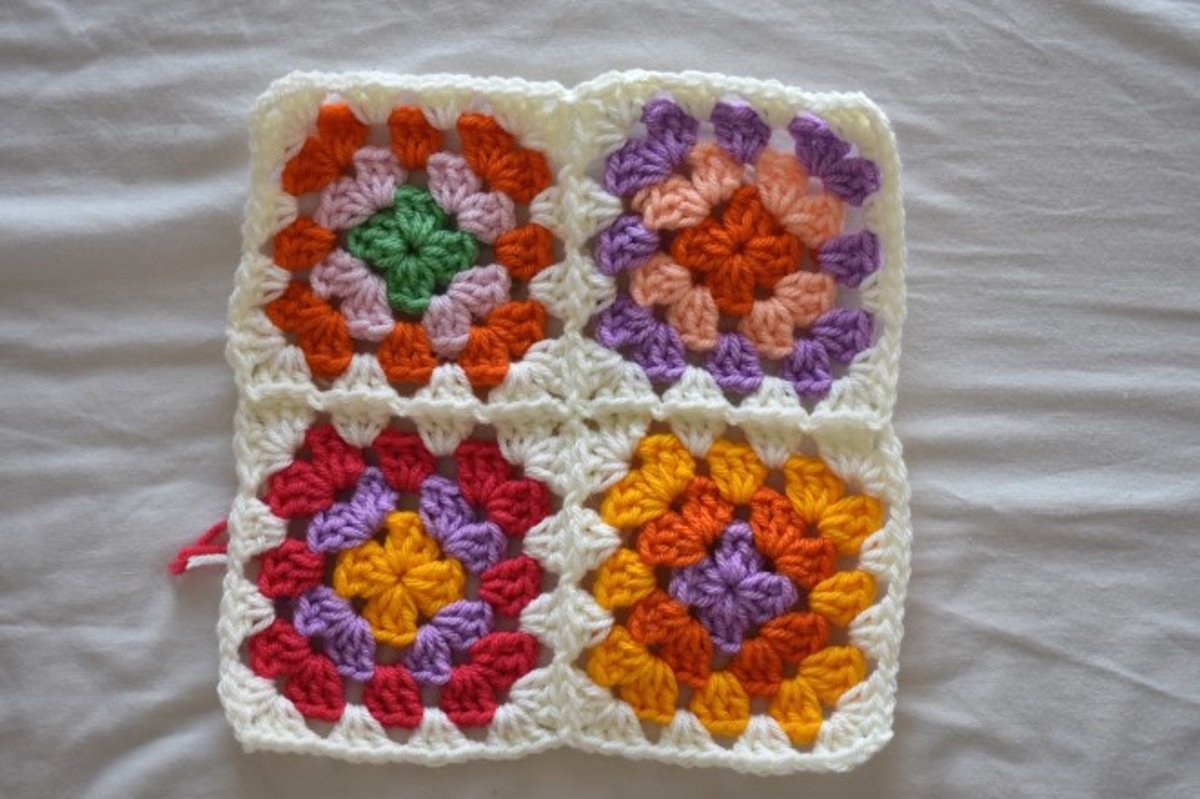
- Attach Square 3 to create an L shape. Attach Square 4 along two sides, joining its shared corner to both neighboring corner spaces.
Outer round for the front panel
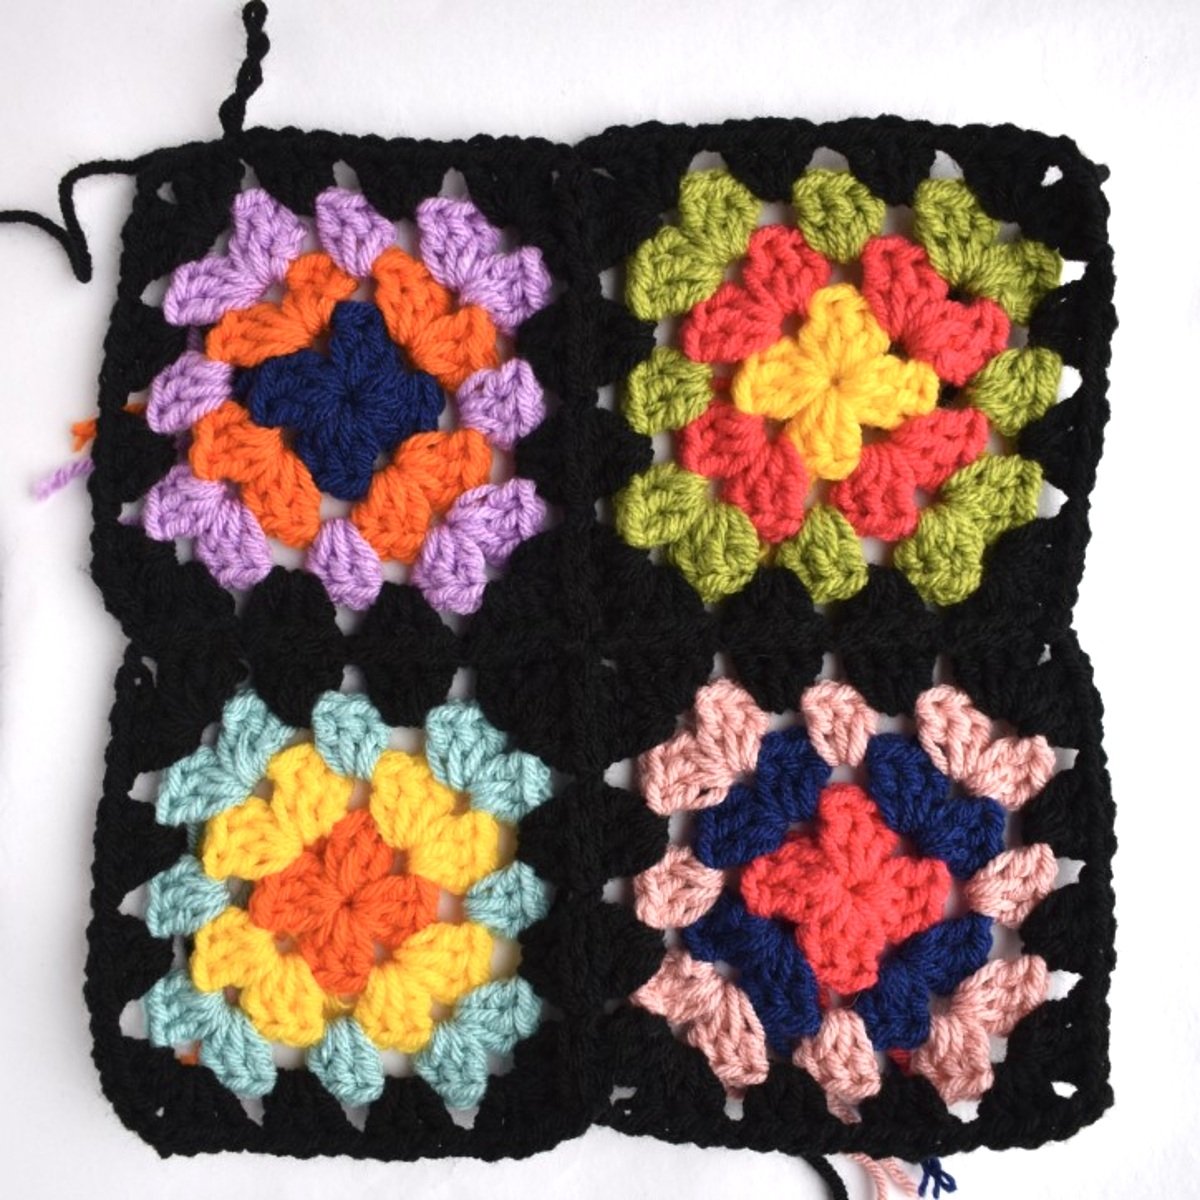
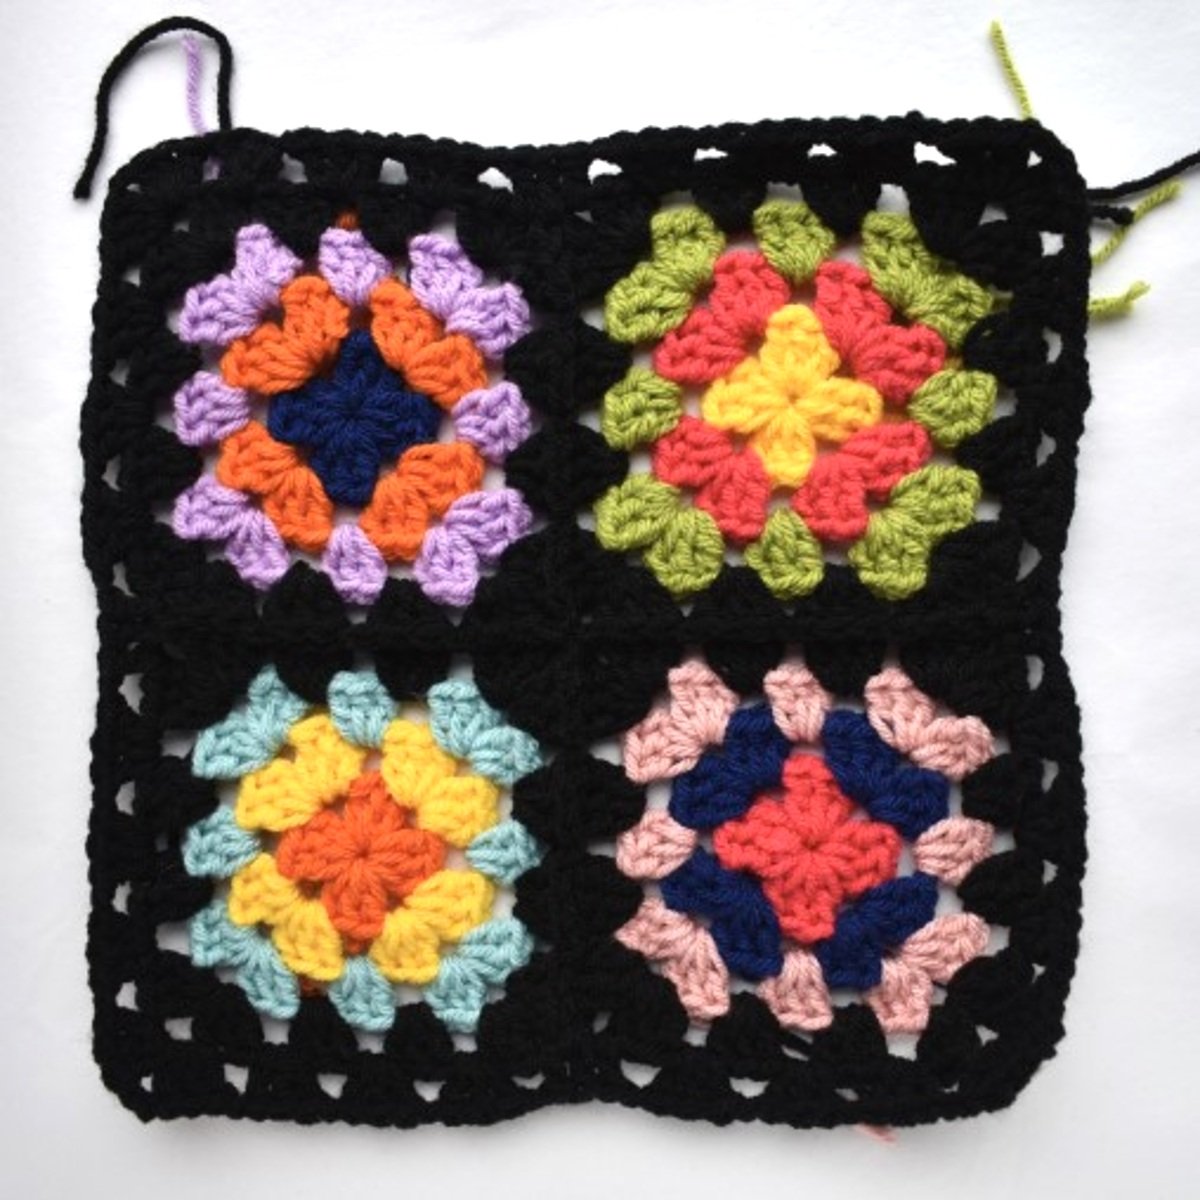
Treat the four joined motifs as one large square. Join the main color in an outside corner and work a standard granny-square round. At each seam, work one 3-dc cluster across the meeting spaces so the outer edge stays continuous. Finish with four corner groups of (3 dc, ch 2, 3 dc).
Back Panel — One Nine-Round Square
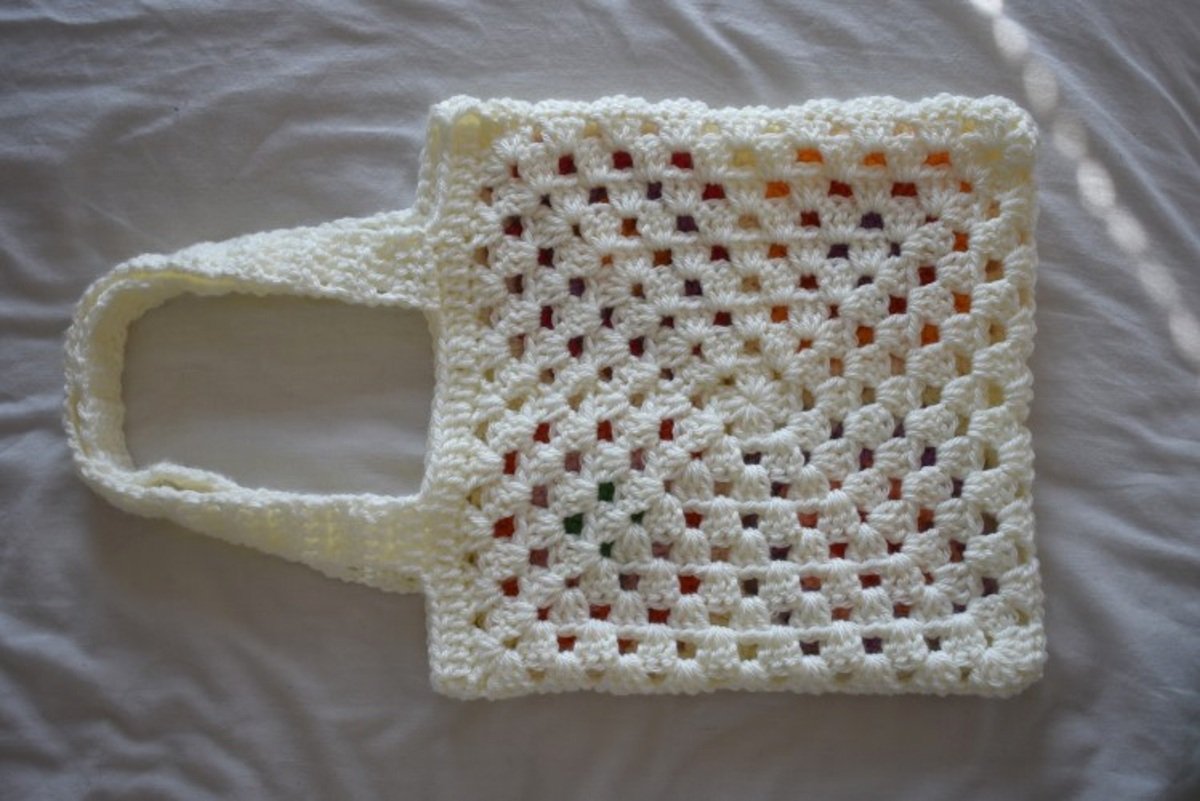
Make one standard granny square in the main color. Begin with the same Round 1 construction. Turn after joining each round. For Rounds 2–9, work (3 dc, ch 2, 3 dc) in every corner and one 3-dc cluster in every ch-1 side space, with ch 1 between clusters. Each new round adds one side cluster per side. Fasten off after Round 9.
Assembly and Top Edge
- Place the front and back panels with wrong sides together.
- Match the corners and stitches. Whip stitch the two sides and bottom, leaving the top open.
- Join yarn anywhere along the opening. Ch 3 (counts as dc) and dc in every stitch around. Join and fasten off. 74 dc.
Straps — Make Two
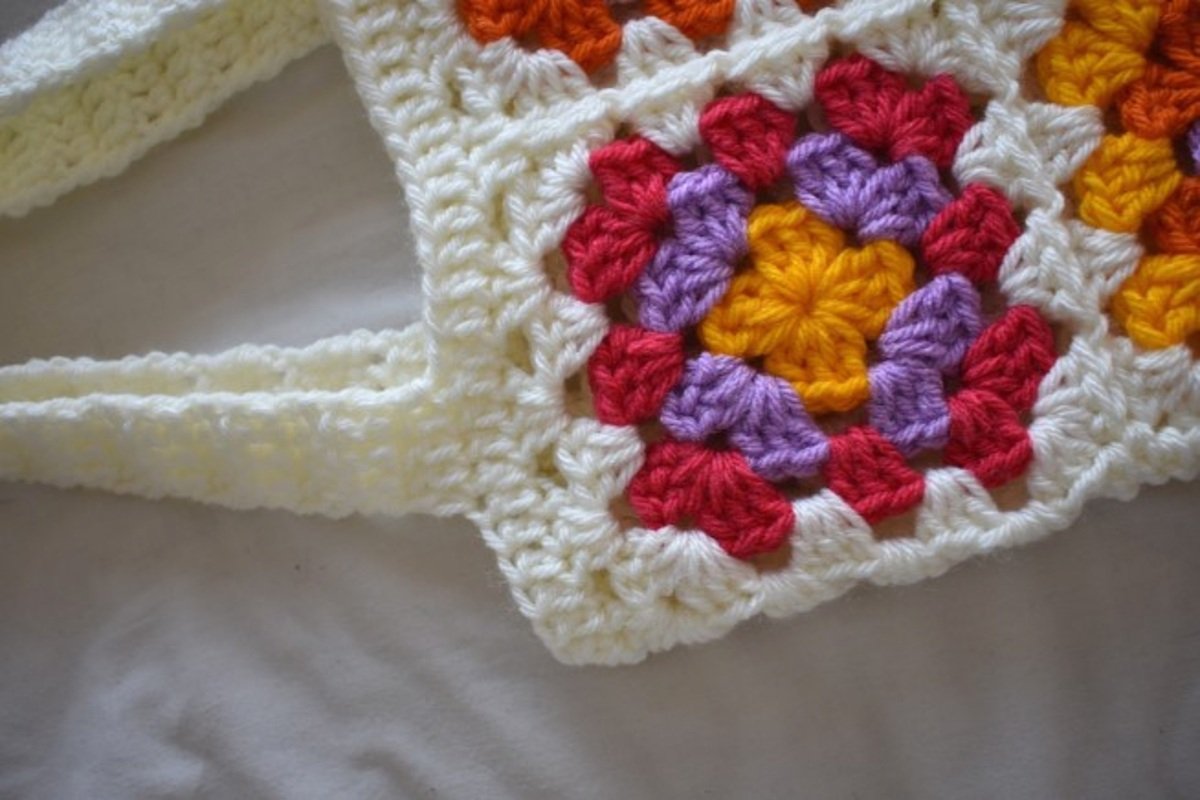
- On the front top edge, count 12 stitches from the left side and join yarn.
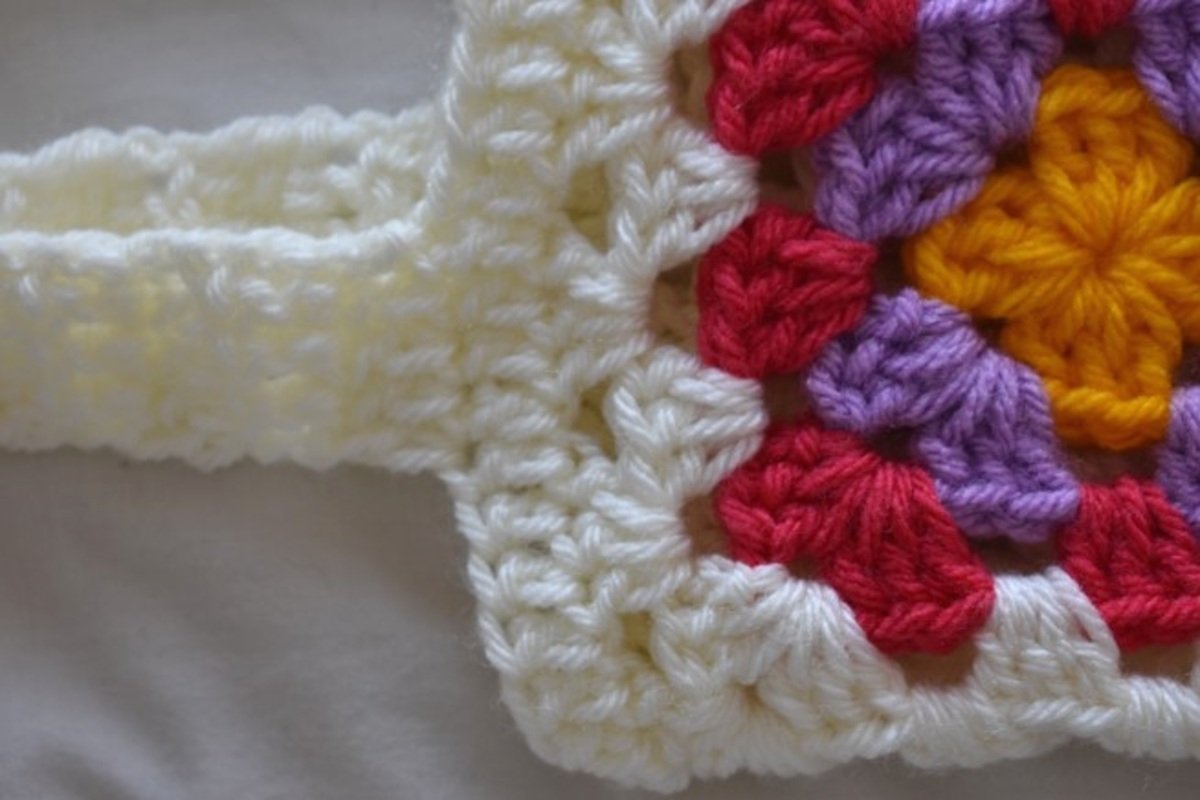
- Ch 3 (counts as the first dc) and dc in the next 4 stitches. The strap is five stitches wide.
- Ch 3, turn and dc in the next 4 stitches. Repeat until the strap has 30 rows total.
- Fasten off with a long tail. Count 12 stitches from the right side and sew the free end to the matching five-stitch section.
- Repeat on the back panel for the second strap.
Count and Shape Checks
- Front: four motifs, each completed through Round 4, followed by one continuous outer round.
- Back: one granny square completed through Round 9.
- Opening edge: 74 dc after the panels are joined.
- Each strap is five stitches wide and 30 rows long.
- The front and back must match along all three joined sides before whip stitching.
- The source does not include lining instructions. Add a lining only as an optional separate sewing step.
Step 1 of 8
Check materials and gauge
Frequently Asked Questions
Can I use fewer colors?
Yes. Preserve the four-round motifs and all stitch counts while choosing any color arrangement.
Why is the back one large square?
The single nine-round square creates a continuous back panel while matching the approximate size of the joined front.
Does the pattern include a lining?
No. The verified source ends after the straps and finishing. A fabric lining is optional and requires separate sewing instructions.
How do I keep the straps equal?
Count exactly 30 rows for each strap and compare them without stretching before sewing the second ends in place.
Leave a Reply