
Freestyle Beanie Crochet Pattern
Make a custom ribbed beanie from worsted, bulky, or super-bulky yarn. Measure the wearer, crochet a simple rectangle in back-loop half double crochet, shape the crown, seam the hat, and add your favorite finishing details.
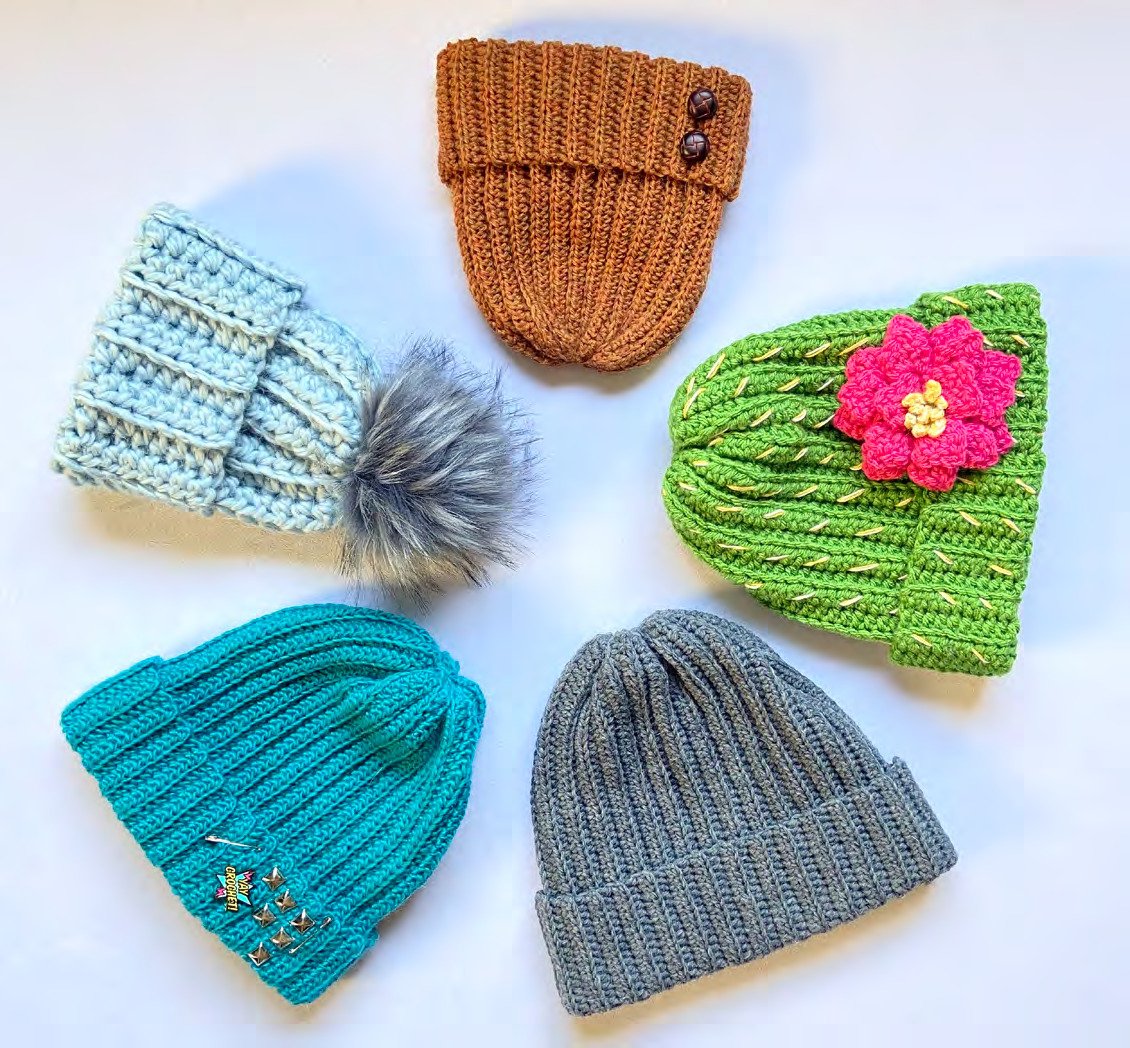
Before You Start the Freestyle Beanie Crochet Pattern
This beanie is built sideways. The foundation chain determines the finished hat height, while the number of ribbed rows determines the circumference. Because both measurements are adjustable, there is no fixed stitch count or row count for every maker.
Choose a hook that produces a firm, flexible fabric without large spaces. The source gives three useful starting combinations:
| Yarn weight | Suggested hook | Adult medium estimate |
|---|---|---|
| Worsted #4 | 4.0 mm | About 290 yd |
| Bulky #5 | 5.5 mm | About 225 yd |
| Super bulky #6 | 6.5 or 8.0 mm | About 190 yd |
Materials
- Worsted, bulky, or super-bulky yarn in your chosen color.
- A crochet hook that creates a firm but stretchable fabric.
- Flexible measuring tape.
- Yarn needle for cinching, seaming, and weaving in ends.
- Scissors.
- Optional pompom, buttons, embroidery yarn, flower, pins, or studs.
Calculate the Beanie Size
1. Choose the total height
Measure from the planned lower edge of the hat to the center top of the head. If you want a folded brim, add the planned brim depth to that measurement.
The sample calculation used an 8 in / 20.5 cm hat height plus a 3 in / 7.5 cm folded brim, for a total rectangle height of 11 in / 28 cm.
2. Choose the rectangle length
Measure the head circumference where the hat will sit. Crochet the ribbed rectangle until its long edge is 1-3 in / 2.5-7.5 cm smaller than that measurement. This negative ease lets the ribbing stretch for a secure fit.
Pin the short ends together and try on the rectangle before shaping the crown. The source does not provide a fixed size chart, so the wearer’s real measurement and your actual gauge are the best checks.
Stitches and Construction
| Term | Meaning |
|---|---|
| ch | Chain |
| sc | Single crochet |
| hdc | Half double crochet |
| sl st | Slip stitch |
| yo | Yarn over |
| BLO | Back loop only |
| sc2tog | Single crochet two stitches together |
| WS | Wrong side |
The vertical ribs come from working every hdc row through the back loop only. The ch 2 used for turning does not count as a stitch and is never worked into.
Freestyle Beanie: Step Reader
Use Previous and Next while crocheting. Your current step and completed steps are saved in this browser when storage is available.
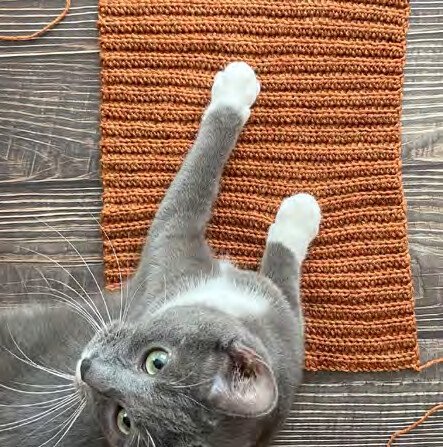
Complete Freestyle Beanie Instructions
Step 1 – Make the foundation chain
Chain slightly more than 1 in / 2.5 cm beyond your target hat height, then add one extra chain for turning. The example made with worsted yarn began with 49 chains, but your count will depend on yarn, hook, gauge, and size.
Step 2 – Crochet the first row
Beginning in the second chain from the hook and working into the underside bumps of the foundation chain, hdc across until the row reaches the target hat height. Unravel any unused chains at the end.
Optional smoother seam: work the first row in sc instead of hdc. The foundation chain plus the sc row can resemble the height of one hdc row and may blend more neatly when seamed.
Step 3 – Build the ribbed rectangle
Chain 2 without counting it as a stitch. Turn. Work one hdc through the back loop of every stitch. Repeat this row until the rectangle reaches the target circumference with 1-3 in / 2.5-7.5 cm of negative ease.
Check the row width again after the first few rows because starting tension can change. End after an even number of rows so the working loop sits opposite the beginning yarn tail. The example used 50 rows.
Step 4 – Shape the crown
Rotate the rectangle to work across the row ends along the top edge. Insert the hook into the next ridge, yarn over, and pull up a loop. Insert into the following ridge, yarn over, and pull up a loop. Yarn over and pull through all three loops. Repeat the sc2tog decrease across the crown edge. If one ridge remains, work one sc into it.


Step 5 – Cinch the crown
Fasten off, leaving a long sewing tail. Thread the tail through every sc worked along the crown edge. Pull firmly to close the opening without breaking the yarn.
Step 6 – Seam the side
Continue with the same tail and whipstitch the short edges together. For a blended seam, pass the needle under the top loop of the final row and under both loops of the foundation edge.


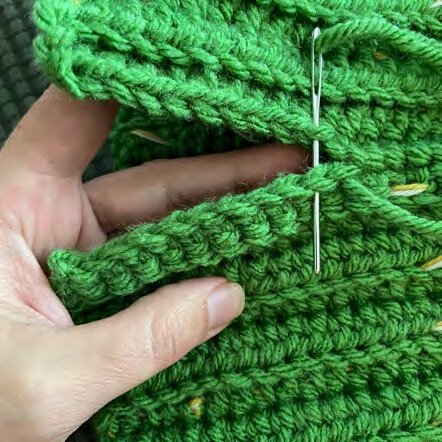
Step 7 – Finish
Secure the seam, weave in all ends, and block the hat gently for an even shape. Fold the brim to the planned depth and check the fit.
Five Ways to Customize the Beanie
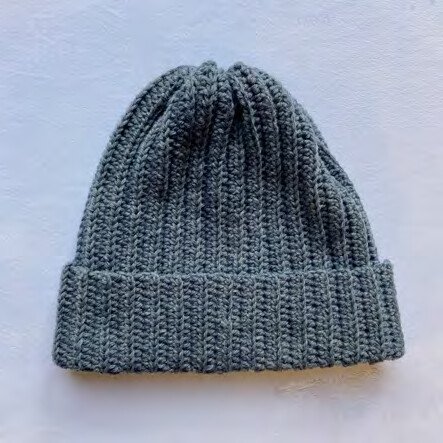


Pointed flower variation
For a larger coiled flower, begin the flower strip with 19 chains instead of a short foundation. Add a small ch-2 picot between the center two double crochets of each final-row petal to create pointed tips. Coil the strip, secure the base in a spiral, and stitch it firmly to the hat.
Textured flower center
Chain 5. Beginning in the second chain from the hook, slip stitch through the next four chains. Repeat this branch eight more times for nine branches total. Coil the connected base and stitch it into the flower center.
Fit and Shape Checks
- Hat is too loose: shorten the rectangle before seaming or increase the negative ease.
- Hat is too tight: add more ribbed rows; do not rely on blocking to correct a major sizing error.
- Height changes across rows: recount stitches and make sure the turning chain is not treated as a stitch.
- Ribbing looks flat: confirm every hdc is worked through the back loop only.
- Crown hole remains open: check that the sewing tail passes through every crown sc, then pull evenly and reinforce the opening.
- Seam looks bulky: use the top loop of the last row and both loops of the foundation edge as described.
Freestyle Beanie Crochet Pattern: Questions
Is there one stitch count for every size?
No. The foundation chain follows the desired height, and the number of rows follows the measured head circumference and your gauge.
Does the turning chain count as a stitch?
No. Chain 2 to turn each ribbed row, but do not count it and do not work into it.
Why must I finish after an even number of rows?
An even row count places the working loop opposite the beginning yarn tail, which prepares the rectangle for crown shaping and seaming as described.
Can I use single crochet instead of half double crochet?
The main ribbed fabric uses back-loop hdc. Only the first row may be worked in sc as an optional way to make the foundation edge blend into the seam.
How much smaller should the rectangle be than the head?
Aim for 1-3 in / 2.5-7.5 cm smaller. Test the stretch by pinning the short ends and trying on the rectangle before shaping the crown.
Can I use a different yarn weight?
Yes. Use a hook that gives firm, flexible fabric, then determine both dimensions from measurements rather than copying another yarn’s stitch count.
Leave a Reply