
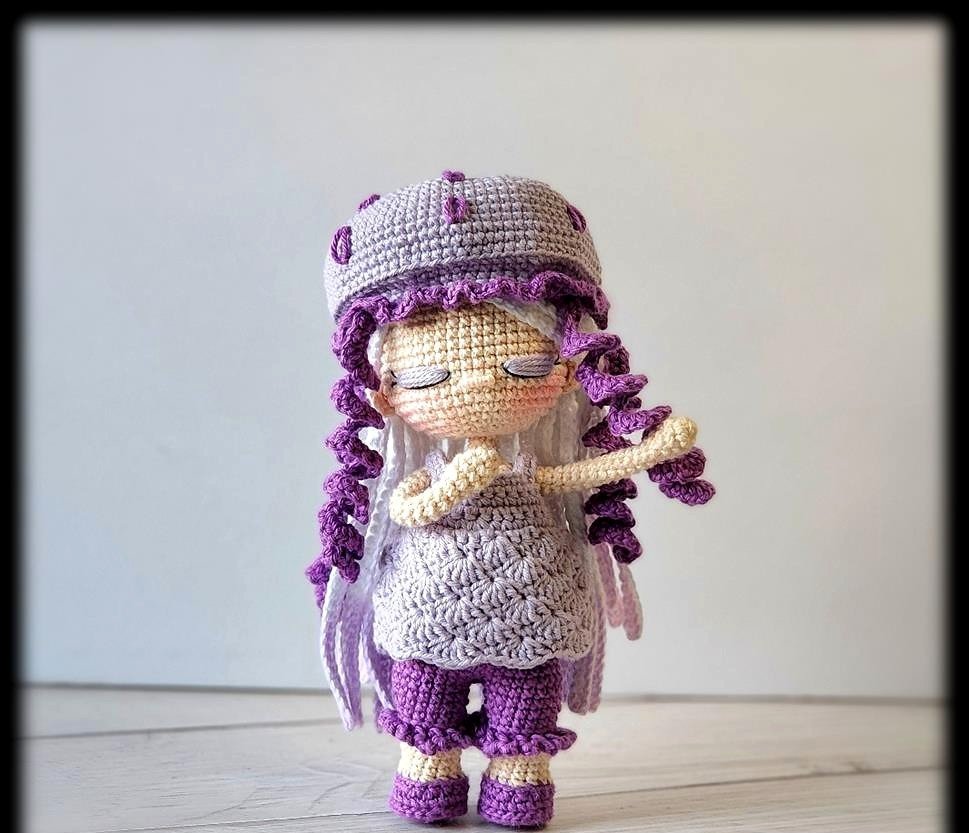
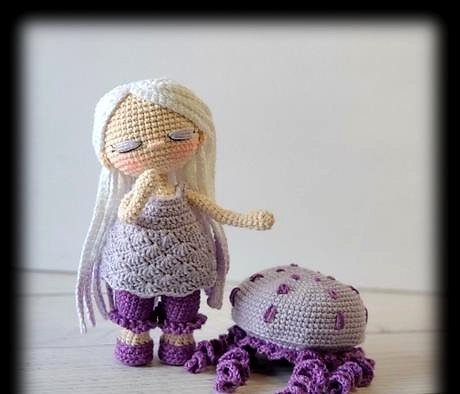
Jellyfish Girl crochet pattern: a small doll with a jellyfish hat, curling tentacles, embroidered face, long white hair, and a scalloped button-back shirt. Work the doll in tight single crochet, then make the outfit and sew on the finishing details.
Materials and stitch guide
Use a 1.75 mm crochet hook and size 1 or 2 cotton yarn in four colors: Color A (dark purple), Color B (light purple), skin tone, and white. You also need black embroidery thread, fiberfill, a tapestry needle, stitch markers, craft glue, 16 or 18 gauge aluminum wire or similar, and two 6 mm white buttons for the shirt. The sample uses Hobbii Friends Cotton 8/4 in Nightshade 64, Misty Violet 67, Cream 04, and White 01. Your gauge and final doll size may vary with yarn and hook.
US terms: mr = magic ring; ch = chain; sc = single crochet; hdc = half double crochet; dc = double crochet; INC = increase; DEC = decrease; inv DEC = invisible decrease; slst = slip stitch; st/sts = stitch/stitches; sk = skip; sp = space; BLO/FLO = back/front loops only. Parentheses followed by × indicate repeats. Braces { } mean work all indicated stitches in the same stitch. The stitch count at the end of each round is in parentheses.
The sample uses yarn-under single crochet for the doll and hat, and yarn-over stitches for the clothing and hair. Choose a hook that makes a firm fabric that holds stuffing without visible gaps. Rounds are continuous unless the instructions say to join.
Arms (make 2)
Skin tone yarn; yarn-under technique. Leave unstuffed.
Rnd 1: 6 sc in mr (6).
Rnd 2: (1 sc, INC) × 3 (9).
Rnds 3–4: 9 sc (9).
Rnd 5: (1 sc, inv DEC) × 3 (6).
Rnds 6–18: 6 sc (6). Fasten off; do not stuff.
Legs and shoes (make 2)
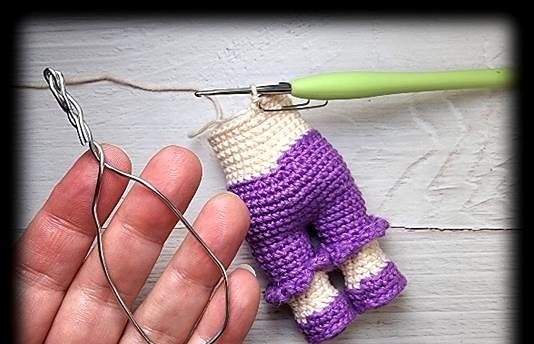
Start each leg with Color A. The shoe shaping has a front and back; keep both legs oriented for joining.
Rnd 1: 8 sc in mr (8).
Rnd 2: INC × 8 (16).
Rnd 3: INC, 2 sc, INC × 2, 3 sc, INC × 2, 2 sc, INC, 3 sc (22).
Rnd 4: BLO 22 sc (22).
Rnd 5: 6 sc, (inv DEC) × 4, 6 sc, inv DEC (17).
Change to skin tone. Rnd 6: BLO (2 sc, DEC) × 4, 1 sc (13).
Rnd 7: 11 sc, inv DEC (12).
Rnd 8: 12 sc (12).
Rnd 9: 3 sc, INC, 4 sc, INC, 3 sc (14).
Rnd 10: 14 sc (14).
Change to Color A. Rnd 11: 14 sc (14).
Rnd 12: BLO 4 sc, INC, 5 sc, INC, 3 sc (16).
Rnd 13: 16 sc (16).
Rnd 14: 4 sc, INC, 6 sc, INC, 4 sc (18).
Rnd 15: 18 sc (18).
Left leg, Rnd 16: 16 sc, ending on the inside. Cut yarn with a tail to close the small join gap later.
Right leg, Rnd 16: 18 sc.
Right leg, Rnd 17: 6 sc, ending on the inside. Keep the yarn attached for the body.
Stuff each leg, keeping the foot flat. An optional small round plastic insert can help flatten each sole. For each shoe, slip stitch around the exposed front loops of Rnd 2 with the sole facing you. With the leg upside down, join Color A at the back of the exposed Rnd 11 front loops and repeat {1 sc, ch 3} around: 14 chain-3 spaces.
Body and neck
With the backs of the legs facing you, join the right leg to the last stitch of the left leg Rnd 16. Work around both legs and mark the round start. Close the join gap with the left-leg tail.

Rnd 1: 18 sc around left leg, 18 sc around right leg (36).
Rnd 2: 3 sc, INC × 2, 26 sc, INC × 2, 3 sc (40).
Rnds 3–7: 40 sc (40).
Rnd 8: 36 sc, inv DEC × 2 (38).
Rnd 9: inv DEC × 3, 6 sc, inv DEC, 12 sc, inv DEC, 10 sc (33).
Change to skin tone. Rnd 10: BLO 33 sc (33).
Rnd 11: (10 sc, inv DEC) × 2, 9 sc (31).
Rnd 12: 31 sc (31).
Rnd 13: inv DEC, 29 sc (30).
Rnds 14–16: 30 sc (30).
Rnd 17: (3 sc, inv DEC) × 6 (24).
Rnd 18: 24 sc (24). Recenter the start at the back if needed; the sample adds 1 sc.
Rnd 19: 5 sc, 2 sc through inside of first arm and body, 10 sc, 2 sc through inside of second arm and body, 5 sc (24).
Rnd 20: 5 sc, 4 sc on the outside of first arm, 10 sc, 4 sc on the outside of second arm, 5 sc (28).
Rnd 21: (2 sc, inv DEC) × 7 (21).
Rnd 22: (1 sc, inv DEC) × 7 (14).
Rnd 23: inv DEC × 7 (7).
Rnds 24–32, neck: 7 sc (7). Close the opening by whipstitching through the front loops and pulling tight.
Stuff the body as you work. Insert a wire frame with neck support before Rnd 17, and wire into the arms before Rnd 21. Tuck and secure wire ends carefully.
Head
Work the first narrow rounds as an inner tube, with the wrong side facing out and the hook working inside the tube. The head grows around it. Skin tone yarn, yarn-under stitches.

Rnd 1: 6 sc in mr (6).
Rnd 2: (1 sc, INC) × 3 (9).
Rnds 3–9: 9 sc (9).
Rnd 10: INC, (1 sc, INC) × 4 (14).
Rnd 11: BLO (1 sc, INC) × 7 (21).
Rnd 12: 1 sc, INC, (2 sc, INC) × 6, 1 sc (28).
Rnd 13: (3 sc, INC) × 7 (35).
Rnd 14: 2 sc, INC, (4 sc, INC) × 6, 2 sc (42).
Rnd 15: (5 sc, INC) × 7 (49).
Rnds 16–26: 49 sc (49).
Rnd 27: (5 sc, inv DEC) × 7 (42).
Rnd 28: 2 sc, inv DEC, (4 sc, inv DEC) × 6, 2 sc (35).
Rnd 29: (3 sc, inv DEC) × 7 (28).
Rnd 30: (2 sc, inv DEC) × 7 (21).
Rnd 31: (1 sc, inv DEC) × 7 (14).
Rnd 32: inv DEC × 7 (7). Close through front loops and weave in ends.
After Rnd 29, place the head onto the body’s neck peg. Thread a separate length of yarn through the head’s inner tube and the neck near the top, then knot it firmly. Stuff the head and continue adding fiberfill through the last shaping rounds.
Embroidered face and ears
Place the eyes between head Rnds 19 and 20, or eight rounds above the visible neck loops, with five stitches between the eye positions. With Color B, make five neat passes of yarn for each eyelid. Use black thread or separated thin yarn for eyeliner under each lid (two thread thicknesses) and one-thickness eyelashes. For the nose, make two passes of skin tone yarn over a width of three stitches, then bring the needle under the two lengths and wrap the yarn across.
For each ear, work 5 hdc in a skin-tone magic ring without joining. Sew at head Rnds 18–19, about five stitches from the eyelid or three stitches from the lashes, just below eye level. Alternatively, insert the hook through two head stitches, pull up a loop, ch 2 while holding the tail, work 5 hdc around the pulled strand, tighten and sew the ends securely at top and bottom. Repeat symmetrically.
Long white hair
The cap holds 21 separate strands. Use yarn-over stitches in white.
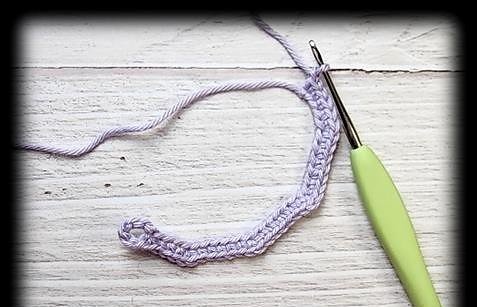
Rnd 1: 7 sc in mr (7).
Rnd 2: INC × 7 (14).
Rnd 3: (1 sc, INC) × 7 (21).
Strands: [Ch 41, turn, work 40 sc from second chain (into back bumps if preferred for straighter strands), slst in next Rnd 3 stitch] × 21.
Wet block the hair overnight to straighten the strands. If desired, tint the lower inch with lightly diluted purple and white brush-on fabric paint, dabbing front and back. Glue the hair cap to the head with an off-center part and secure the strands in place.
Scalloped jellyfish shirt
Color B, yarn-over stitches. Make the starting chain 33; the last five chains form a buttonhole. Adjust those five chains only to fit the buttons you use.

Row 1: From sixth chain: 4 sc, INC, 5 sc, INC, 6 sc, INC, 5 sc, INC, 4 sc, ch 1, turn (32).
Row 2: 5 sc, ch 4, sk 6 sts, 10 sc, ch 4, sk 6 sts, 5 sc, ch 1, turn (28).
Row 3: 5 sc, 4 sc in ch-4 sp, 10 sc, 4 sc in ch-4 sp, 5 sc, ch 1, turn (28).
Row 4: (6 sc, INC) × 4, ch 5 for second buttonhole, turn (32).
Row 5: Skip the five chains, (7 sc, INC) × 4, ch 1, turn (36).
Row 6: 36 sc, ch 1, turn (36).
Row 7: (1 sc, sk 1 st, {5 dc} in next st, sk 1 st) × 9. Bring the two sides together and slst to the starting sc; leave the final skipped stitch unworked (54).
Rnd 8: {ch 2 counting as first dc, 4 dc} in joining stitch, sk 2 sts, 1 sc, sk 2 sts, ({5 dc} in next st, sk 2 sts, 1 sc, sk 2 sts) × 8; slst to ch 2 (54).
Rnd 9: 1 slst, then {slst, ch 1, 1 sc} in middle stitch of next five-dc group; sk 2 sts, ({5 dc} in next st, sk 2 sts, 1 sc, sk 2 sts) × 8, {5 dc} in next st, sk 2 sts, join to starting sc (54). Initial two slip stitches and ch 1 do not count.
Rnd 10: Repeat Rnd 8.
Rnd 11: Repeat Rnd 9.
Rnd 12: Repeat Rnd 8. Cut yarn, make an invisible join, weave in ends, and sew two small buttons to the back.
Across Rnds 8–12, place each five-dc group into the previous round’s sc and each sc into the middle dc of the previous five-dc group.
Jellyfish hat
Work the crown in Color B with yarn-under stitches.
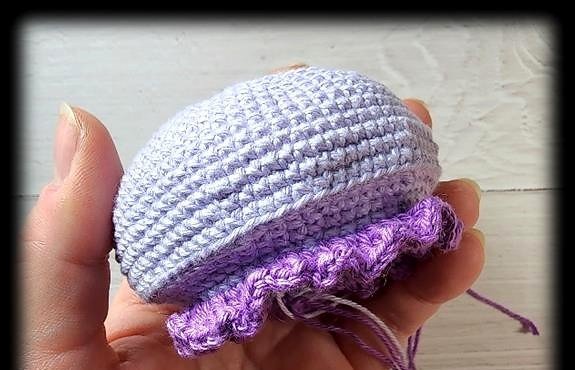
Rnd 1: 7 sc in mr (7).
Rnd 2: INC × 7 (14).
Rnd 3: (1 sc, INC) × 7 (21).
Rnd 4: 1 sc, INC, (2 sc, INC) × 6, 1 sc (28).
Rnd 5: (3 sc, INC) × 7 (35).
Rnd 6: 2 sc, INC, (4 sc, INC) × 6, 2 sc (42).
Rnd 7: 3 sc, INC, (6 sc, INC) × 5, 3 sc (48).
Rnd 8: (7 sc, INC) × 6 (54).
Rnd 9: 4 sc, INC, (8 sc, INC) × 5, 4 sc (60).
Rnd 10: (9 sc, INC) × 6 (66).
Rnd 11: 66 sc (66).
Rnd 12: 5 sc, INC, (10 sc, INC) × 5, 5 sc (72).
Rnds 13–15: 72 sc (72).
Rnd 16: (11 sc, INC) × 6 (78).
Rnd 17: 6 sc, INC, (12 sc, INC) × 5, 6 sc (84).
Rnd 18: 6 sc, inv DEC, (12 sc, inv DEC) × 5, 6 sc (78).
Rnd 19: (11 sc, inv DEC) × 6 (72).
Rnd 20: BLO 5 sc, DEC, (10 sc, DEC) × 5, 5 sc (66).
Rnd 21: (9 sc, inv DEC) × 6 (60).
Rnd 22: 4 sc, inv DEC, (8 sc, inv DEC) × 5, 4 sc (54).
Rnd 23: (7 sc, inv DEC) × 6; slst to join (48).
The opening can look narrow at this point. The ruffle stretches it to the intended fit. Change to Color A. For Rnd 24 ruffle, work {ch 3 counting as the first dc and ch 1, 1 dc, ch 1} in the first stitch; ({1 dc, ch 1}, {1 dc, ch 1, 1 dc, ch 1}) × 23; then {1 dc, ch 1}. Cut yarn and finish with an invisible join. Work each brace group in one stitch.
Curling tentacles and hat accents
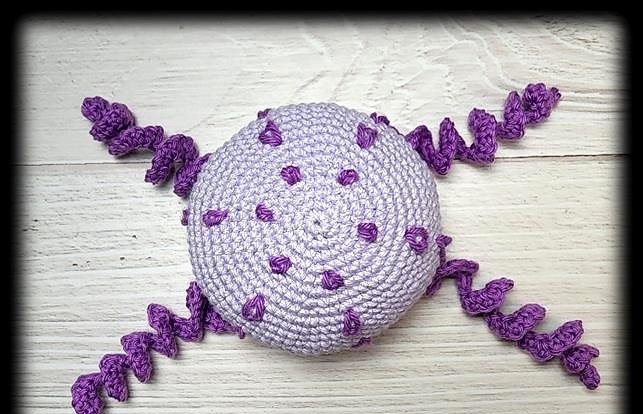
Make four spiral strands in Color A: ch 37. Starting from the second chain, repeat ({1 sc, ch 1, 1 sc, ch 1}, {1 sc, ch 1}) × 18. Leave tails to sew the strands to the hat. If they do not curl enough, tighten tension or try a smaller hook.
Embroider six evenly spaced rows of oval accents on the hat, with three ovals from the lower edge toward the center in each row. Start at the back seam and place another row directly across the front. Keep the yarn loose enough for rounded shapes. Tie and trim the ends inside. Sew the four spirals at the base of the ruffle: one on each side of the face and two at the back. Put the shirt on the doll, button it at the back, place the hat snugly, and gently pull the ruffle into shape.
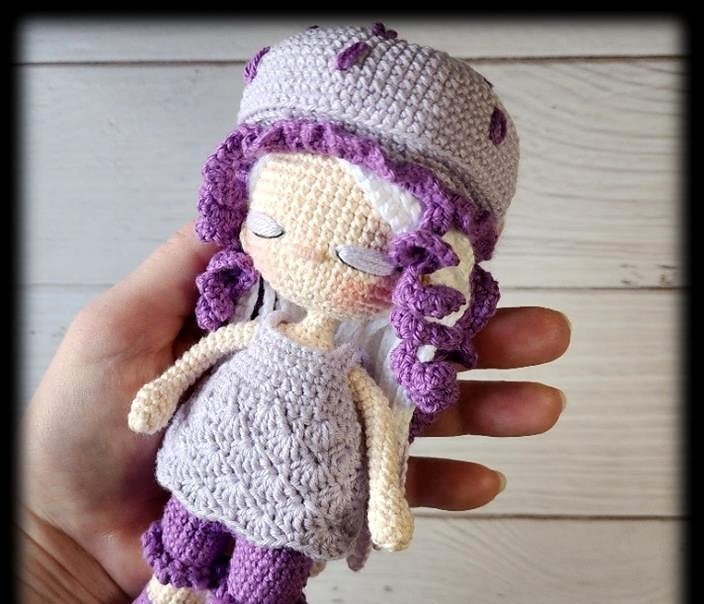
Project checkpoints: The doll is assembled before the head closes; the neck tube goes around the body’s neck peg. The shirt’s arm openings are formed in Row 2. The hat’s four separate spirals are sewn only after the ruffle is finished. Keep the face, ears, hair part, and tentacles aligned before securing the last ends.
Leave a Reply