
This bunny with hoodie crochet pattern makes a plush bunny or kitty with a cozy removable outfit. Follow the head and body first, choose one hood style, then add the ears, pocket and small accessories.
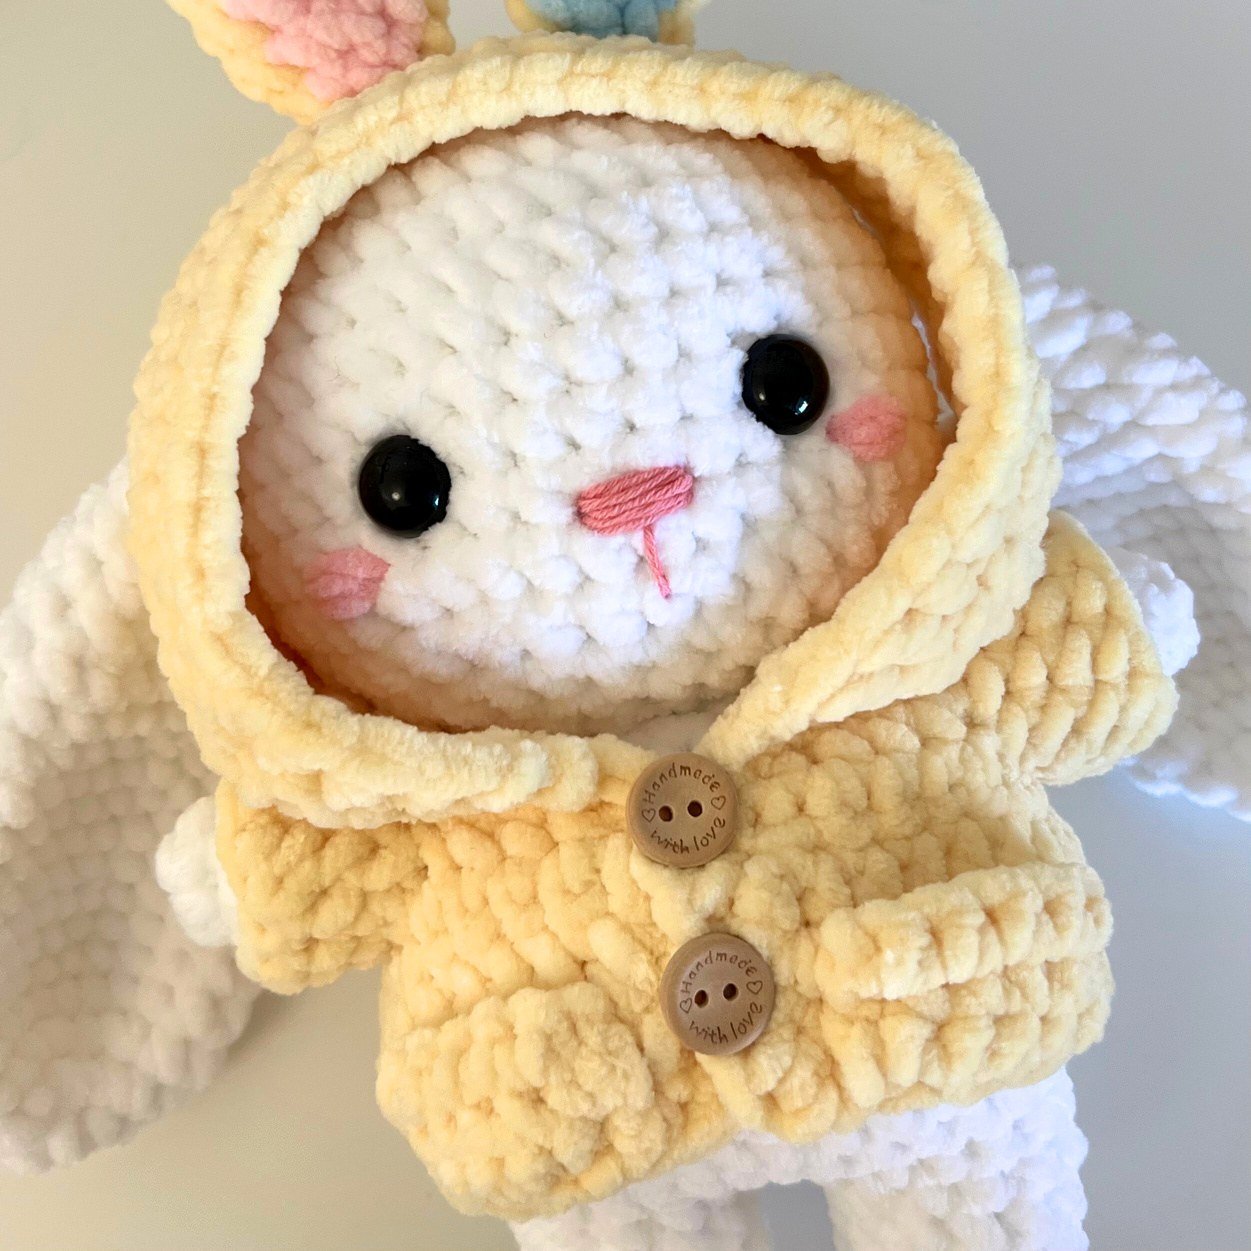
At a glance: US crochet terms · Chunky chenille yarn · 4–5 mm hook · Bunny and kitty head options · Hood variations and accessories. The source does not specify a finished size.
1. Materials and abbreviations
Abbreviations
Mr – magic ring or make ch 2 and sc into the first ch.
Sc – single crochet
Inc – increase
Dec – decrease (invisible dec)
(…)*n – repeat stitches in brackets n times
Slst – slip stitch
Ch – chain
Hdc – half double crochet
DC – double crochet
Trc – treble crochet
BLO – back loop only
FLO – front loop only
BB – bobble stitch
Color – change the color,
for example black 2sc, white 3sc.
Crochet 2sc in black and 3sc in white.
Materials
Crochet hook – 4–5 mm (sample uses 5 mm)
Yarn – Himalaya Dolphin Baby
(you will need less than 1 skein for each color)
Other brands are Yarn Art, Premier Parfait (most similar
available in the US), and other brands depending on
where you live.
Stitch marker, scissors, glue, fiberfill, safety eyes or felt,
tapestry needle
Use larger yarn and hook for a larger doll, or smaller yarn and hook for a smaller doll.
2. Head and face

Head
Use white yarn
1. Mr 8sc (8)
2. 8inc (16)
3. (sc, inc)*8 (24)
4. (3sc, inc)*6 (30)
5. 2sc, inc, (4sc, inc)*5, 2sc (36)
6. (5sc, inc)*6 (42)
7-12. 42sc (42)
13. (5sc, dec)*6 (36)
14. 2sc, dec, (4sc, dec)*5, 2sc (30)
15. (3sc, dec)*6 (24)
16. (2sc, dec)*6 (18)
Stuff the head fully.
Fasten off and cut the yarn. Insert plastic safety eyes
14mm between r.10-11, 6 stitches apart.
To make the kitty yellow nose, use yellow yarn and sew
around 2 stitches in the middle of two eyes, r.11.
To make the kitty whisker, use black embroidery thread
and sew 3 lines, on r.10-12, one stitch beside the eye.
To make the bunny T-shape nose, use pink embroidery
thread, and sew it in the middle of two eyes, r.11 with the
shape shown in the photo.
To make the pinky cheeks, use a pink thread of yarn and
sew beside the eyes.
3. Bunny ears
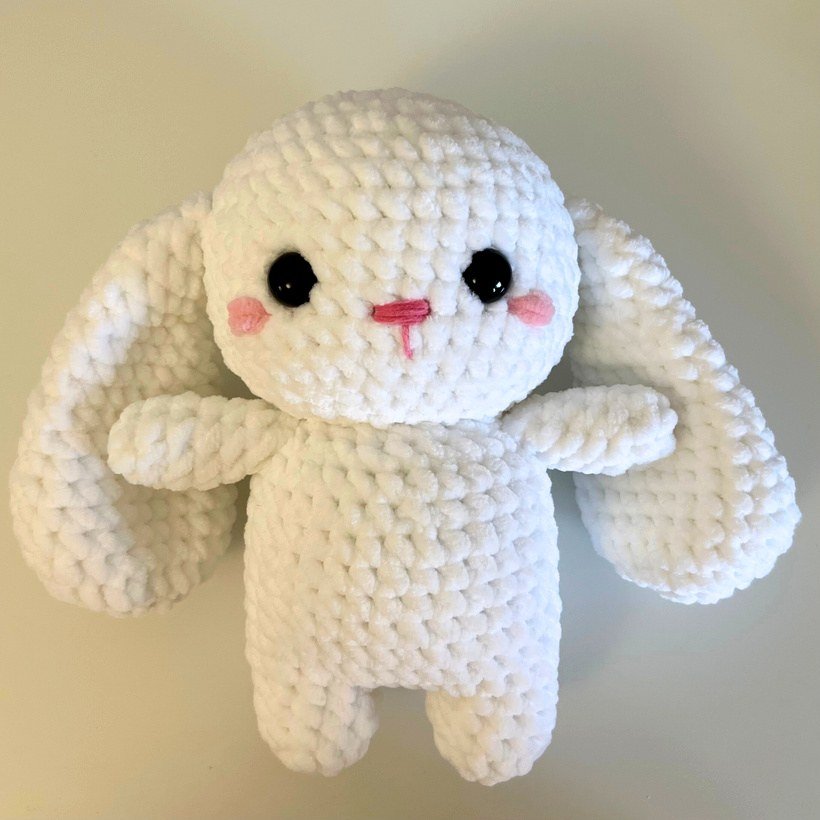
Bunny ear x2
Use white yarn
1. mr 8sc (8)
2. 8inc (16)
3. (sc, inc)*8 (24)
4-7. 24sc (24)
8. (4sc, dec)*4 (20)
9-11. 20sc (20)
12. (3sc, dec)*4 (16)
13-14. 16sc (16)
15. (2sc, dec)*4 (12)
16-17. 12sc (12)
18. (2sc, dec)*3 (9)
19. 9sc (9)
20. (sc, dec)*3 (6)
Fasten off and leave a long tail
of yarn to sew on r.8-9,
around 5 stitches from the eye.
We don’t need to stuff the ears.
4. Kitty ears and arms
Kitty ear x2
Use white yarn
1. Mr 4sc (4)
2. 4inc (8)
3. (Sc, inc)*4 (12)
4. (2sc, inc)*4 (16)
5. 16sc (16)
Fasten off and leave a long tail
of yarn and sew on r.3-7
We don’t need to stuff the ears.
Arm x2
Use white yarn
1. Mr 6sc (6)
2. (2sc, inc)*2 (8)
3-7. 8sc (8)
Stuff the arms lightly.
Fasten off and leave a long tail
of yarn and sew on r.16.
5. Legs and body
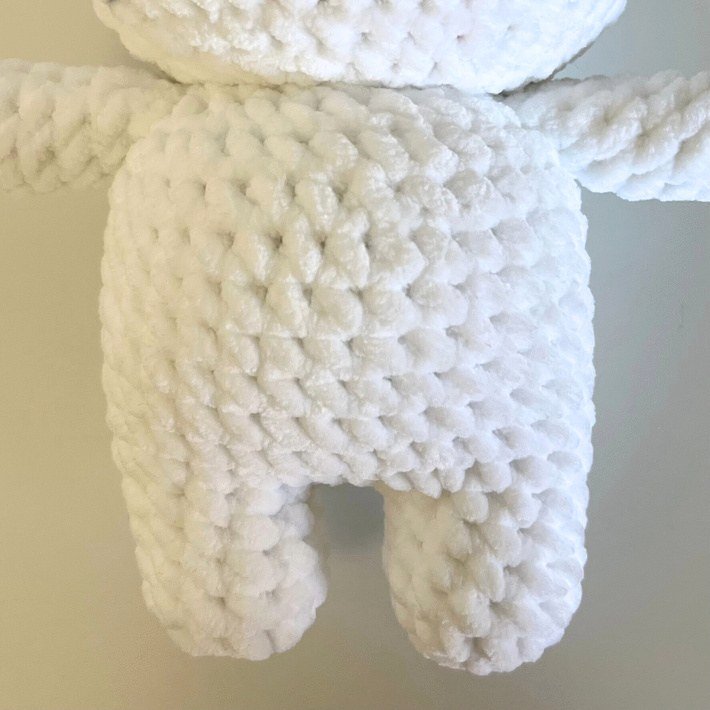
Body
We will start with the first leg.
Use white yarn.
1. Mr 6sc (6)
2. 6inc (12)
3-5. 12sc (12)
Fasten off and cut the yarn.
Second leg
1. Mr 6sc (6)
2. 6inc (12)
3-5. 12sc (12)
Continue making chains 2.
Join the first leg with a sc. This is the first sc of r.6
6. 12sc (first leg) + 2sc (first side of chains) + 12sc
(second leg) + 2sc (other side of chains) (28)
7. 3sc, inc, (6sc, inc)*3, 3sc (32)
8-13. 32sc (32)
14. (14sc, dec)*2 (30)
15. 30sc (30)
16. (3sc, dec)*6 (24)
17. (2sc, dec)*6 (18)
Fasten off and leave a long tail of yarn to sew with the
head. Don’t forget to stuff the body chubby ~
6. Bunny hood
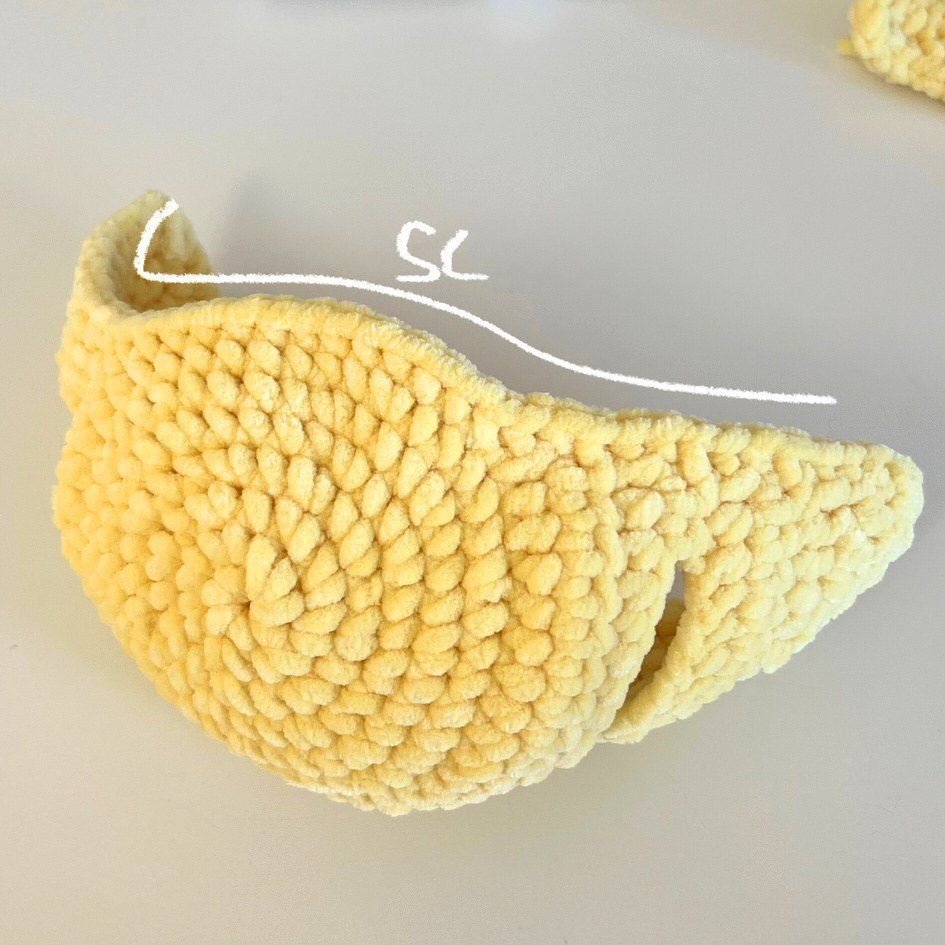
Hoodie part 1
To make the hoodie, we will sew together parts 1 and 2,
the “hat” piece and the “shirt” piece.
Bunny hoodie – use yellow yarn.
1. Mr 8sc (8)
2. 8inc (16)
3. (sc, inc)*8 (24)
4. (2sc, inc)*8 (32)
5. (3sc, inc)*8 (40)
6. 2sc, (5sc, inc)*6, 2sc (46)
7. 6sc, 34hdc, ch 2, turn
8-9. 34hdc, ch 2, turn
10. 3hdc, ch 7, skip 6 stitches, 16hdc, ch 7, skip 6 stitches,
3hdc, ch 2, turn
11. 3hdc, 14sc, dec, 14sc, 3hdc, ch 2, turn
12. 35hdc, ch 2, turn
13-14. 3dc, 3hdc, 23sc, 3hdc, 3dc, ch 2, turn
15. 2dc, 2hdc, 27sc, 2hdc, 2dc
sc across the line so we can get a smooth line
(Start from r.15, 14, 13 … all the way down), increasing at
some stitches so we get a total of 40 stitches.
(with a total of 40 stitches, it’s easier to sew with the shirt
piece later, each stitch of the hat with each stitch of the
shirt)
7. Kitty hood
This is how the row looks like after we sc across the line,
otherwise it will be a little uneven.
You can decide between leaving a long tail of yarn on
the hat piece or shirt piece to sew the parts together.
Kitty hoodie – use pink yarn.
1. Mr 8sc (8)
2. 8inc (16)
3. (sc, inc)*8 (24)
4. (2sc, inc)* 8 (32)
5. (3sc, inc)*8 (40)
6. 2sc, (5sc, inc)*6, 2sc (46)
7. 6sc, 34hdc, ch 2, turn
8-9. 34hdc, ch 2, turn
10. 6hdc, ch 9, skip 8 stitches, 6hdc, ch 9, skip 8 stitches,
6hdc, ch 2, turn
11. 3hdc, 14sc, dec, 14sc, 3hdc, ch 2, turn
12. 35hdc, ch 2, turn
13-14. 3dc, 3hdc, 23sc, 3hdc, 3dc, ch 2, turn
15. 2dc, 2hdc, 27sc, 2hdc, 2dc
(follow the instructions on the bunny hoodie)
8. Monkey hood option
Monkey hoodie – use yellow/red yarn
1. Mr 8sc (8)
2. 8inc (16)
3. (sc, inc)*8 (24)
4. (2sc, inc)* 8 (32)
5. (3sc, inc)*8 (40)
6. 2sc, (5sc, inc)*6, 2sc (46)
7. 6sc, 34hdc, ch 2, turn
8-9. 34hdc, ch 2, turn
10. 2hdc, ch 8, skip 7 stitches, 16hdc, ch 8, skip 7 stitches,
2hdc, ch 2, turn
11. 3hdc, 12sc, ch 6, skip 6 stitches, 12sc, 3hdc, ch 2, turn
12. 36hdc, ch 2, turn
13. 3dc, 3hdc, 11sc, dec, 11sc, 3hdc, 3dc, ch 2, turn
14. 3dc, 3hdc, 23sc, 3hdc, 3dc, ch 2, turn
15. 2dc, 2hdc, 27sc, 2hdc, 2dc
(follow the instructions on the bunny hoodie)
9. Shirt and sleeves

Hoodie part 2
Use the chosen hoodie color.
1. Make chains 41, second ch from hook, crochet:
5sc, ch 6, skip ch 6, 18sc, ch 6, skip ch 6, 5sc, ch 1, turn
2-4. 40hdc, ch 1, turn
5. 40hdc
Sc around the corners so we get a smoother line on top.
Cut and hide in the rest of the yarn (or leave a yarn tail to
sew with the hat piece).
Gently stretch the pieces to make dressing the doll easier.
To make the sleeves, we will crochet around where we
made chains 6 and skip ch 6 on r.1
Insert your hook on a chain and sc around to create the
sleeve.
1. 6sc + sc +6sc + sc (14)
2-4. 14sc (14)
Cut and hide the rest of the yarn.
Optional: attach one or two buttons on one side of the shirt and enlarge corresponding holes on the other side.
← Previous: Monkey hood option Next: Hood ears and frog option →
10. Hood ears and frog option
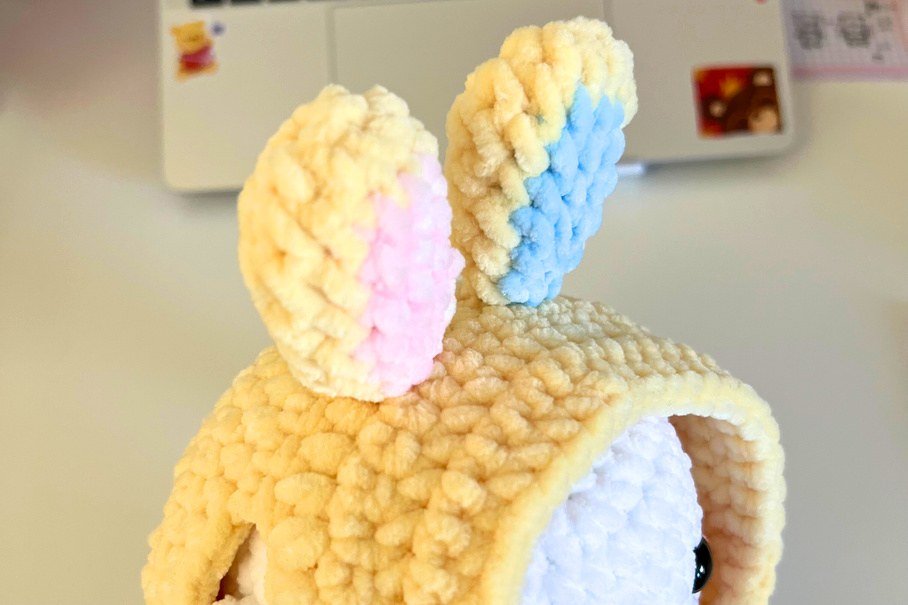
Hoodie ear x2
Bunny – yellow yarn.
1. mr 7sc (7)
2. 7inc (14)
3. sc, pink 3sc, yellow 10sc (14)
4. sc, pink 4sc, yellow dec, 5sc, dec (12)
5-6. sc, pink 4sc, yellow 7sc (12)
7. sc, pink sc, dec, sc, yellow sc, dec, 2sc, dec (9)
8. sc, pink dec, sc, yellow, dec, sc, dec (6)
Fasten off and leave a long tail of yarn to sew on r.11 of
the hoodie, 1-2 stitches apart. Do not stuff the ears.
Pink kitty – pink yarn.
1. mr 7sc (7)
2. 7inc (14)
3-4. 14sc (14)
5. (5sc, dec)*2 (12)
6. 12sc (12)
7. (2sc, dec)*3 (9)
Stuff the ears lightly.
Fasten off and leave a long tail of yarn to sew on r.10-11
of the hoodie.
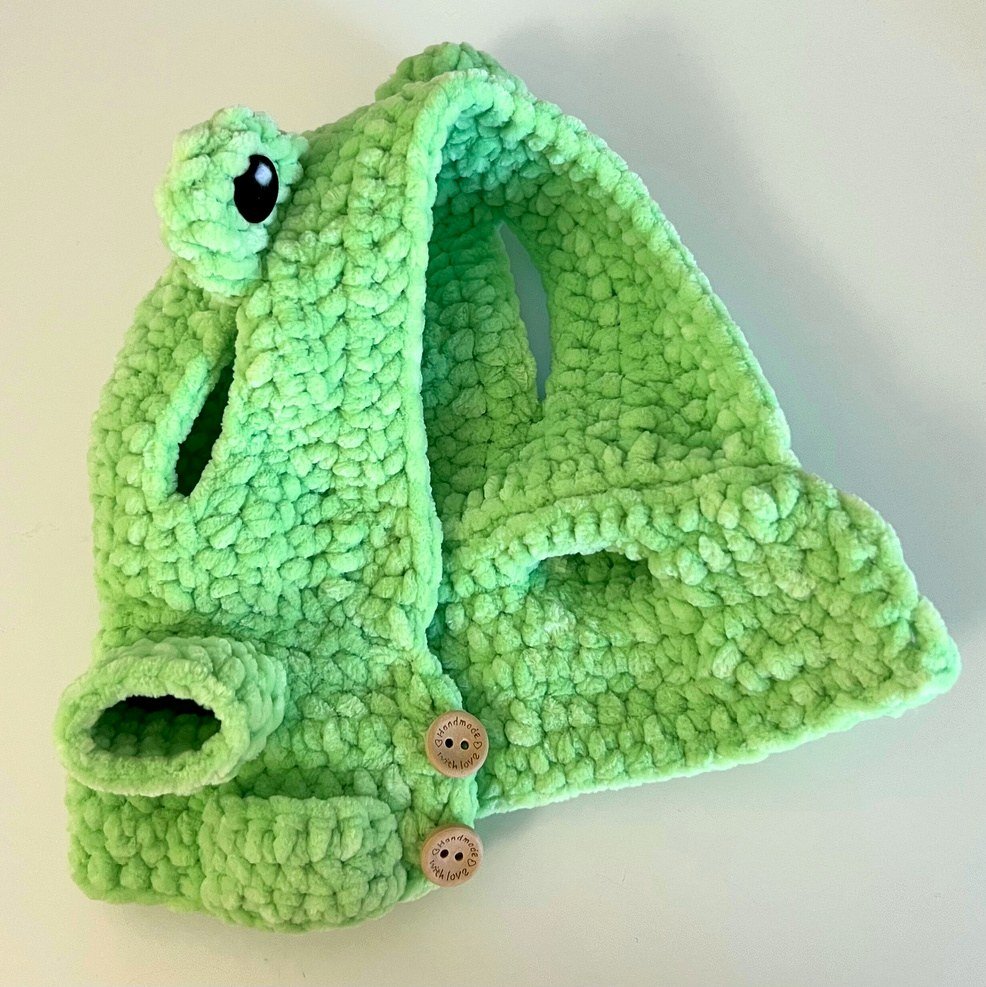
Frog – green yarn.
1. mr 6sc (6)
2. 6inc (12)
3. 12sc (12)
Fasten off and leave a long tail of yarn to sew on r.11 of
the hoodie. Do not stuff the ears.
11. Pocket and carrot bag

Hoodie’s pocket
1. Make chains 7, second ch from
hook, crochet: 6sc, ch 1, turn
2. 6sc, ch 1, turn
3. 6sc
Leave a long tail of yarn and sew on
the shirt to make the cute pockets.
Accessory bags
Carrot – orange yarn
1. mr 4sc (4)
2. 4inc (8)
3. 8sc (8)
4. (sc, inc)*4 (12)
5. 12sc (12)
6. (4sc, dec)*2 (10)
7. 5dec (5)
Stuff and weave in the rest of yarn.
Use a cream yarn and sew two lines
on the carrot ~
Leaf – green yarn
1. Make chains 3, second ch from
hook, crochet 2 slst, repeat 2 more
times.
Leave a long tail of yarn and sew it
on top of the carrot.
You can use another orange yarn
and sew on the carrot as a little bag
strap, or place it in the pocket.
12. Chicken bag
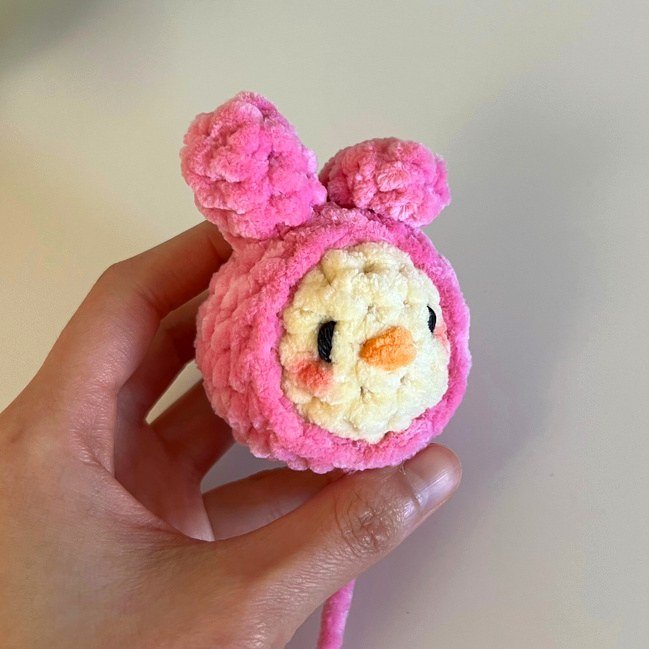
Pink hood chicken bag
Chicken – yellow yarn
1. mr 7sc (7)
2. 7inc (14)
3-6. 14sc (14)
7. 7dec (7)
Stuff and weave in the rest of yarn.
Use black embroidery thread and sew on r.4 to make the
eyes, 2 stitches apart.
(Or you can use plastic safety eyes about 6–8 mm.)
To make the beak, take an orange yarn and sew in the
middle of two eyes.
Bunny cover – darker pink yarn
1. mr 8sc (8)
2. 8inc (16)
3. (3sc, inc)*4 (20)
4-7. 20sc (20)
Fasten off and leave a long tail
of yarn to sew it around the chicken.
Bunny ear x2 – darker pink yarn
1. Mr 6sc (6)
2-4. 6sc (6)
We don’t need to stuff the ears.
Leave a long tail of yarn and sew it on top of the bunny
cover piece. One ear standing, and one ear laying.
Take a long thread of pink yarn and sew on two sides of
the pink hood chicken bag to make its bag strap.
← Previous: Pocket and carrot bag Next: Chicken egg and bow →
13. Chicken egg and bow
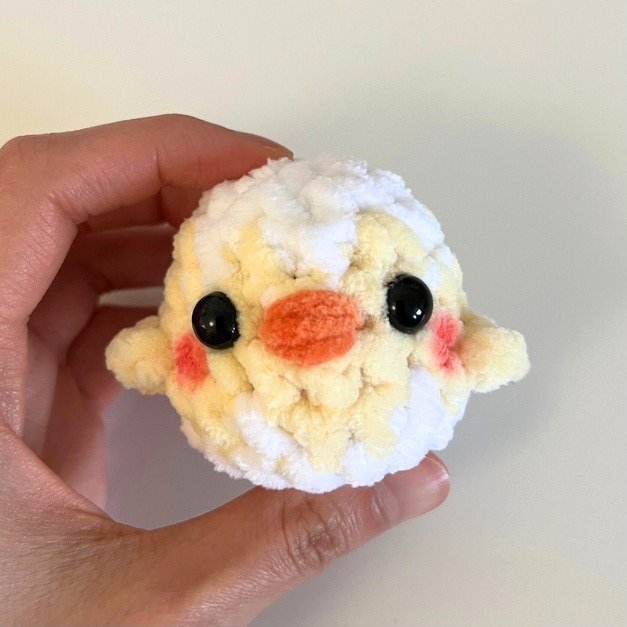
Chicken x egg – use white yarn
1. mr 6sc (6)
2. 6inc (12)
3. (white sc, yellow sc, white sc, yellow inc)*3 (15)
4. (4sc, inc)*3 (18)
5. 18sc (18)
6. (yellow 2sc, white sc)*6 (18)
7. 18sc (18)
8. 9dec (9)
Stuff the egg fully and weave in the rest of the yarn.
Insert plastic safety eyes 9mm on r.4-5, 3 stitches apart.
To make the little wing, insert crochet hook on r.5-6,
the stitch beside the eyes, crochet 3sc,
cut and hide the rest of yarn.
Bow – darker pink
Make chains 4, crochet everything into the first chain:
2dc, chains 3, slst, chains 3, 2dc, chains 3, slst.
Leave a long tail of yarn and roll in the middle to make
the bow shape. Glue or sew on the hoodie.
Finishing notes
The hood and shirt are sewn together along their matching 40-stitch edges. Choose the corresponding white head ears and separate hood ears. If using buttons, check that the opening fits before sewing them on. Secure all parts and weave in remaining ends.

Leave a Reply