
← Previous pattern: Crochet Cotton Tank Top · Next pattern: Crochet Hexi Hooded Pullover → · More wearables
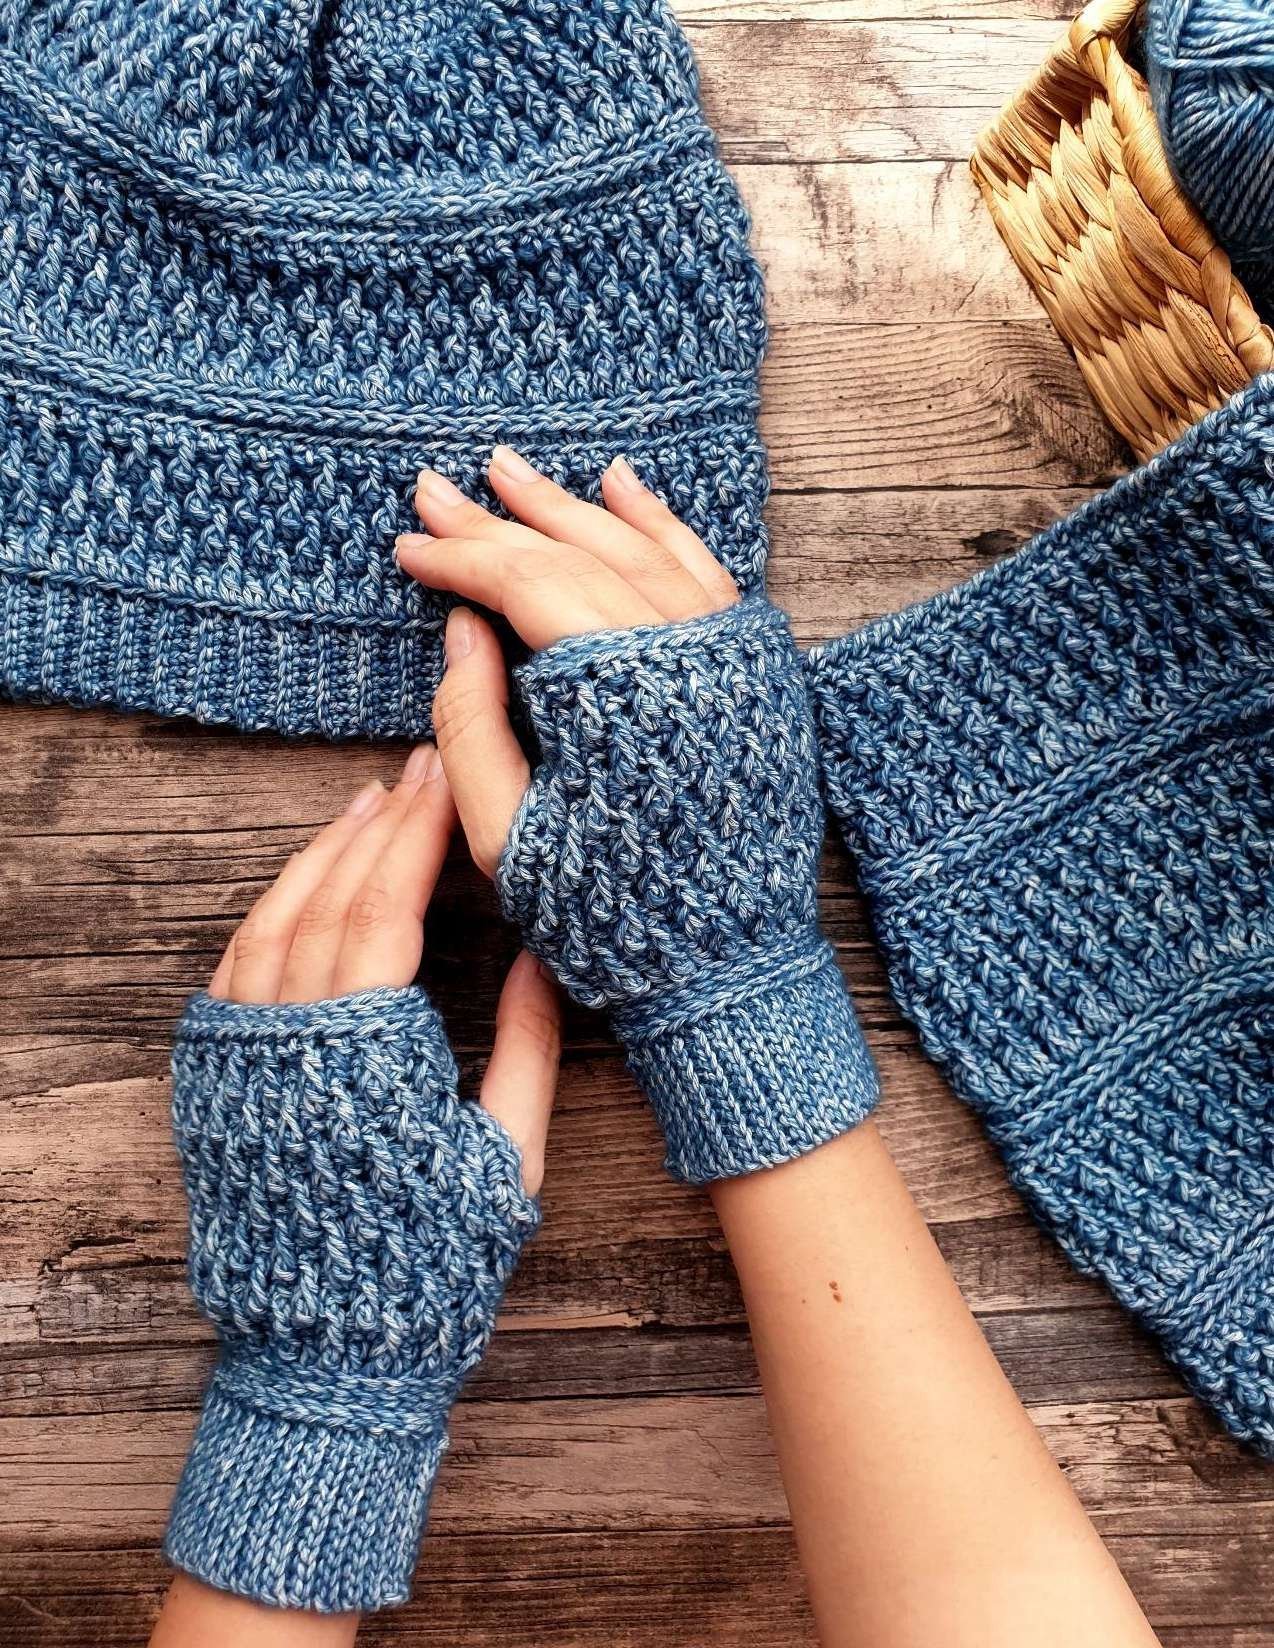
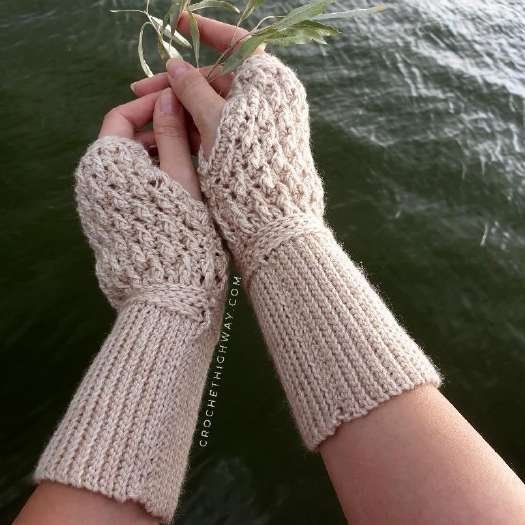
These alpine stitch fingerless gloves combine a stretchy ribbed cuff with a textured hand section. Work the short or extended cuff, then crochet the glove flat and seam around a thumb opening. The five sizes run from toddler to adult large.
At a glance
Skill level: Intermediate. Construction: A back-loop slip-stitch cuff followed by a flat, turned-row body; seam the edges while leaving a thumb opening, then finish the opening with single crochet. Terminology: US crochet terms. Make two matching gloves.
Sizes · Cuff · Body · Assembly · Fit adjustments
Quick construction guide — tap to open
Choose a size by palm circumference, make either cuff to fit your wrist, work the body flat using the size stitch count, leave a thumb gap while seaming, then edge the opening. Follow the numbered rows and size-specific repeats below for the complete pattern.
Materials, gauge and sizes
- Sport/fine (CYC 2) or DK/light (CYC 3) yarn that meets gauge.
- 3.5 mm hook for the cuff and 5 mm hook for the body, or hook sizes needed to meet gauge.
- Tape measure, scissors, darning needle and 2 stitch markers.
Gauge: Cuff: 13.5 stitches and 20 rows = 5 cm (2 in) in back-loop slip stitch with the smaller hook. Body: 16 stitches and 16 rows = 10 cm (4 in) in alpine stitch with the main hook. Work slip stitches loosely. Chain 1 and chain 2 do not count as stitches.
| Size | 1 Toddler | 2 Child | 3 Adult S | 4 Adult M | 5 Adult L |
|---|---|---|---|---|---|
| Palm circumference, below knuckles (exclude thumb) | 13 cm / 5⅛ in | 15 cm / 6 in | 18 cm / 7 in | 20 cm / 7⅞ in | 22 cm / 8⅝ in |
| Short cuff: finished length | 8.25 cm | 10.5 cm | 13.5 cm | 15.25 cm | 16.5 cm |
| Extended cuff: finished length | 12.75 cm | 15.75 cm | 20 cm | 21.25 cm | 23.25 cm |
| Short cuff yarn | 55 m / 60 yd | 64 m / 70 yd | 124 m / 135 yd | 140 m / 153 yd | 150 m / 164 yd |
| Extended cuff yarn | 92 m / 100 yd | 100 m / 110 yd | 165 m / 180 yd | 200 m / 220 yd | 215 m / 235 yd |
The glove is designed with 0–2 cm (0–¾ in) negative ease at wrist and knuckles. Make the cuff to your own wrist circumference. Short cuff lengths for sizes 1–5 are 3 (3, 3.5, 4, 4) cm; extended cuff lengths are 7.5 (8.25, 9, 9.75, 10.5) cm.
US abbreviations
ch = chain; sc = single crochet; dc = double crochet; sl st = slip stitch; blo = back loop only; bloSLST = back-loop-only slip stitch; bloDC = back-loop-only double crochet; bloDC2TOG = double crochet 2 together through back loops; FPDC = front post double crochet; sk = skip; st(s) = stitch(es); RS = right side; WS = wrong side; beg = beginning; prev = previous; rem = remaining.
Cuff — 3.5 mm hook
Numbers throughout are for sizes 1 (2, 3, 4, 5). Choose A for a short cuff or B for an extended cuff. Leave a long beginning tail for joining. Work the slip stitches loosely; the last stitch is easy to miss. The foundation chain may be made shorter or longer for your preferred cuff length.
Row 1A, short cuff: Ch 9 (9, 10, 11, 11). Working in the top loop of the chain, sl st in second ch from hook and each ch across. Turn. 8 (8, 9, 10, 10) sl sts.
Row 2A: Ch 1, bloSLST in each stitch across. Turn. 8 (8, 9, 10, 10) sts.
Row 1B, extended cuff: Ch 21 (23, 25, 27, 29). Working in the top loop of the chain, sl st in second ch from hook and each ch across. Turn. 20 (22, 24, 26, 28) sl sts.
Row 2B: Ch 1, bloSLST in each stitch across. Turn. 20 (22, 24, 26, 28) sts.
Repeat the chosen Row 2 until the cuff fits snugly around the wrist, ending with an even number of rows. Record the row count for your second glove. One example uses 64 rows for a 16 cm (6¼ in) wrist. Do not fasten off. Pull the band horizontally from time to time to even out stitches that tighten.
Glove body — 5 mm hook
Rotate the work to crochet into the ends of the cuff rows. From Body Row 1 onward, the size stitch count stays at 20 (24, 28, 32, 36), except when using the documented fit adjustment below.
Row 1 (RS): Ch 1; evenly place 20 (24, 28, 32, 36) sc across between the ribbing ridges. Turn. A smaller hook, such as 4 mm, may help you work the row loosely through tight gaps.
Row 2: Ch 1, sl st in first stitch and each stitch across. Turn.
Row 3: Ch 1, bloSLST in first stitch and each stitch across. Turn.
Rows 4–6: Repeat Row 3. The horizontal ribbing of Rows 2–6 should be at least as wide as the cuff when laid flat, or the glove may pull in at the wrist and hand.

Row 7: Ch 2, bloDC in first stitch and each stitch across. Turn.
Row 8: Ch 1, sc in first stitch and each stitch across. Turn.
Row 9: Ch 2, FPDC around first dc from two rows below, sk first sc from previous row and dc in next sc; *FPDC around next dc from two rows below, sk next sc from previous row and dc in next sc. Repeat from * across. Turn.
Row 10: Ch 1, sc in first stitch and each stitch across. Turn.
Row 11: Ch 2, dc in first sc of previous row, sk next FPDC from two rows below and FPDC around next dc; *dc in next sc of previous row, sk next FPDC from two rows below and FPDC around next dc. Repeat from * until two stitches remain. Dc in last two stitches. Turn.
Row 12: Ch 1, sc in first stitch and each stitch across. Turn.
Size-specific alpine stitch repeats
- Size 1: Repeat Rows 9–11 once more, then go directly to Row 17.
- Size 2: Repeat Rows 9–11 once more, then go to Row 13.
- Size 3: Repeat Rows 9–12 two more times, stopping the final repeat after Row 11 (7 additional rows); then Row 13.
- Size 4: Repeat Rows 9–12 three more times, stopping the final repeat after Row 9 (9 additional rows); then Row 13.
- Size 5: Repeat Rows 9–12 three more times, stopping the final repeat after Row 11 (11 additional rows); then Row 13.
For a custom length, end the alpine section on Row 9 or Row 11 and allow about 1 cm (⅜ in) for Rows 13–17. Record the number of rows for the second glove.
Row 13: Repeat Row 2. Rows 14–17: Repeat Row 3. The final row is on the WS. Fasten off with a long tail. For Size 1, follow the direct instruction to Row 17 after its alpine repeat.
Seam and thumb opening
1. With the RS facing out, fold the glove and use the beginning tail to mattress-stitch the ribbed cuff together, passing through both loops of the last ribbing row and both loops of the foundation chain. This keeps the cuff seam neat on the RS.
2. Turn the glove inside out and fold again. Divide it roughly into thirds with two markers. Try it on and adjust the marker positions to set a comfortable thumb opening.

3. With WS out, use the beginning tail to seam up to the first marker. Use the finishing tail to seam up to the second marker, leaving the space between markers open.
4. Check the thumb opening, adjust it if needed, then seam back in the opposite direction for a secure join. Fasten off.
Thumb edging: Turn RS out. Join yarn with a sl st anywhere on the open edge and ch 1. Work 2 sc into the side of each dc row and 1 sc into the side of each sc row around the opening. Sl st into the top of the first sc; fasten off and weave in ends. Repeat the complete pattern for the second glove.
Fit adjustments from the pattern
If the horizontal ribbing of Body Rows 2–6 narrows compared with the cuff, work those rows more loosely, use a larger hook, or block the section to gain stretch. The pattern also gives a count adjustment: divide your cuff row count by two and use that number of body stitches for Rows 1–6. In Row 7, work enough bloDC2TOG decreases to return to the stated stitch count for your size; position them where Row 9 FPDCs will go around them.
For example, with 48 cuff rows in Size 1, work 24 stitches for Body Rows 1–6. Row 7: ch 2, bloDC2TOG, dc in next 7 stitches, bloDC2TOG, dc in next 5 stitches, bloDC2TOG, dc in next 3 stitches, bloDC2TOG, dc in last stitch (20 stitches). Keep the body ribbing at least as wide as the cuff when laid flat.

Try the pattern and share your fit notes
Did the short or extended cuff work better for you? Try the pattern, then share your size, yarn, and result in the comments. If a row or fit adjustment felt unclear, tell us exactly where so we can help other makers follow along.
Leave a Reply